Single Sign-On in Azure Cloud
Since v3.1.0 LiquidFiles appliance has had new SingleSignOn settings and since that version LF can be configured to work also with SSO IdP in Azure Cloud. Mainly it has been added the "Auth comparison" switch which allows to adjust LF appliance to the only allowed Authn comparison attribute "Exact" in the Azure Cloud. Before you start with following configuration make sure you have your LF updated on v3.1.0 or higher, ideally the latest version.
Prerequisites
- Azure Management console
- Web application for LiquidFiles in your Azure cloud
- LiquidFiles on version 3.1.0 or higher
Settings in Azure
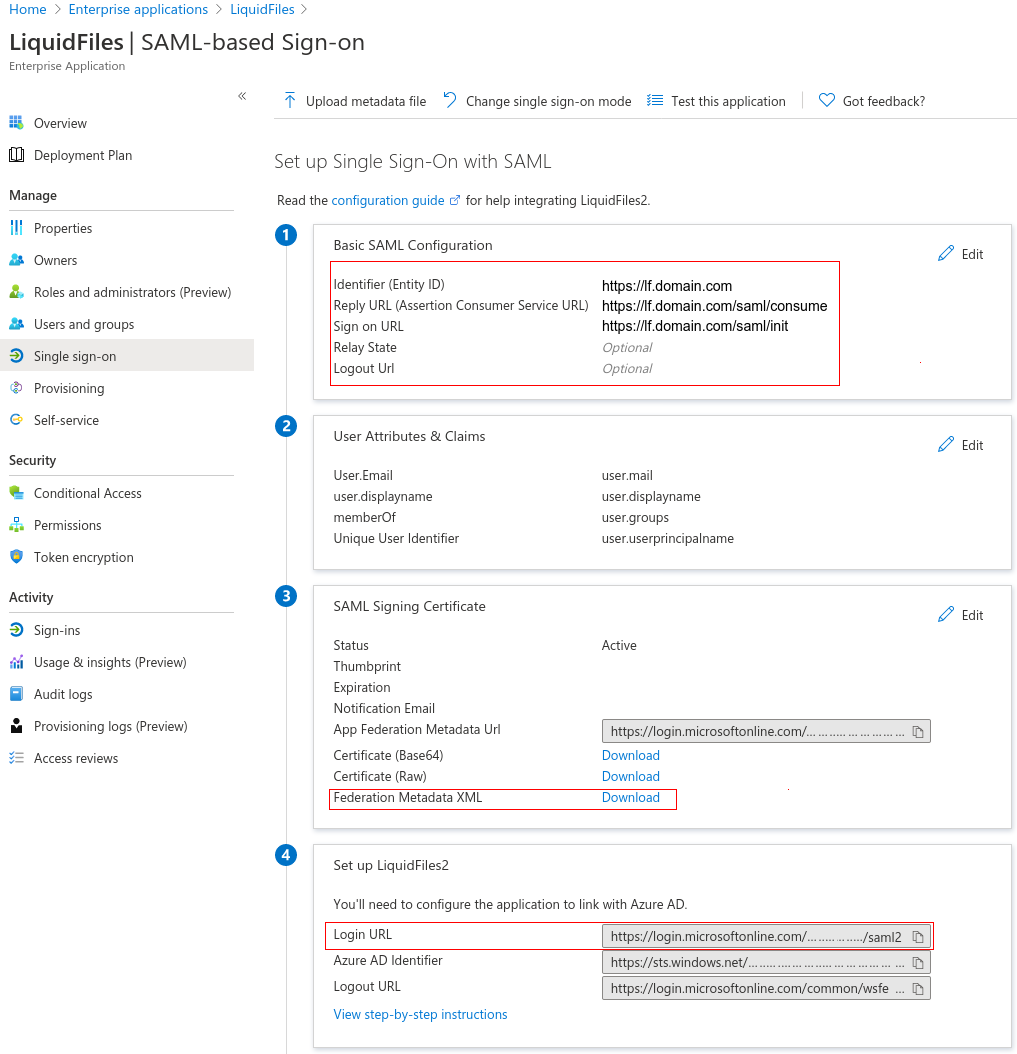
At first open the Web application you have created for your LF server (Service Provider) in your Azure cloud. Log in on your Azure portal page https://portal.azure.com. On the navigation pane, please click on the Azure Active Directory > Enterprise applications icon. A list with your applications will be showed, click on the application you have prepared for your LF server, finally click on the Single sign-on in the menu and your settings should look like this:
- Identifier (Entity ID): https://lf.domain.com
- Reply URL: https://lf.domain.com/saml/consume
- Sign on URL: https://lf.domain.com/saml/init
Settings in LiquidFiles
On the LF server server click on "Single Sign-On (SSO)" in the "Admin > Configuration" drop down menu, and set following settings:
- Single Sign On Method: SAML 2 (In newest LF versions you can choice here pre-configured template Azure SAML2)
- IdP Login URL: here paste the Azure's login URL. It's Azure's unique login URL of your application. This URL you can find in Azure Active Directory > Enterprise applications > your LF application > Single sign-on > Set up > Login URL. It will looks similarly like this example: https://login.microsoftonline.com/yourdomainid/saml2
- IdP Logout URL: https://login.microsoftonline.com/common/wsfederation?wa=wsignout1.0
- IdP Cert Fingerprint: To this box copy the Fingerprint of your Azure X.509 certificate. You can paste Fingerprint which is using SHA-256 algorithm (preferred), or alternatively Fingerprint which is using SHA-1 algorithm.
- Name Identifier: urn:oasis:names:tc:SAML:1.1:nameid-format:emailAddress (default settings)
- Authn Context: urn:oasis:names:tc:SAML:2.0:ac:classes:unspecified (universal setting for Azure)
- Signature Algorithm: SHA-256 (preferred) or SHA-1
- Auth Comparsion: set to Exact (important, it's only allowed option for Azure)
Getting the Fingerprint
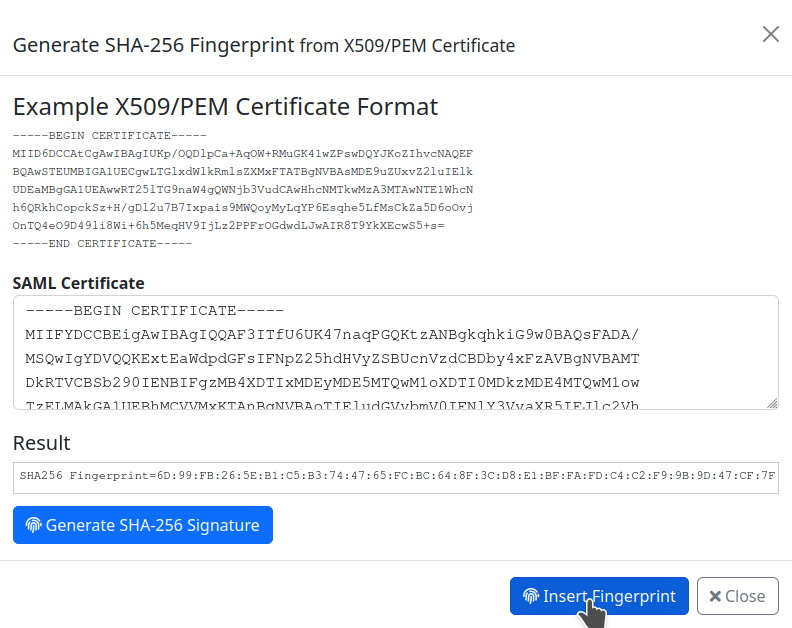
Here is described an approach how to obtain the FingerPrint from your Azure cloud. In the Single sign-on settings download and open Federation Metadata XML file. Copy the X.509 certificate between <X509Certificate> and </X509Certificate> tags. In the XML document you can find it inside of the <Signature> and </Signature> tags.
In order to get the fingerprint of the certificate click on the Generate Fingerprint from Certificate button and paste the certificate and generate the Fingerprint.
Finally insert the fingerprint in the SSO configuration and save the settings.
Automatic Assignment of Azure SSO Users to Groups
If you are interested in configuration of automatic assignment of users authenticated via the SSO/SAML2 service in Azure cloud please read this doc.