Relay Outgoing Emails with Amazon SES (Simple Emails Service)
In this example we will set Amazon SES as a SMTP relay service for the LiquidFiles virtual appliance.
As opposed to Microsoft Office 365, Gmail and other User Email focused services, Amazon SES is a dedicated email relay service and is therefore much more suited to relaying emails from a product like LiquidFiles.
In this example, we're going to use domain validation when setting up Amazon SES, which means that we can use the LiquidFiles setting "Local Domain Emails use their own addresses", so all your local users will send messages with their own emails and not the global email sender address or email relay address that's required with Office365, Gmail and similar services.
Setting up Amazon SES
If you don't have an Amazon AWS account, you will need to sign up for that first.
When you're logged in to the Amazon AWS Console, please go, or select, the SES Service in the Region you want to relay emails from.
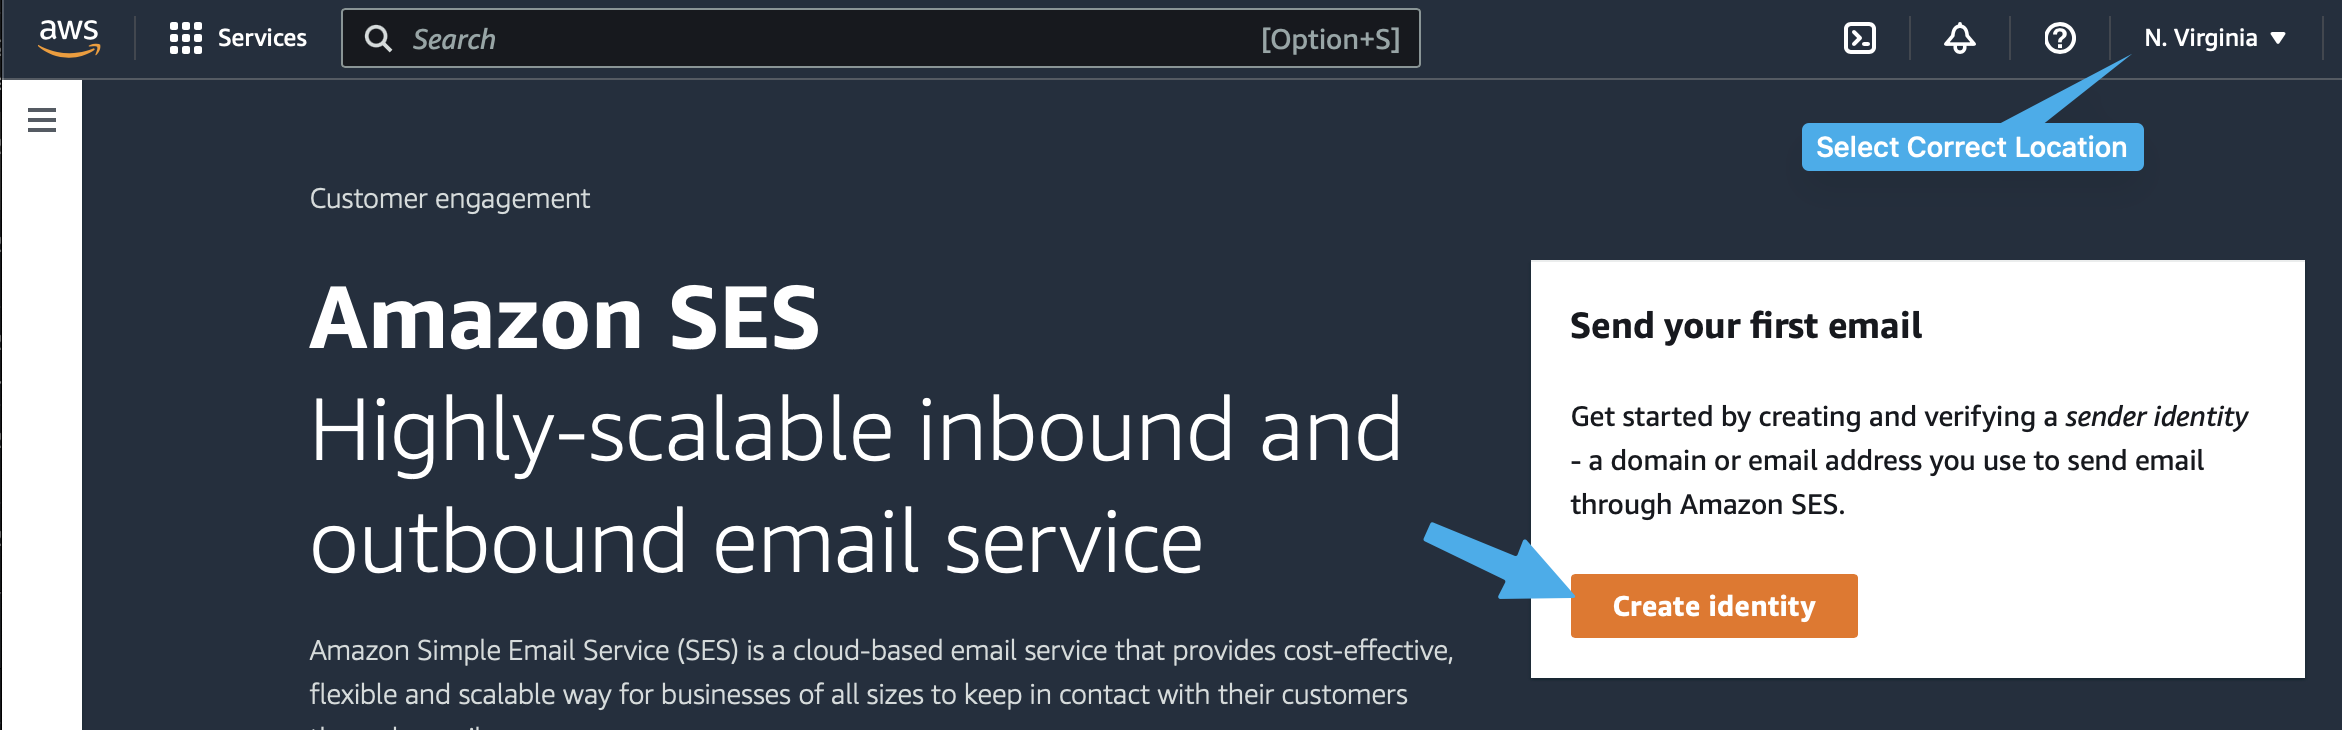
When you're creating the identity, select Domain validation and enter your domain:

As a next step, you will be prompted to add DKIM entries to your DNS configuration for your domain, which will also serve as a way of validating the Amazon SES configuration. It will look something like the following.
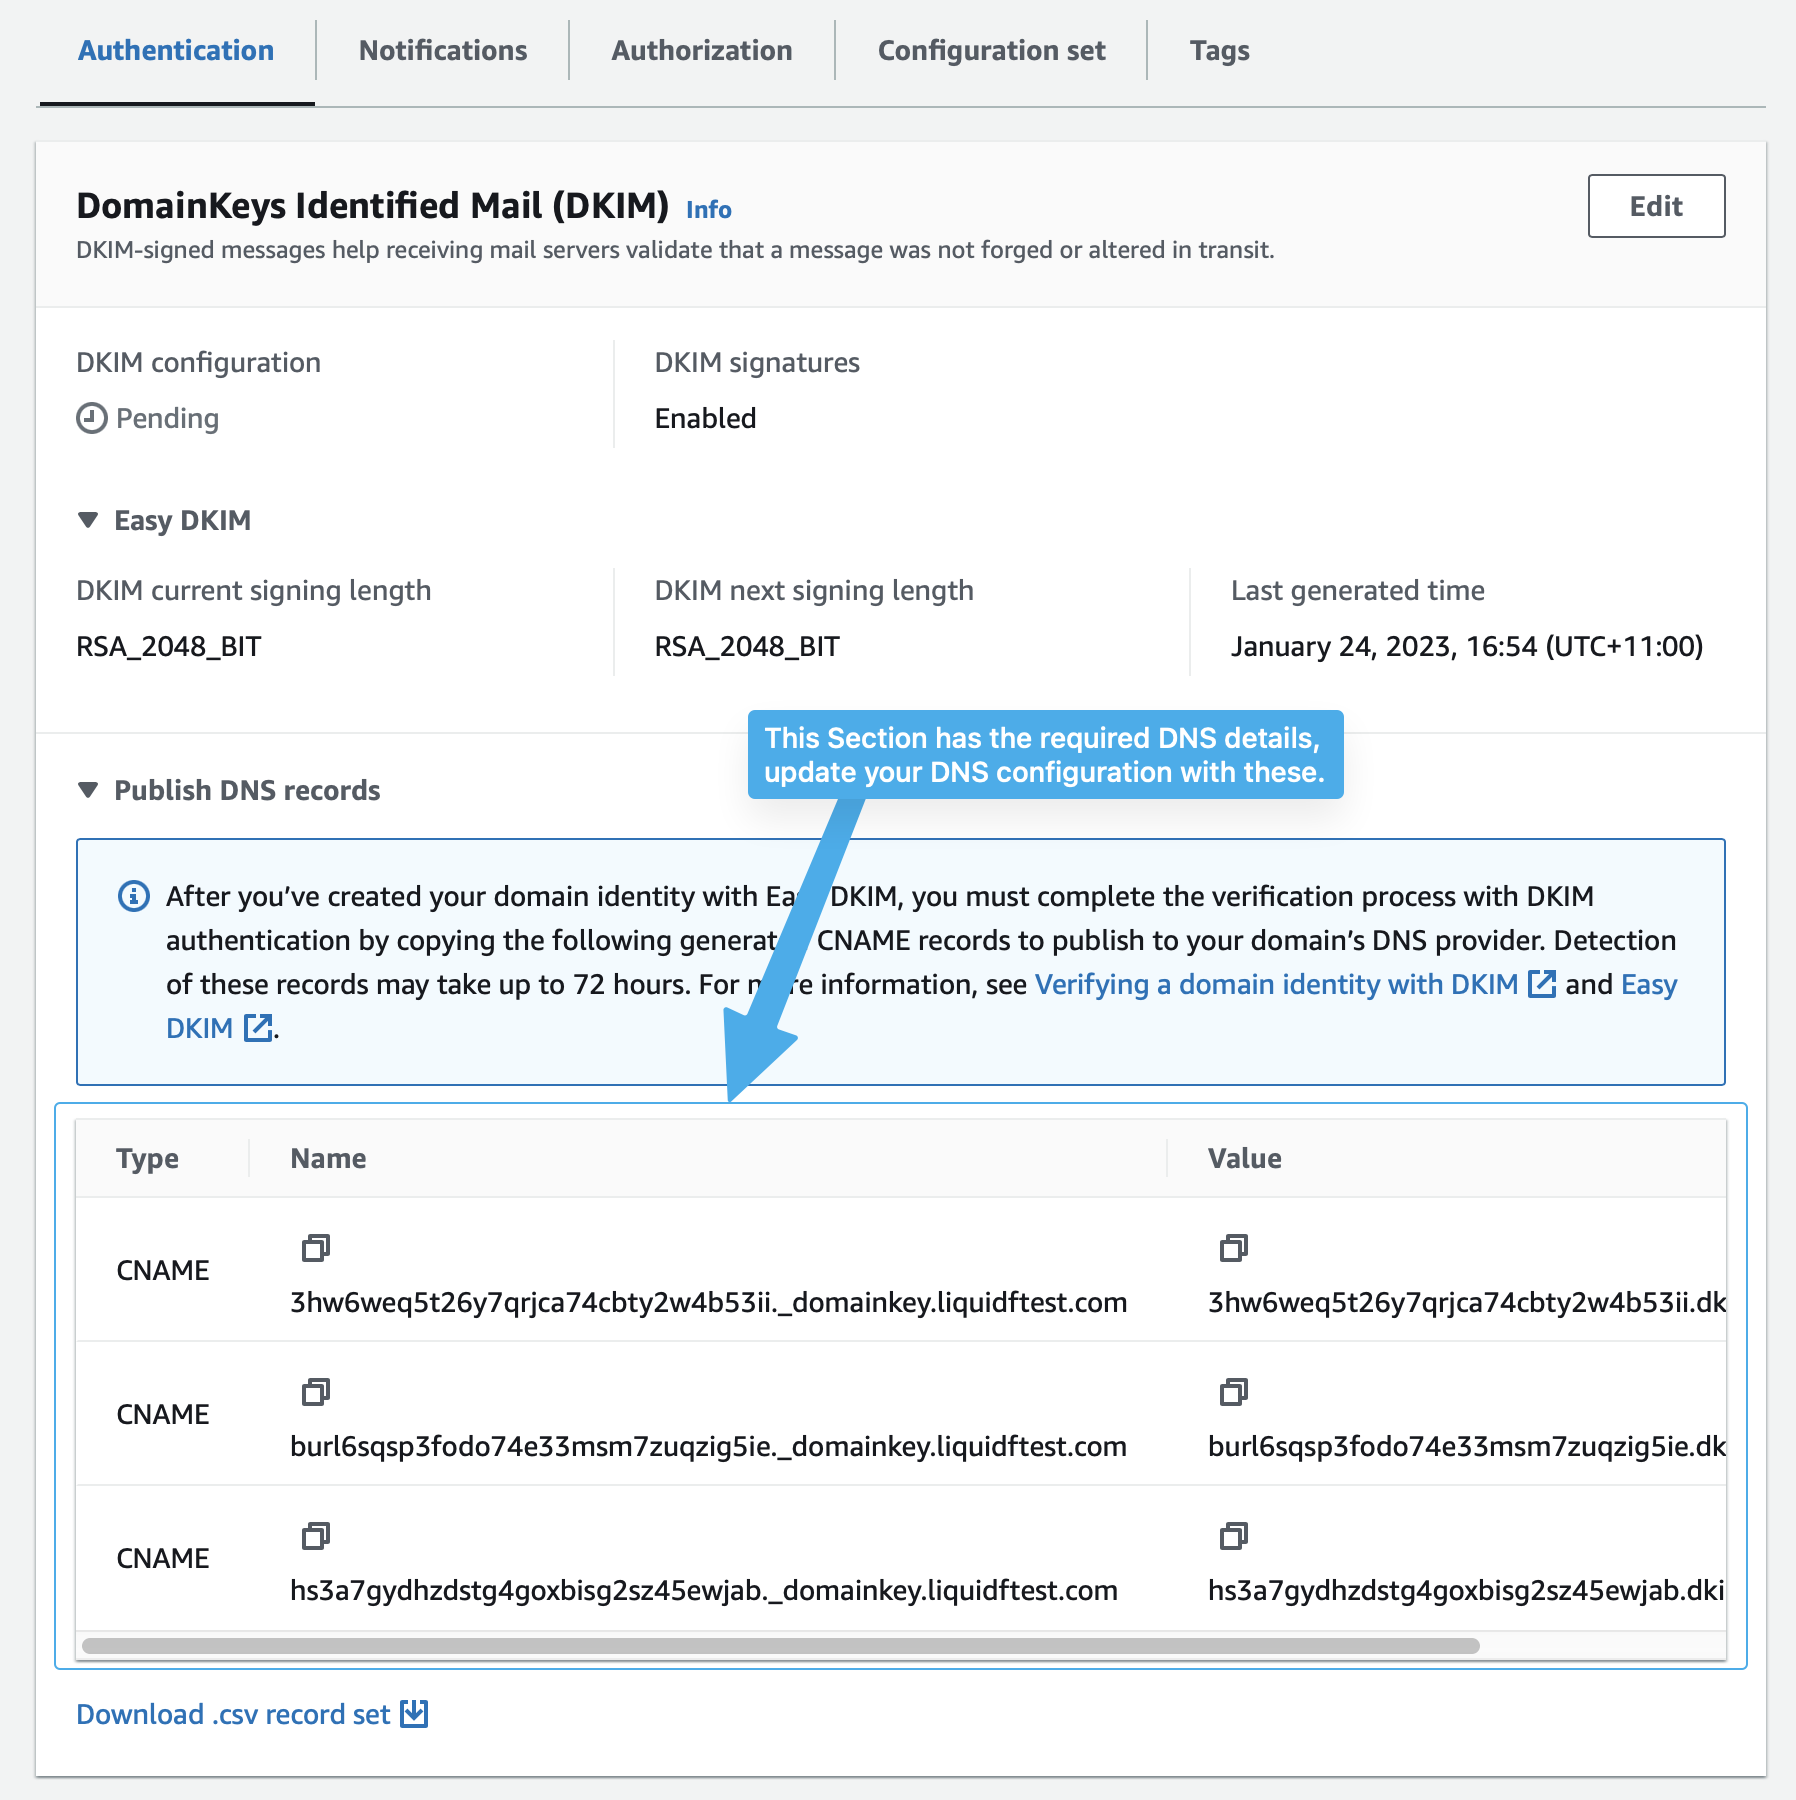
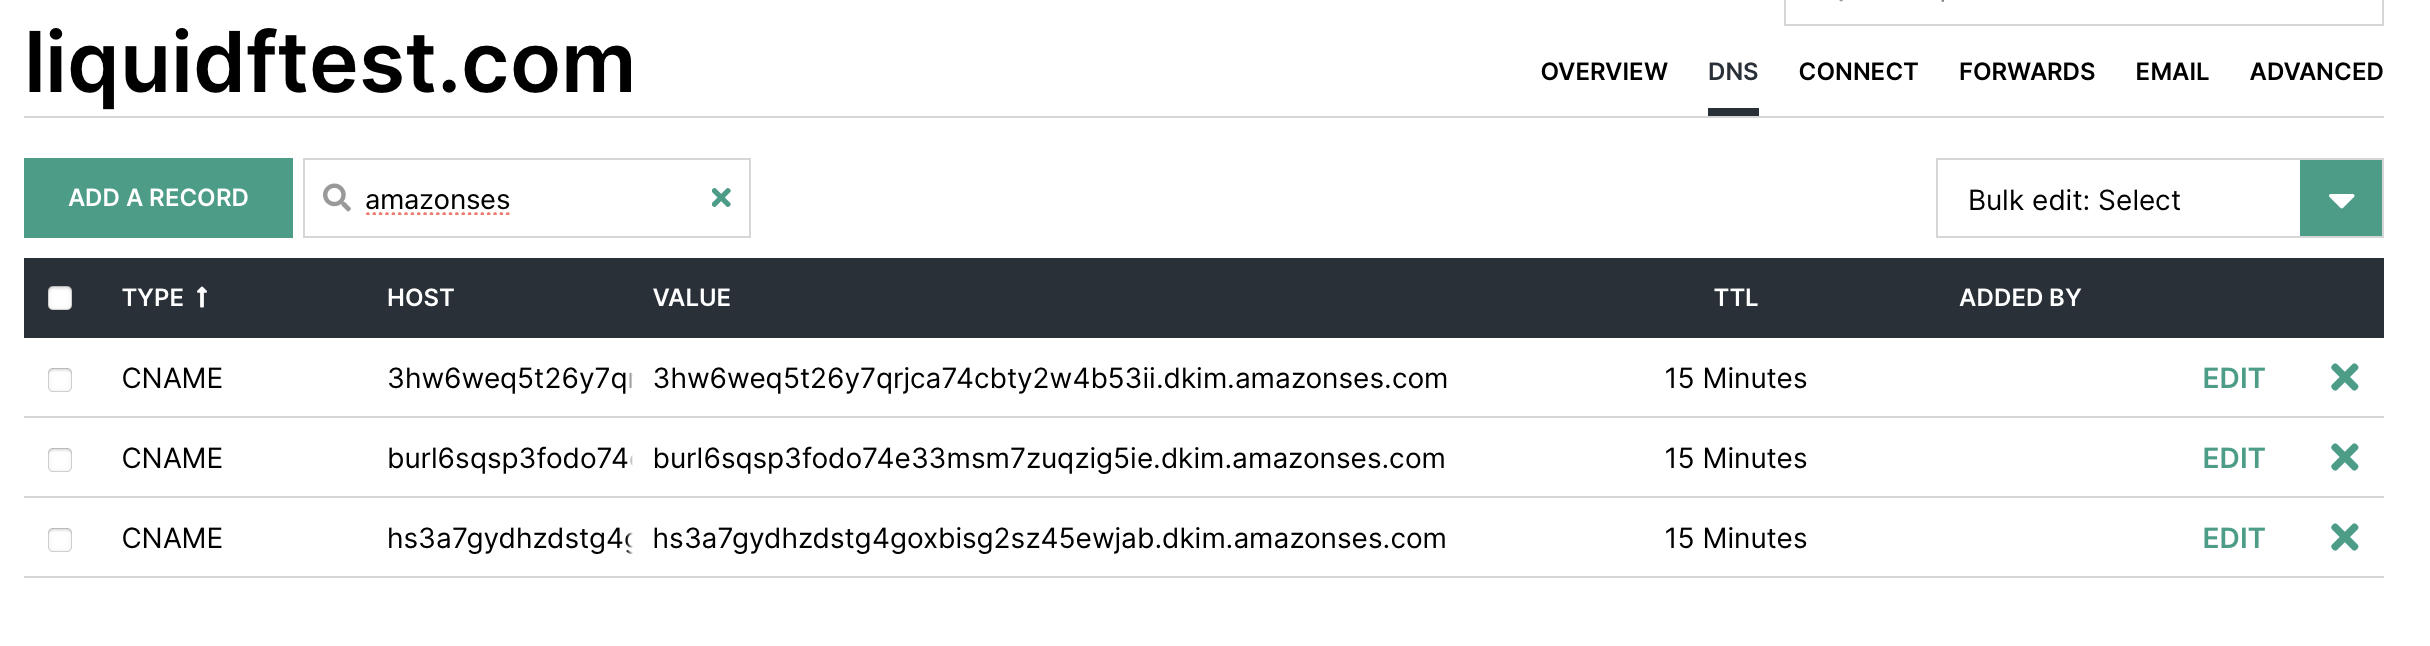
You will need to copy the three CNAME DNS entries and add them to your DNS configuration for your domain. In our example we're using Hover as our DNS service. This will differ depending on how you're configuring your DNS but will look something like the following when you're completed:
After the DNS configuration has been updated, you can go back to the Amazon SES configuration and it will validate that the DNS has been successfully updated.
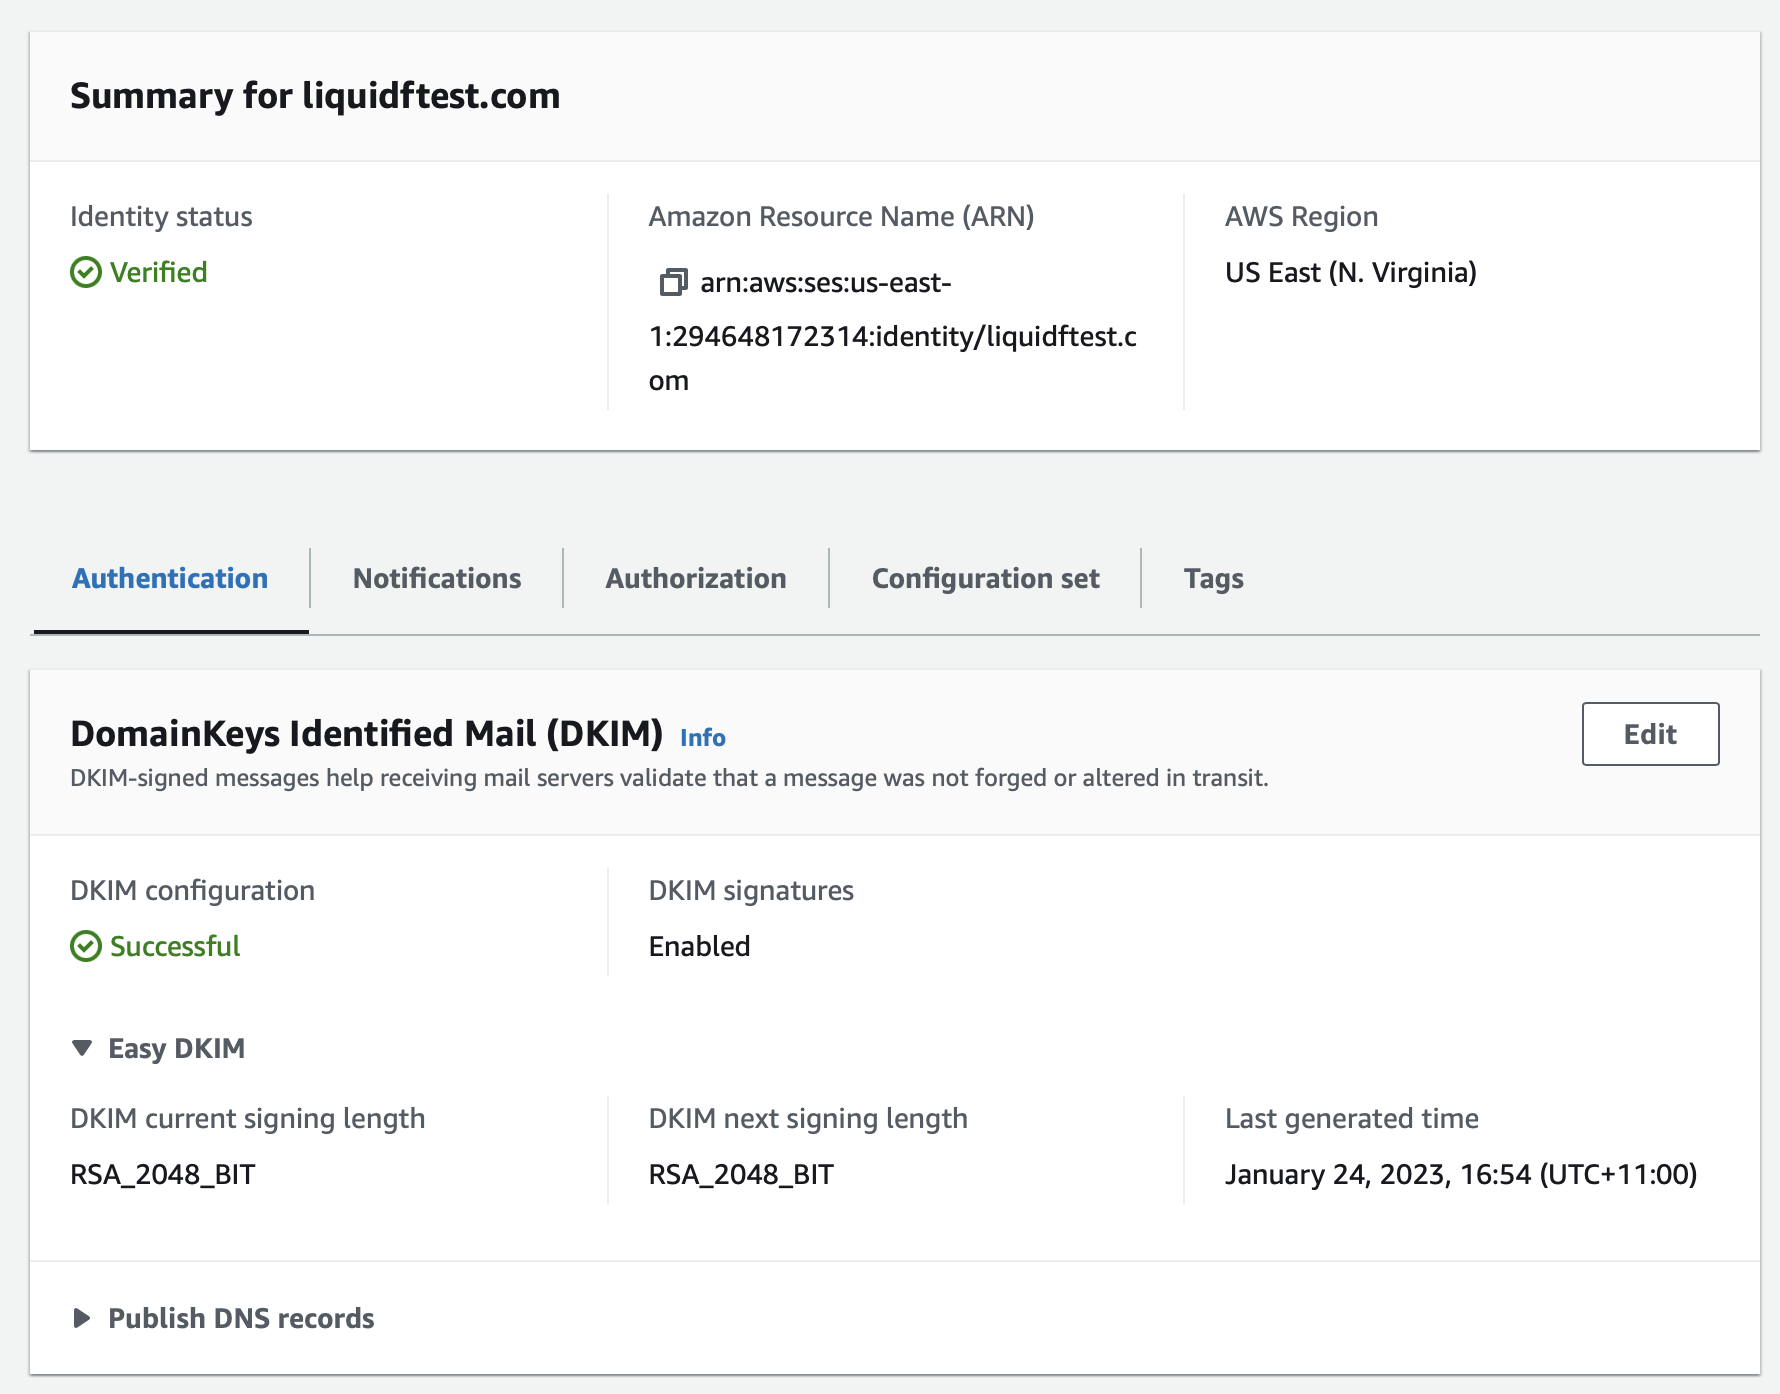
This is all you have to do to validate your domain as authorized as sending through Amazon SES. The next step is to create the SMTP credentials and get the hostname we need to use when sending emails from LiquidFiles.
When you get to the SMTP settings page, the first thing to note is the SMTP Endpoint, and we'll add that to the LiquidFiles configuration.
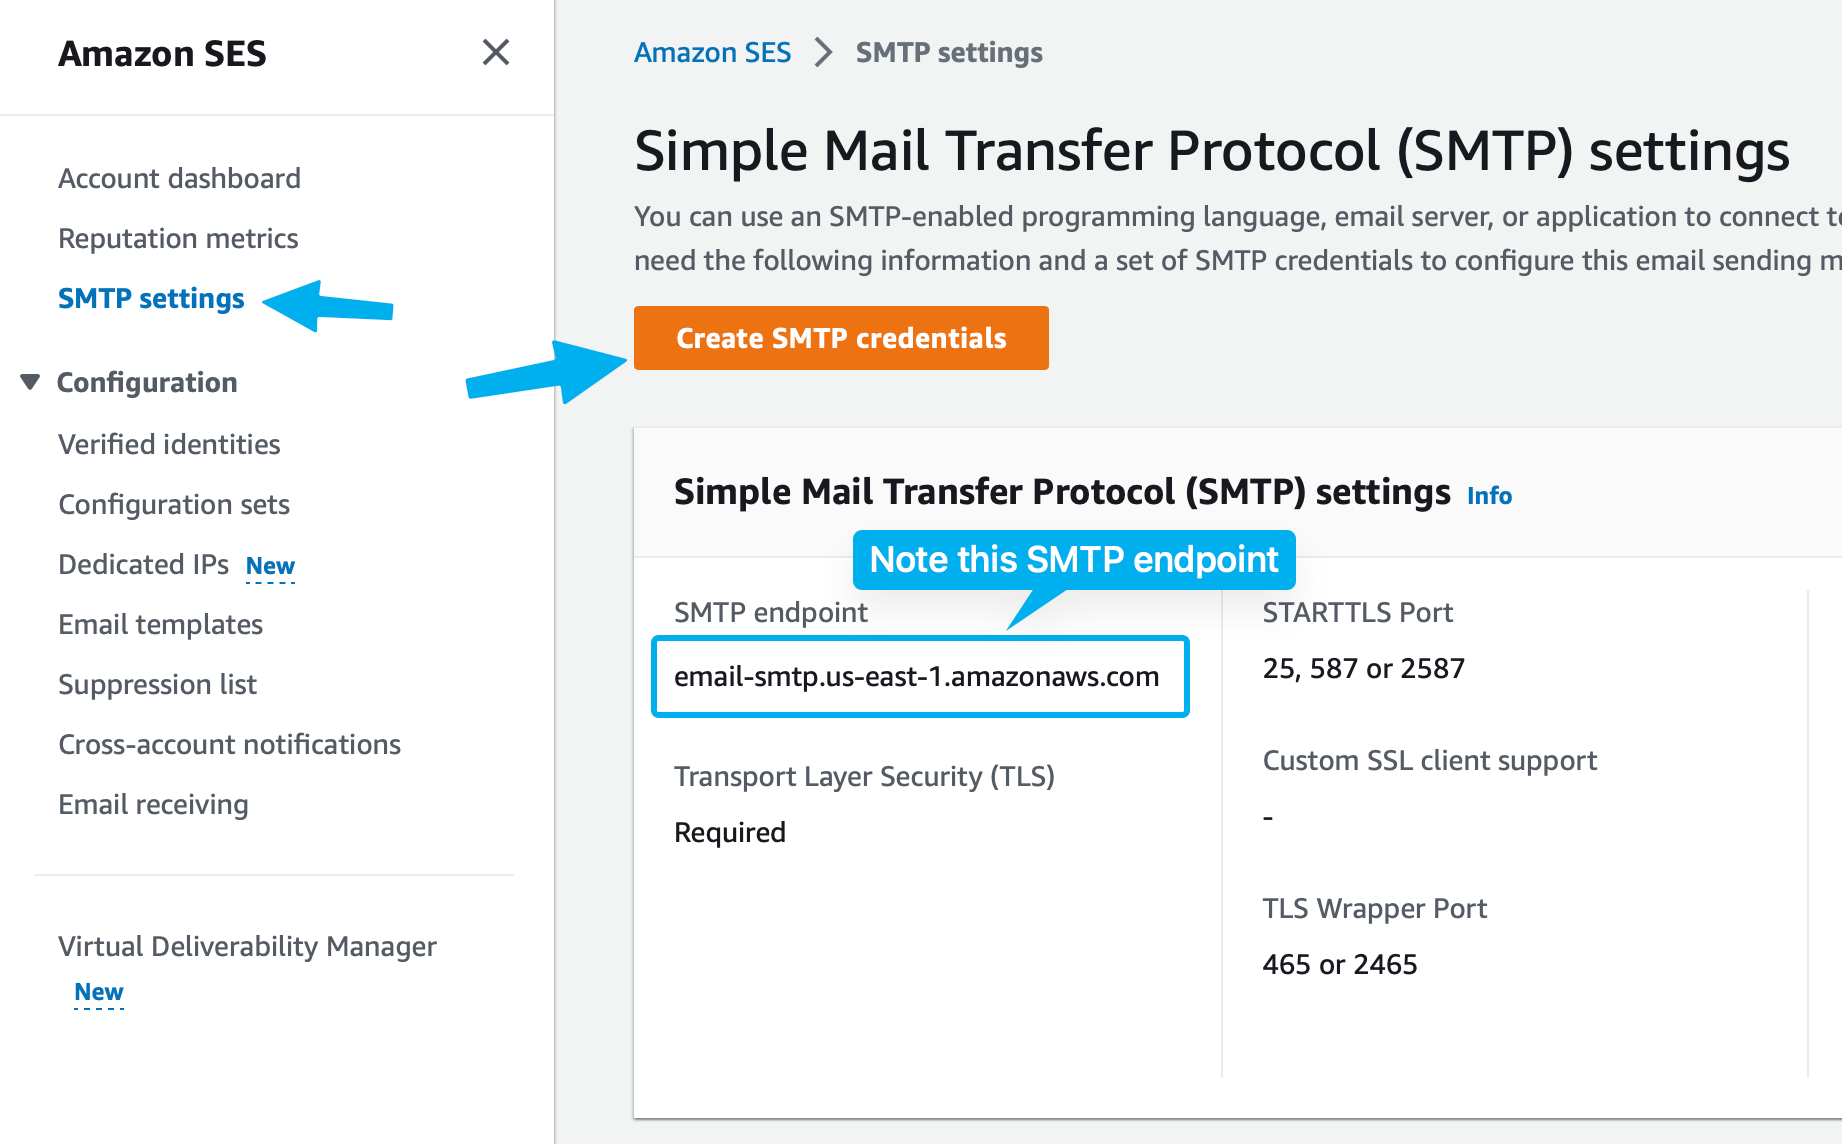
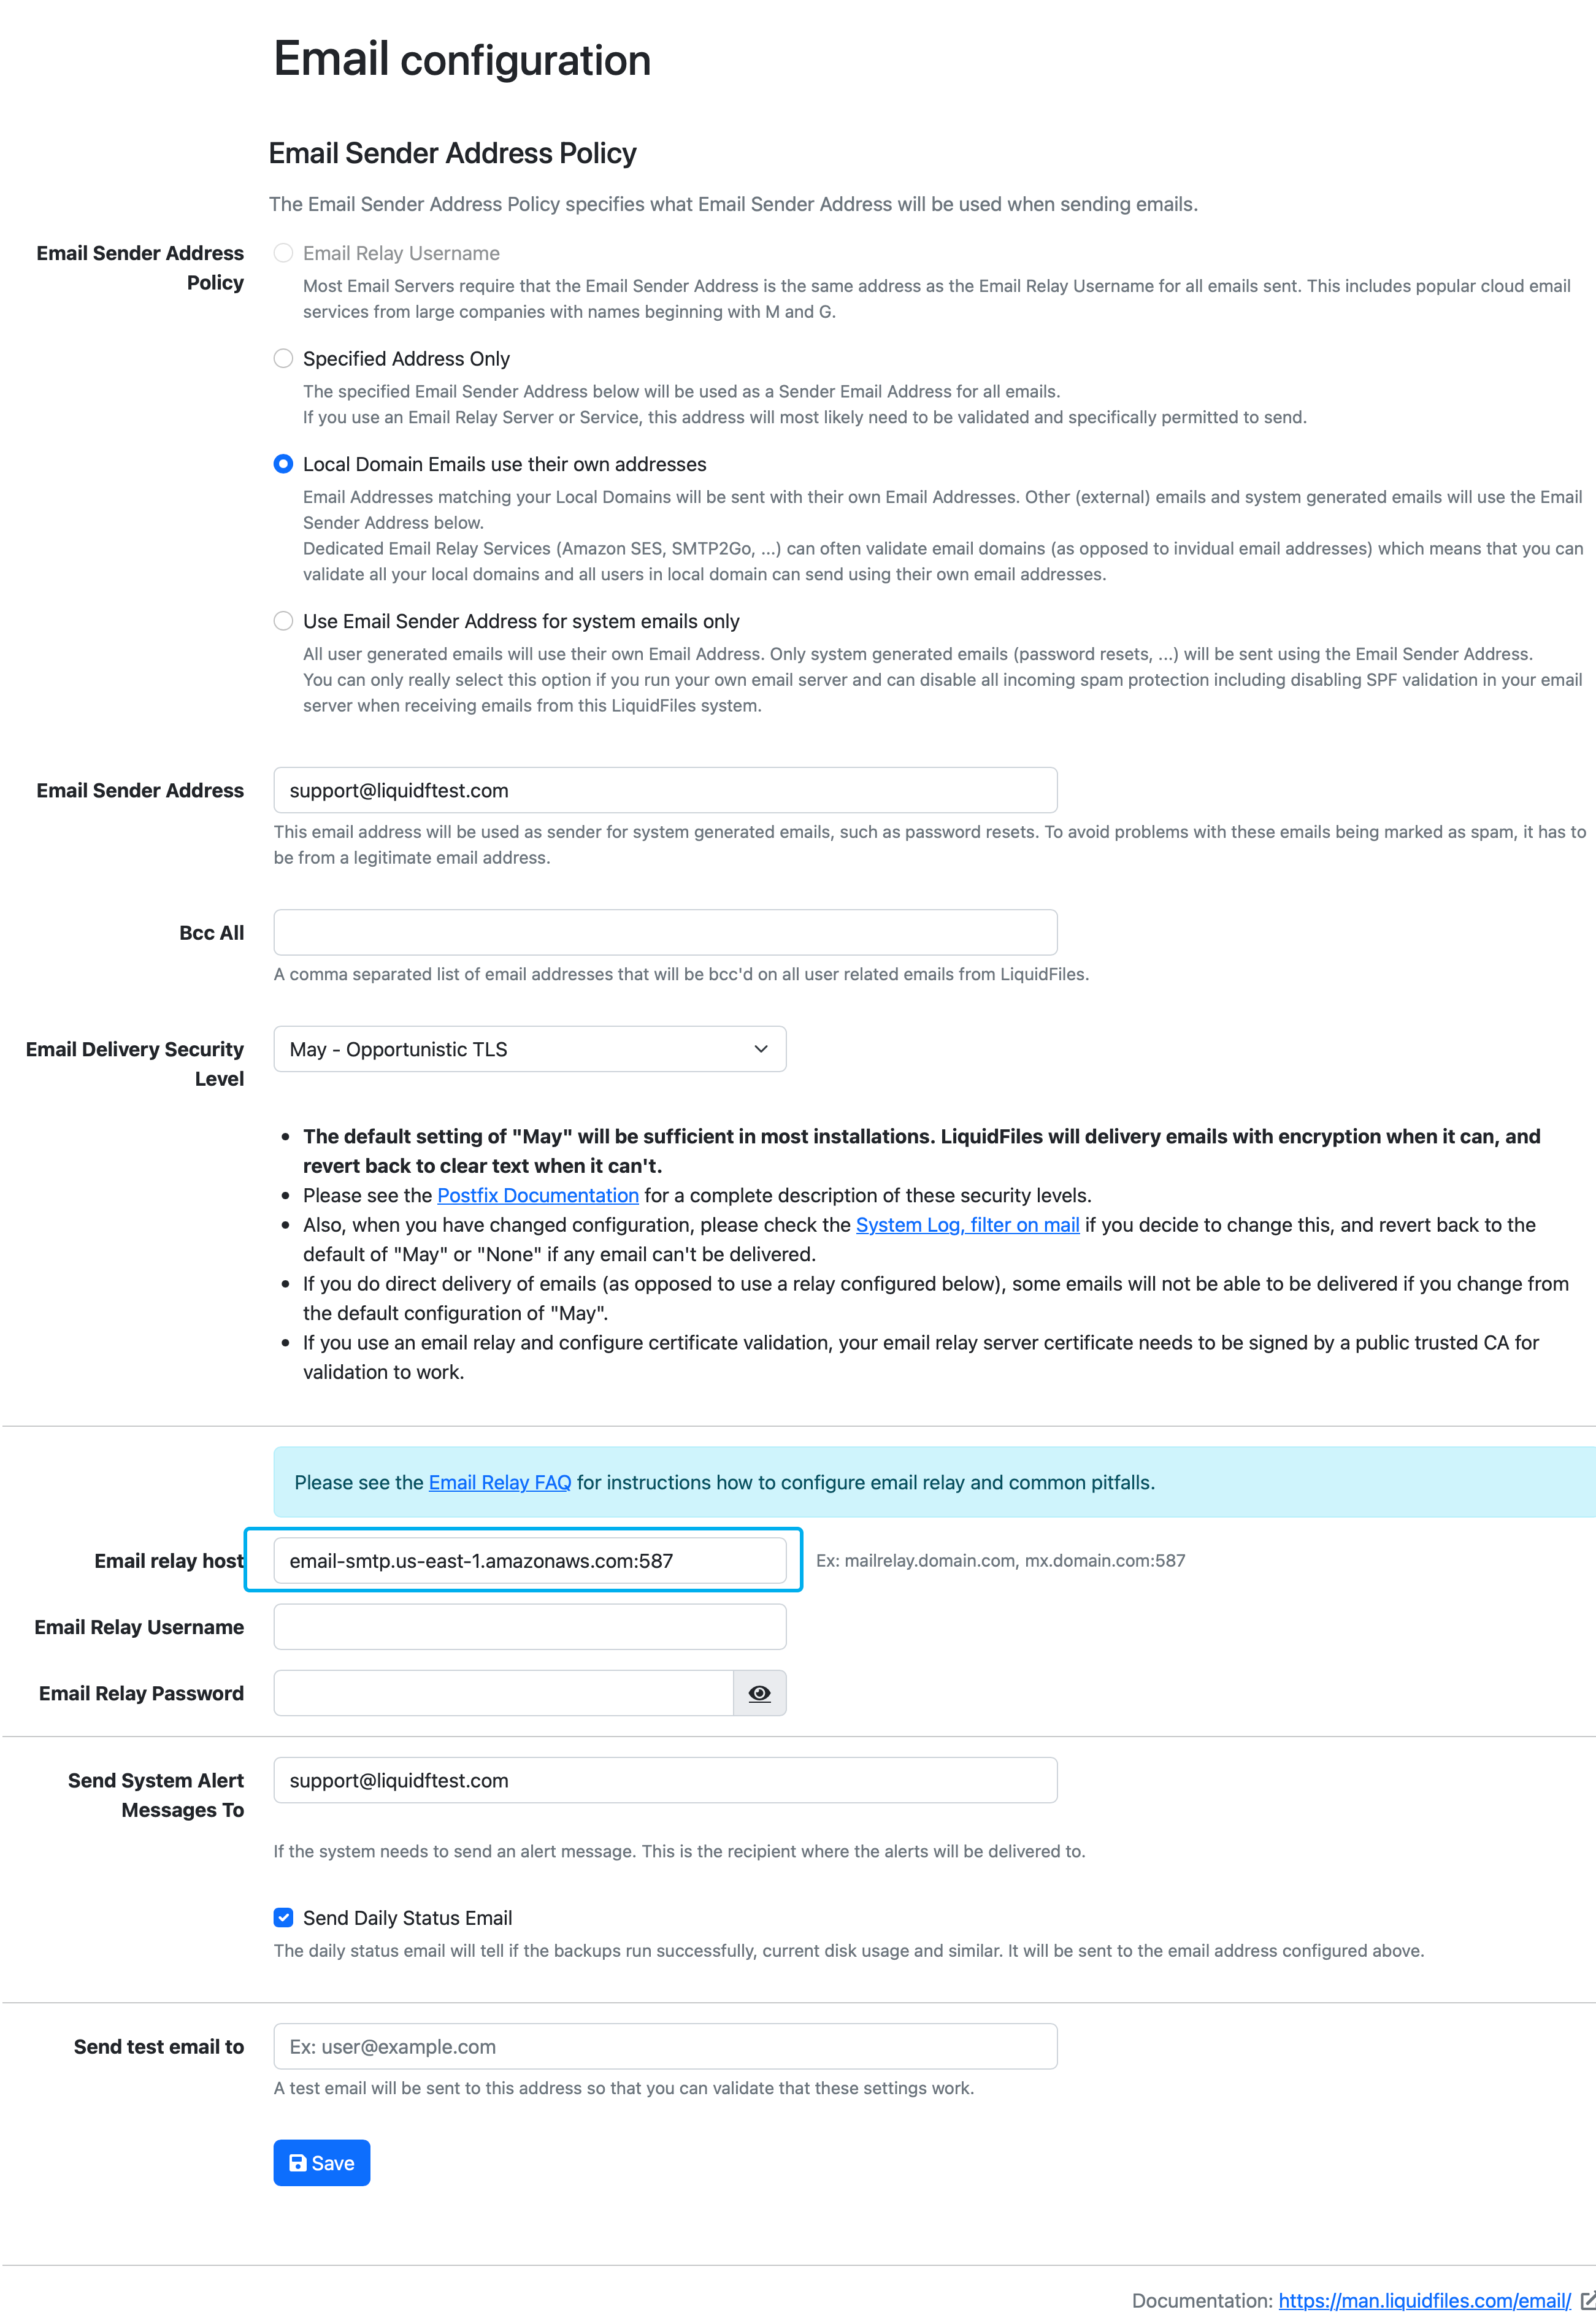
Added to the LiquidFiles configuration as:
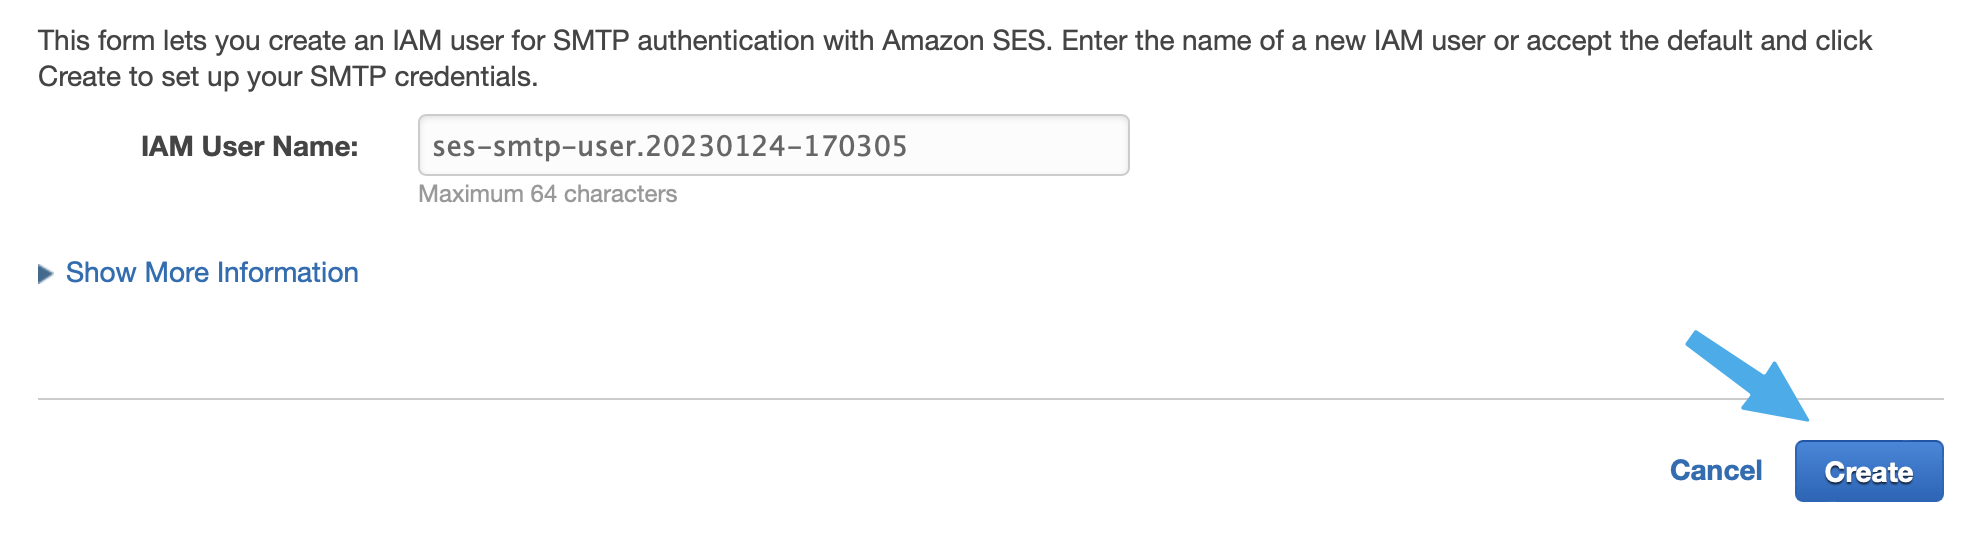
When then go back to the SMTP settings and click on Create SMTP Credentials, which will get us to the following page where we're prompted what IAM username the SMTP credentials should be tied to. The default is fine:
When we click Create the SMTP credentials are created:
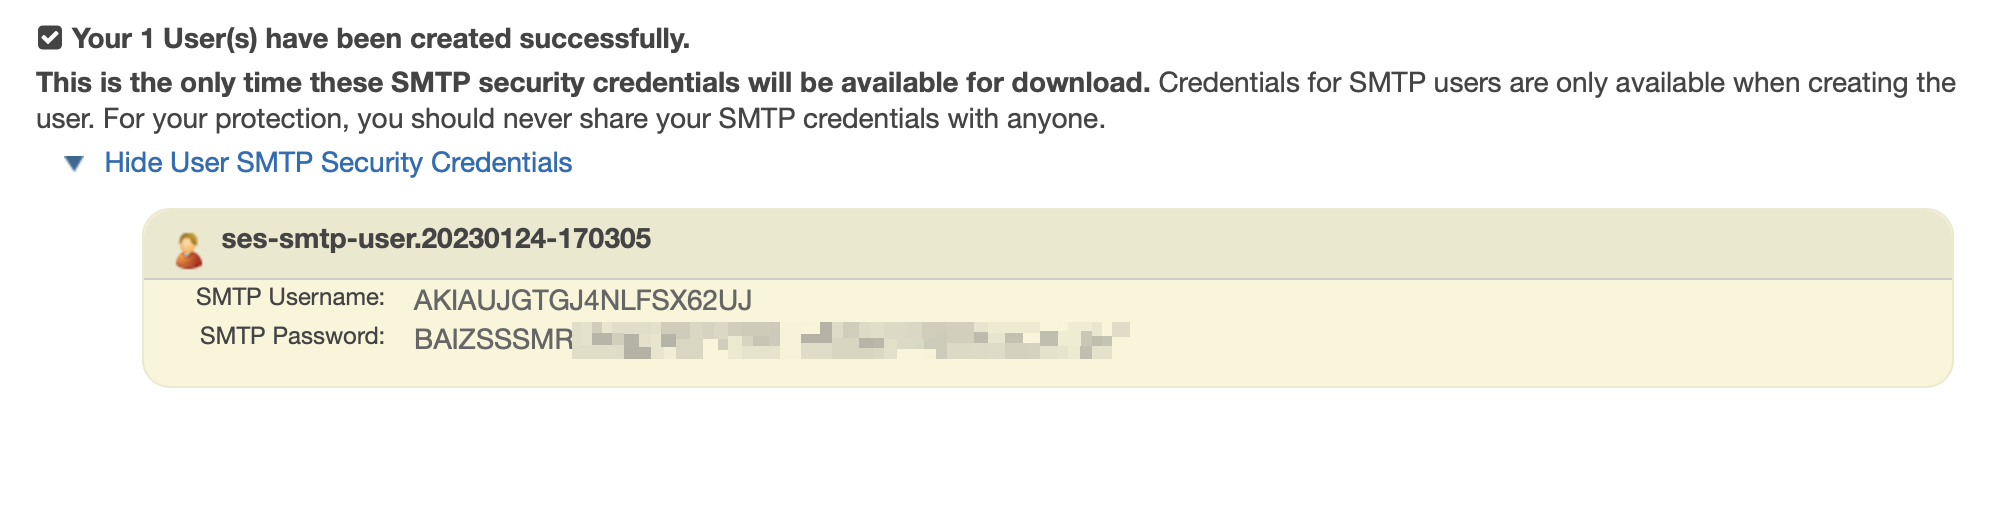
And we take these credentials and add them to the LiquidFiles Email configuration page:
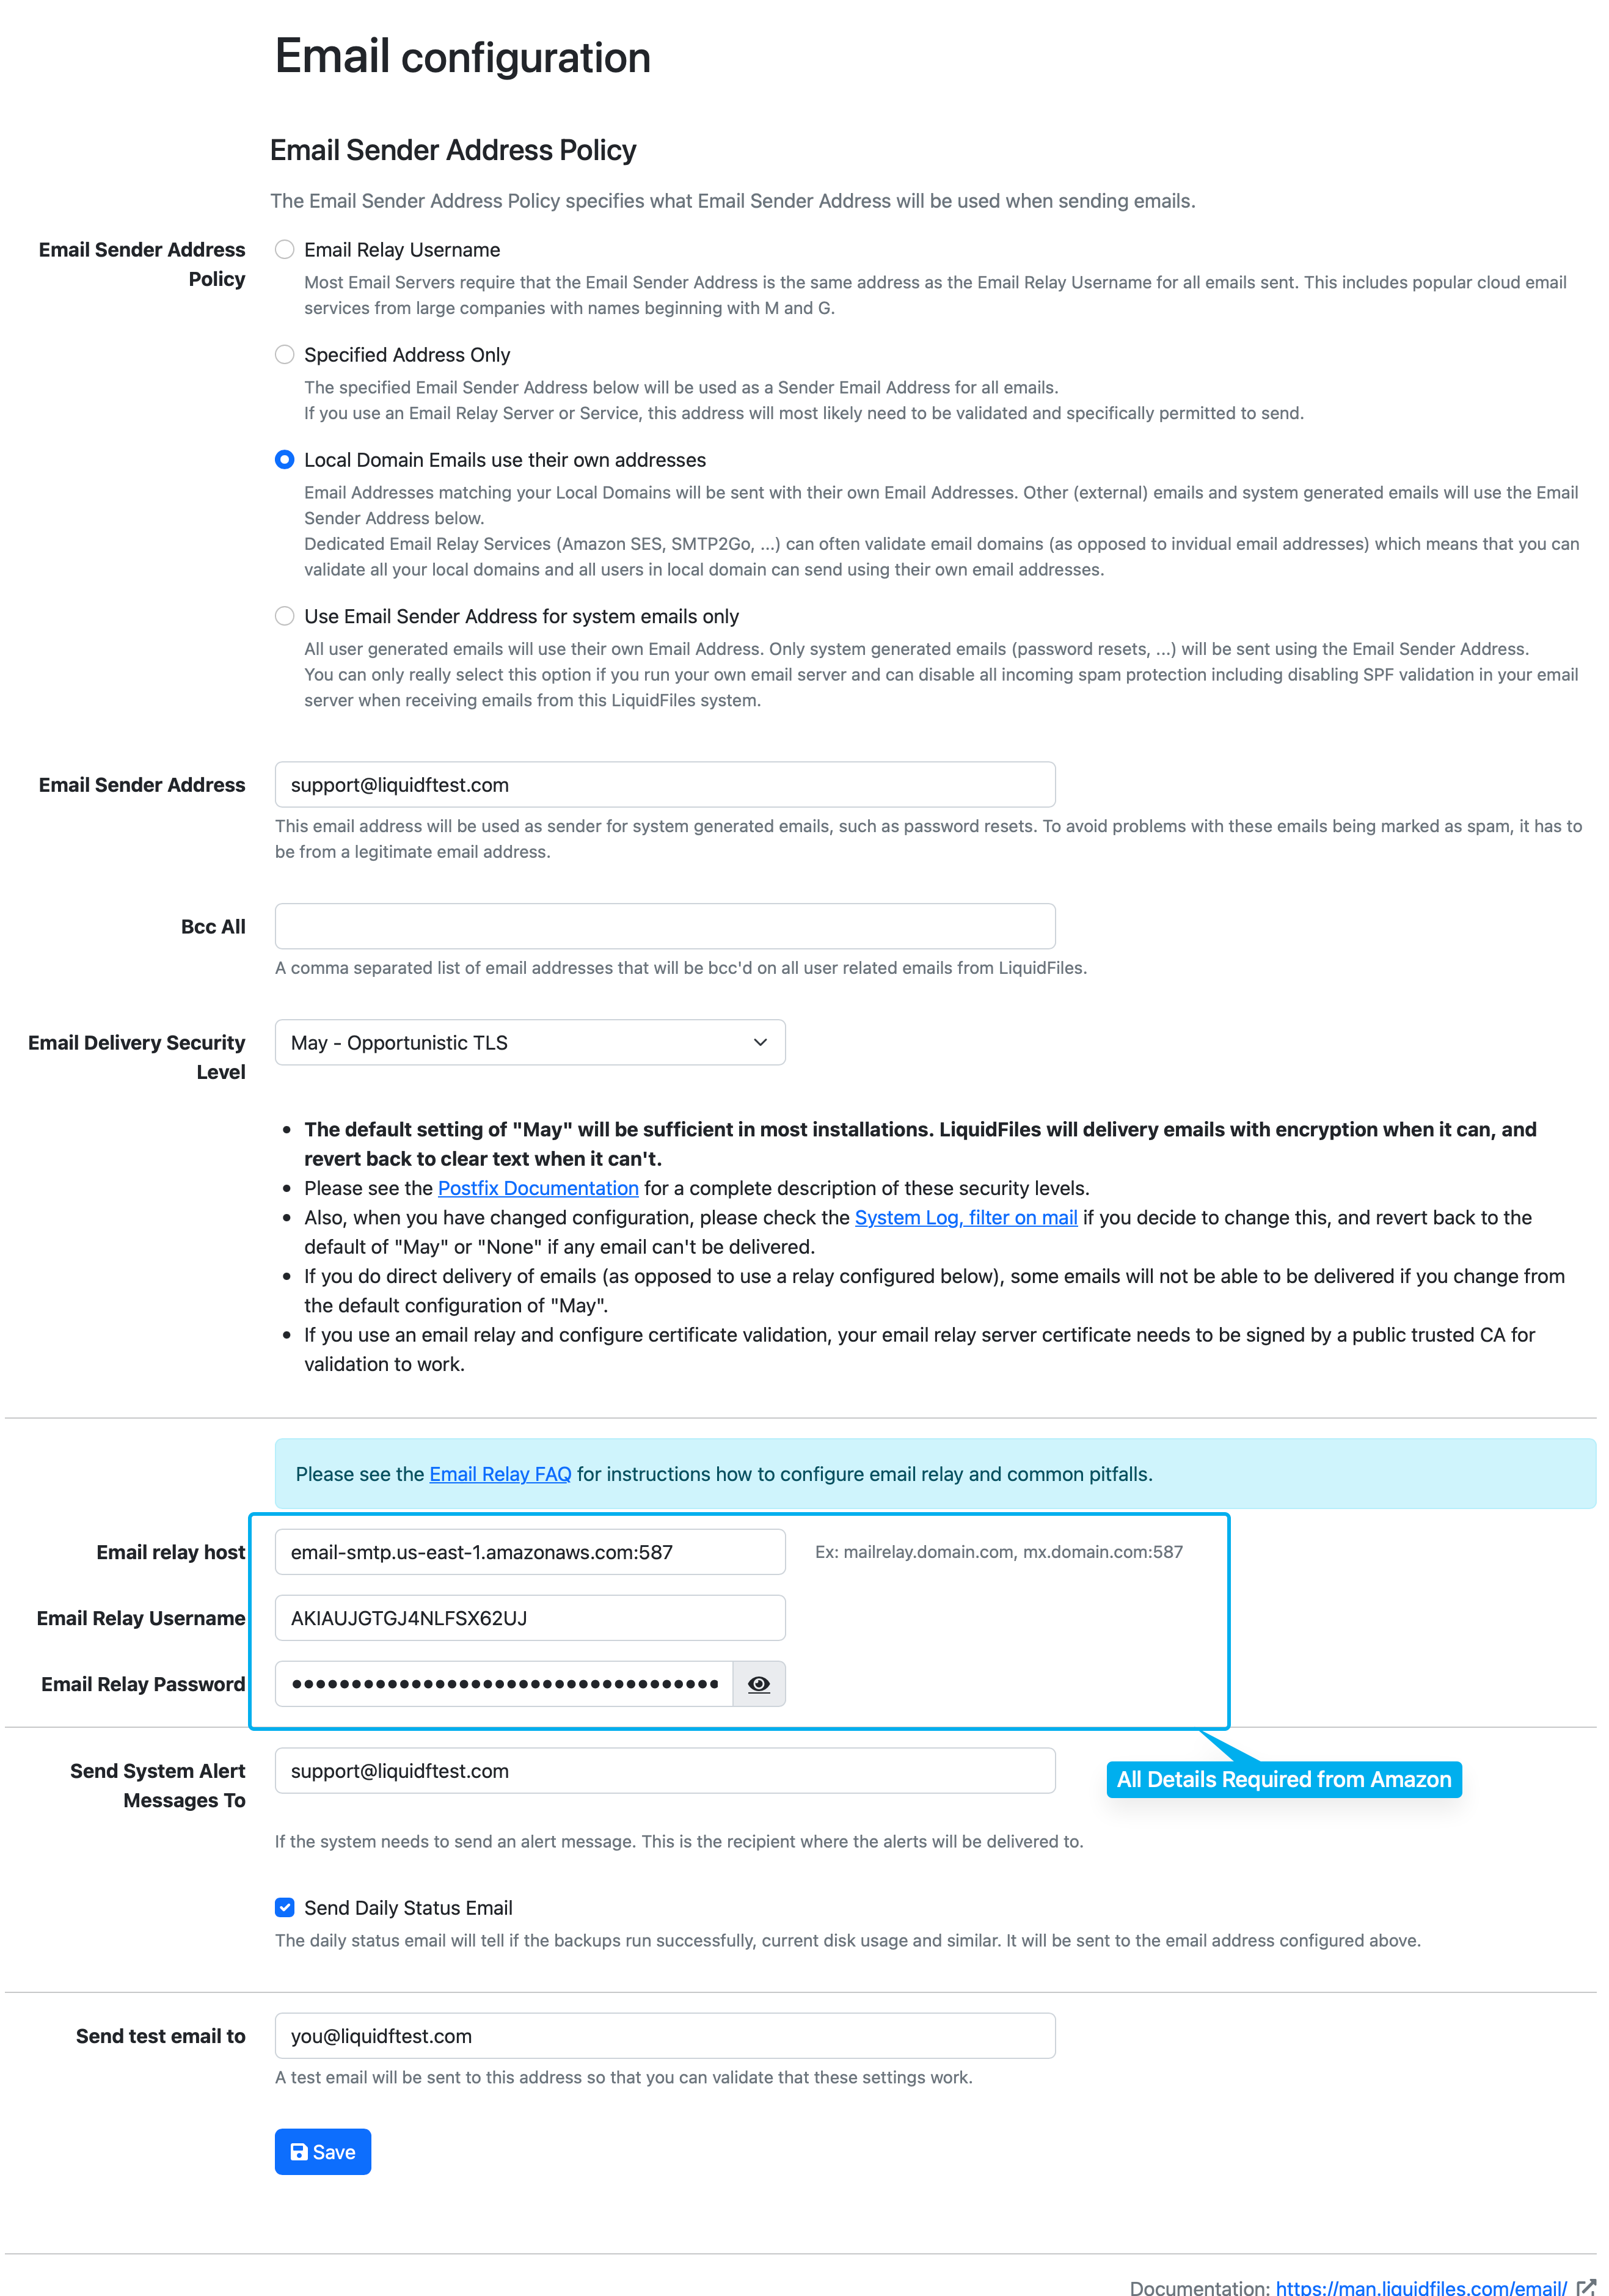
And that's it for Amazon SES and LiquidFiles configuration. When you click Save in LiquidFiles, all emails will be delivered through Amazon SES.
The only other configuration that you may need to do is to add the Amazon SES SPF records to your SPF configuration. Since this is something that happens purely in your DNS server its outside the scope of this guide to direct how this is done. Please see the Amazon SES SPF configuration guide for more information.