Increasing Disk Size in EC2
LiquidFiles is created using an 8Gb partition, which is enough to get started and try things out. In most cases though, you will probably need to add more disk space for production usage. This artice outlines how to do that.
The first step is to login to the Amazon EC2 Console and click on Volumes and then Create Volume.

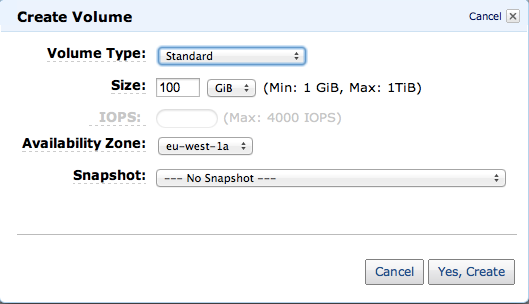
In the next screen you choose the disk size you want to create. In this example we're creating a 100 Gb data volume as LiquidFiles storage:
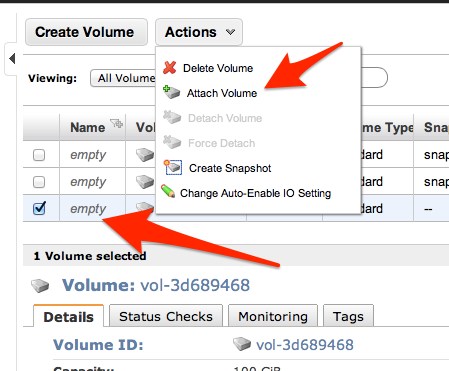
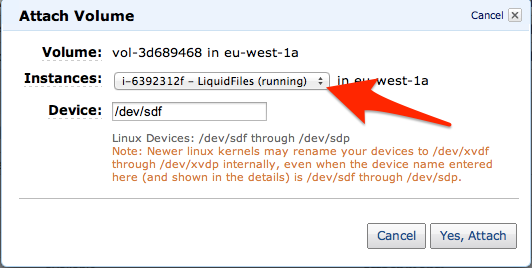
The next step is to assign the data disk to the LiquidFiles instance:
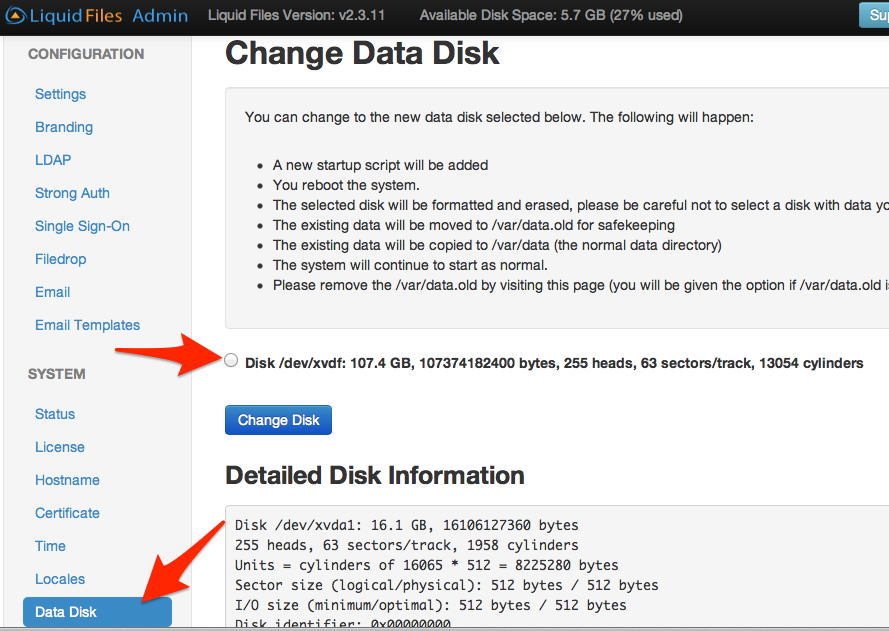
When that's completed, we can login to the LiquidFiles system and select to use the data disk as in the screenshot below. After you've selected the new disk, please restart the system and on restart all the data will be moved to the selected disk and when the system has come up, you will have the 100Gb data disk as file storage.
If you need to increase the disk size further on, you can just add another larger disk, say a 150 Gb or a 200 Gb disk and repeat this procedure. Once the data has been migrated, you can delete the first data disk.