Troubleshoot Certificate Installation problems
If you get any errors when installing the certificates, it may be one of the following:
Invalid Certificate Format
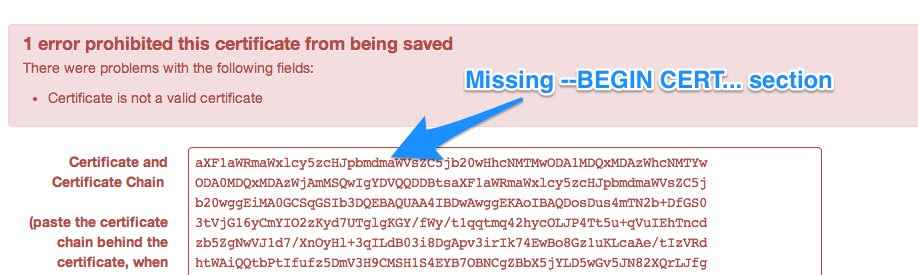
Please make sure that you copy all of the certificate data, including the ----BEGIN CERTIFICATE----- sections.
Certificate does not match key
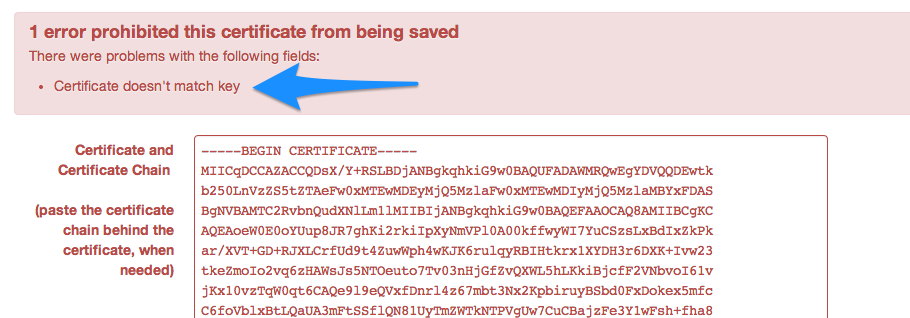
When generating a certificate the relationship is: KEY → Certificate Signing Request (CSR) → Certificate.
You begin with a private key, from the private key you generate a CSR that you send to the CA. The CA will then send a signed certificate back.
If you use the Generate CSR function in LiquidFiles, it will use the private key that's installed in LiquidFiles and that won't change unless you select the "Replace Private Key and Re-Generate Self-Signed Certificate" function. If you have selected the Replace Private Key option after you've generated the CSR and you haven't kept a copy of the previous private key, you will need to generate a new CSR and get your CA to sign the new CSR.
Another alternative is if you have used the Custom CSR function to generate a custom CSR. In that case you need to use the private key that was generated by the OpenSSL command when you generated the CSR when uploading the certificate.
A third alternative is if you've copied the certificate from another system. It could for instance be that you have a company wide wildcard certificate you wish to use. In that case you will also need to copy the corresponding private key from the same system that you copied the certificate from.
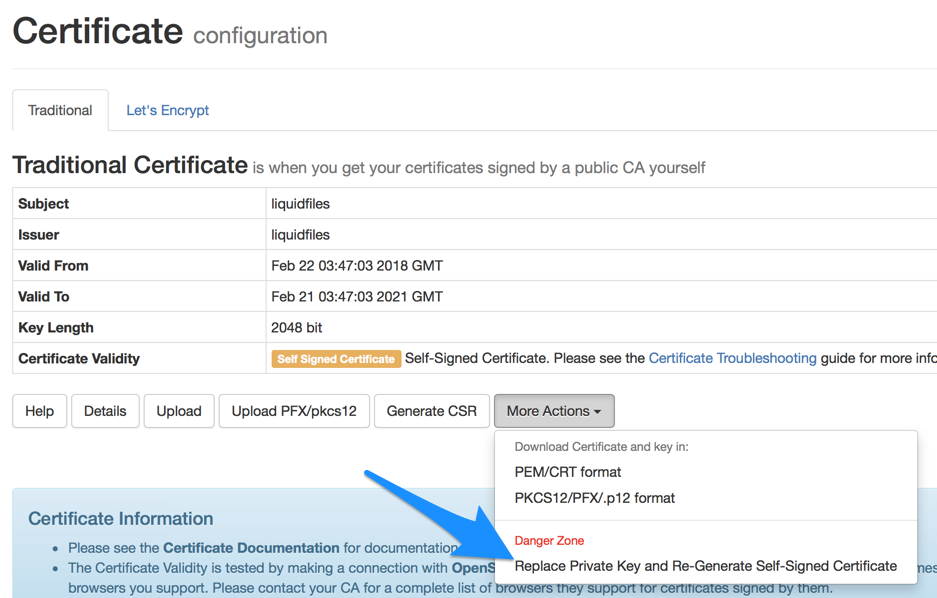
Self-Signed Certificate
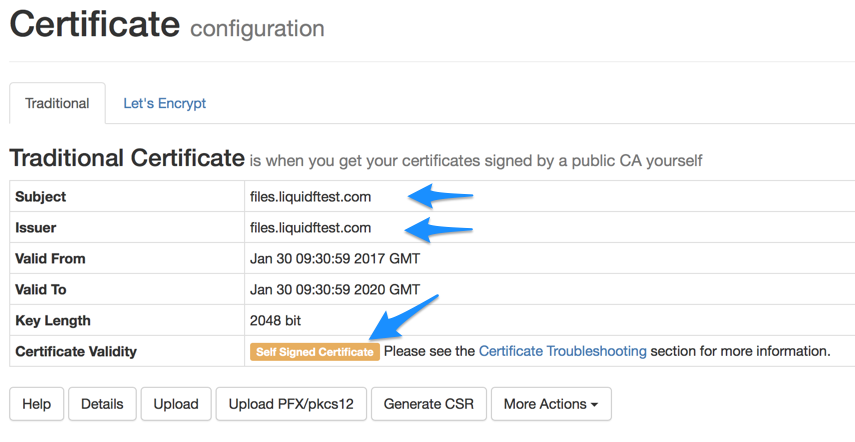
When LiquidFiles is first installed, it comes with a Self-Signed Certificate. You can see the Self Signed Certificate warning, and also that both the Subject and the Issues is the same — i.e. self signed. If you've just reset the Private Key, either from the console or from the "More Actions" dropdown, LiquidFiles will also install a Self-Signed Certificate with the new Private Key.
Using Self-Signed Certificates works great in testing but will always give anyone that access the system a Certificate warning. In production, almost certainly you want to replace the Self-Signed Certificate with either a Traditional Certificate or a Let's Encrypt Certificate.
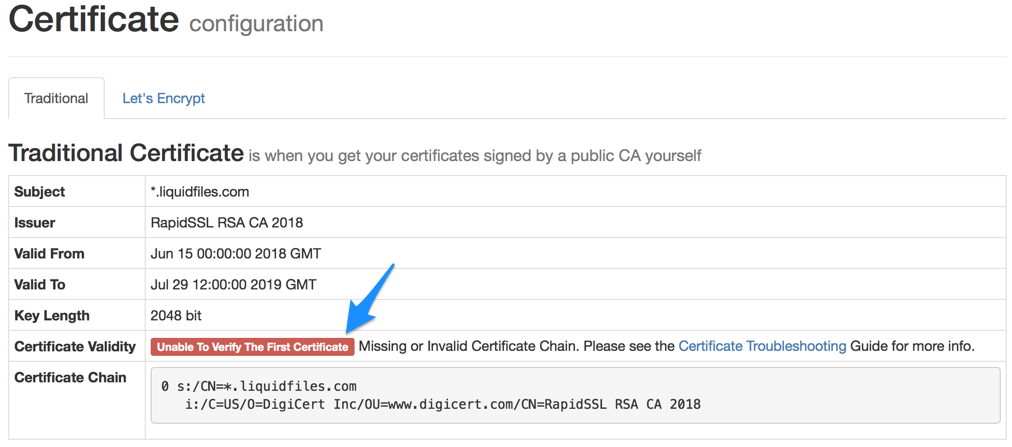
Missing or Invalid Certificate Chain
Please contact your Certificate Authority to get their intermediate certificate. This needs to be added to the Certificate Chain section in the Certificate Upload section.
Please see Troubleshoot Certificate Chain for more information.
Each Certificate installed in LiquidFiles (and every other SSL/TLS enabled server) contains three parts:
- The Private Key — This is normally generated/stored on the LiquidFiles system itself, or at least within your own environment if you have used a Custom CSR or similar.
- The Certificate — When you've sent the CSR to the Certificate Authority, they will send the Signed Certificate back with your details in the Certificate, most importantly the Common Name (CN) matching the URL of your LiquidFiles Appliance.
- The Certificate Chain — that tells browsers how to verify the Certificate
you've received from them. Sometimes the Certificate Chain is also referred to as Intermediate
Certificates.
Each Certificate Authority have their own Certificate Chain and typically all certificates signed by the same CA will share the same Certificate Chain. In some cases though Certificate Authorities have different Certificate Chains depending on type of Certificate so a domain validated Certificate could have a different Certificate Chain from an Extended Validation Certificate.
In this case, you have either not installed the Certificate Chain you got from the Certificate Authority, or you installed the wrong Certificate Chain. Please contact your Certificate Authority and ask them for the Certificate Chain for your specific Certificate. Once you have the correct Certificate Chain, please follow the Certificate Install guide to upload the Certificate Chain.
Reset Certificate with new Key and Self-Signed Certificate
If something gets very wrong, the easiest way to get back into the console can be to reset the certificate back to a self-signed certificate. A couple of warnings first:
The Private Key will Change
If you reset the Key and generate a new Self-Signed Certificate. Any Certificate Signing Requests you've already generated will become invalid with the new key, so make sure you backup the key and certificate before you begin.
Backup Existing
Please make sure you backup the existing certificate and key before you replace them in case you need to use the private key and certificate at some point.
HSTS can block your browser
If you've used LiquidFiles with the protocol setting of "Force HTTPs" with a either a traditional CA signed Certificate or a Let's Encrypt Certificate, HSTS will have been enabled in any browser you've used to access LiquidFiles. This means that any browser you've already used cannot be used to access the LiquidFiles system when there's a Self-Signed Certificate installed. Either consult your browser documentation to reset the HSTS setting, or use another browser you haven't previously used to connect to LiquidFiles when logging in and updating the Certificate after you've reset it.
Reset Certificate and Key via the Web Admin interface
You can reset the Private Key and generate and new Self-Signed Certificate by going to Admin → System → Certificate, clicking on "More Actions" and select the option to "Replace the Private Key Re-Generate a Self-Signed Certificate".
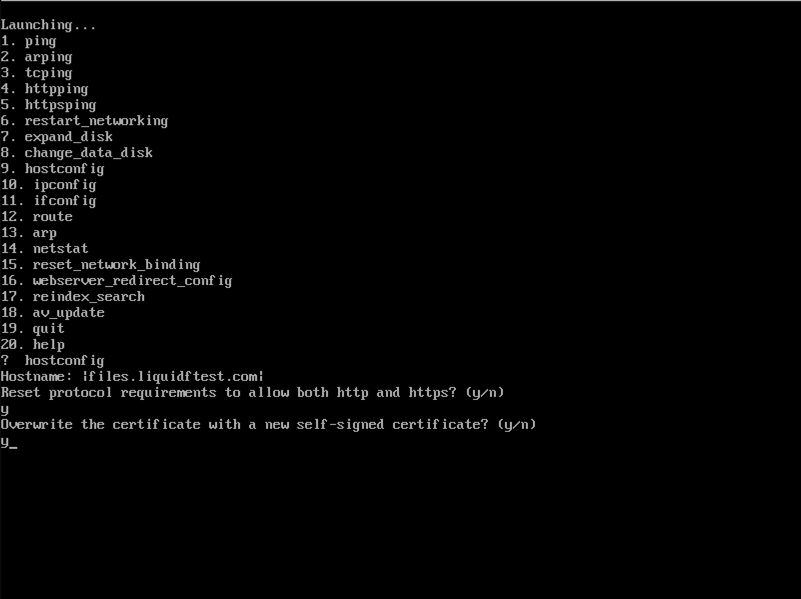
Reset Certificate and Key via the console or command line
You can reset the Private Key and generate a new Self Signed Certificate by clicking on "F2 Setup" on the console and select the "hostconfig" option and select the options as per the screenshot below, or alternatively you can login to the console and run `ft hostconfig` to reach the same command: