Amazon EC2 Installation
In the Amazon Elastic Cloud, it's possible to launch a pre-configured LiquidFiles Virtual Appliance. Amazon has several data centres across the globe. LiquidFiles has pre-configured virtual appliances in all of Amazon's EC2 data centres.
Amazon Virtual Private Cloud (VPC) Configuration
For any Amazon EC2 instance to operate, you will need to configure Amazon Virtual Private Cloud (VPC) in the Amazon AWS space. If you're starting a complete fresh Amazon environment and LiquidFiles is your first instance, please follow these instructions to Configuration Amazon Virtual Private Cloud (VPC).
Installation
This is a step by step instruction for setting up LiquidFiles in the Amazon EC2 cloud.
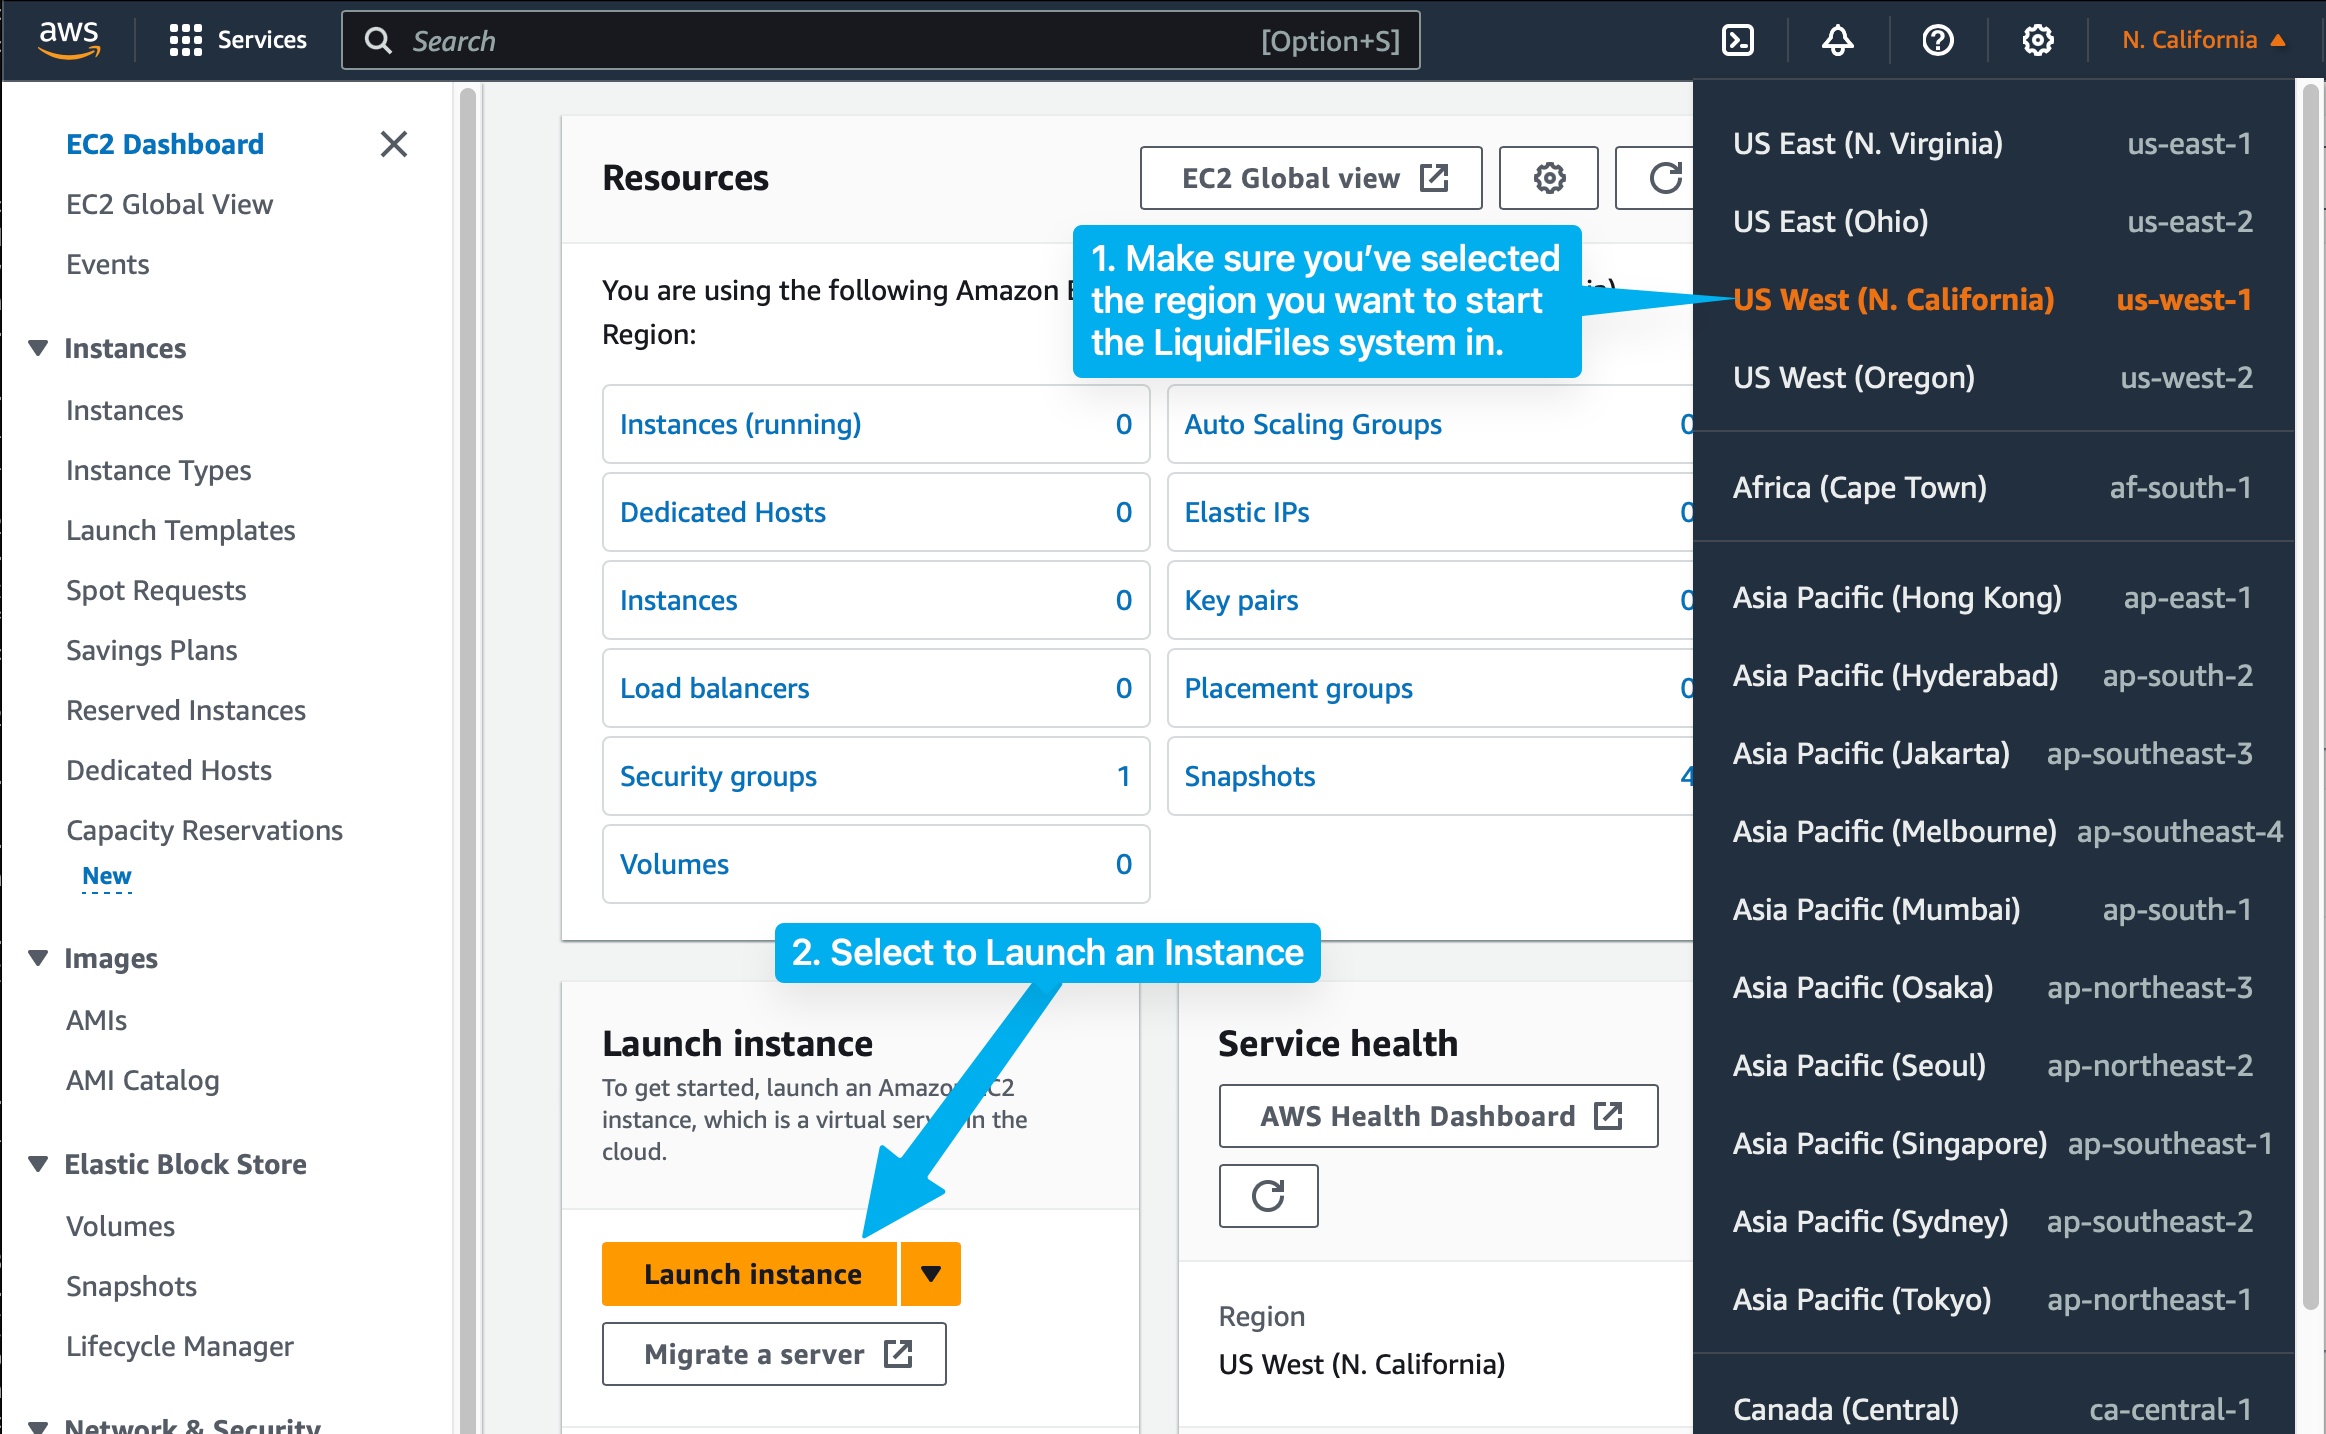
First, login or create an account at the Amazon EC2 console.
First, select the region where you want to Launch the LiquidFiles instance. Select Instances in the left hand menu and click "Launch Instance."
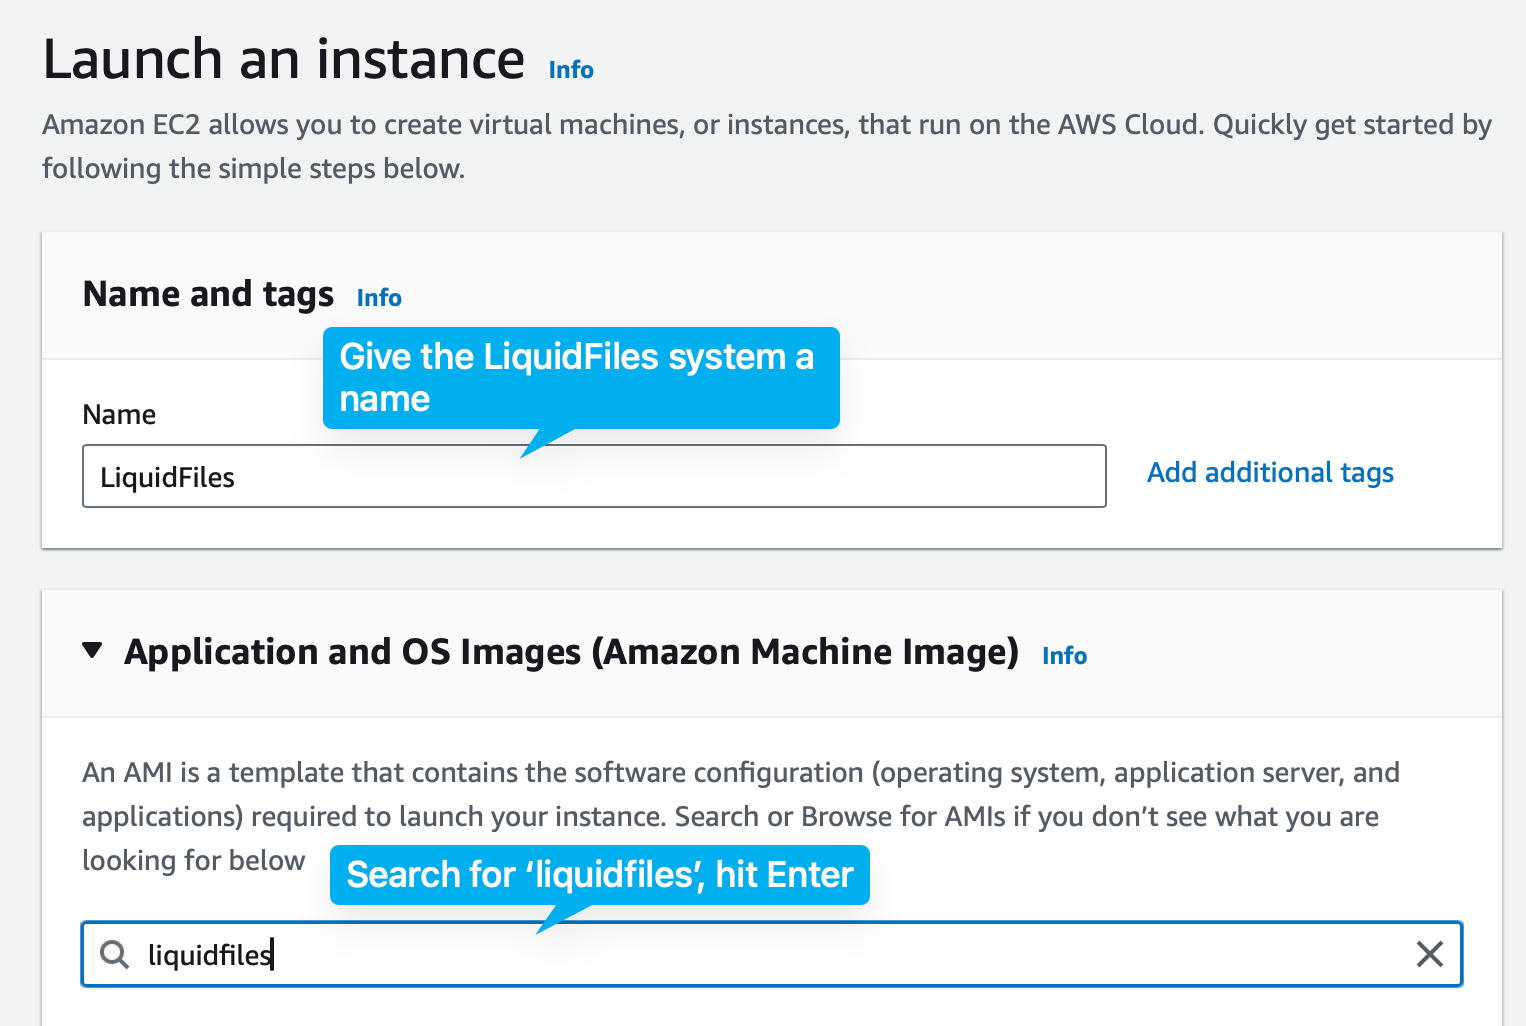
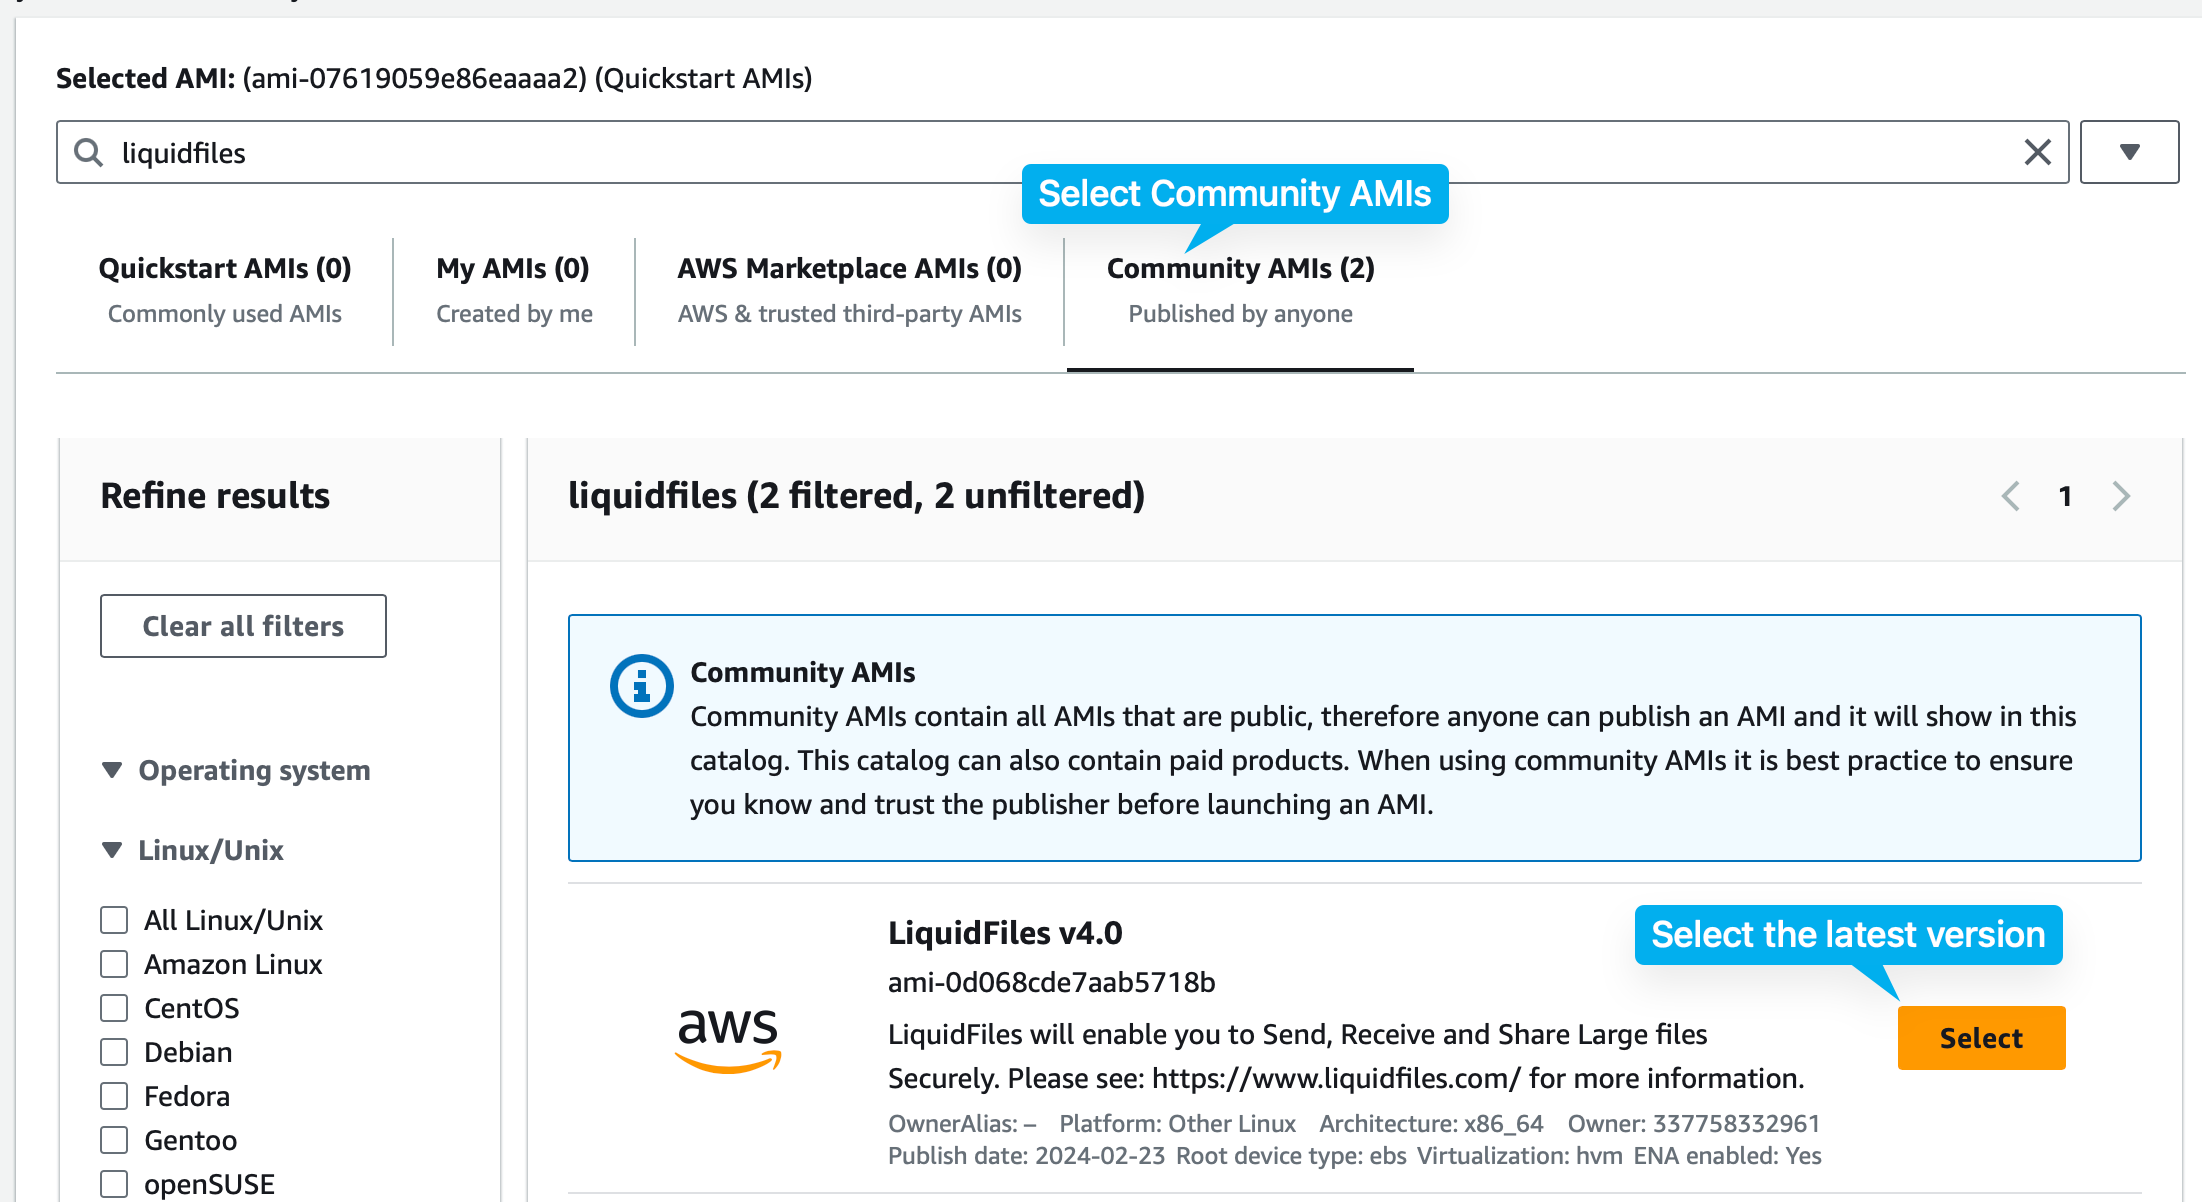
In the Community AMI area, please search for "liquidfiles" and the LiquidFiles Virtual Appliance instance will be ready to be selected.
Regions
Here is the complete list of different EC2 regions and respective AMI's. Latest AMI Version: v4.0.5. The system is set to automatically update to the latest version as part of the nightly maintenance.
| Region | Location | AMI |
|---|---|---|
| USA | ||
| us-east-1 | N. Virginia | ami-04987868a85a426e0 |
| us-east-2 | Ohio | ami-05f86677ca210d933 |
| us-west-1 | N. California | ami-0d068cde7aab5718b |
| us-west-2 | Oregon | ami-0932798bfd1bb8e6c |
| Africa | ||
| af-south-1 | Cape Town | ami-001a3d2a55e1ae369 |
| Asia Pacific | ||
| ap-east-1 | Hong Kong | ami-045ebab565b76569b |
| ap-south-1 | Mumbai | ami-0a9bb21631b3e02ab |
| ap-south-2 | Hyderabad | ami-0a776185d04a2d0ef |
| ap-southeast-1 | Singapore | ami-0038f92346157eb79 |
| ap-southeast-2 | Sydney | ami-011f72c9dd5122f53 |
| ap-southeast-3 | Jakarta | ami-0df04b7b1609b90f7 |
| ap-southeast-4 | Melbourne | ami-01b2206e5bbd52d01 |
| ap-northeast-1 | Tokyo | ami-029446043cb44a51b |
| ap-northeast-2 | Seoul | ami-0cb65566495dabdf9 |
| ap-northeast-3 | Osaka | ami-0b34e1caf69875125 |
| Canada | ||
| ca-central-1 | Canada | ami-064d7221ddcb5fa1a |
| ca-central-1 | Calgary | ami-09302499763382cea |
| Europe | ||
| eu-central-1 | Frankfurt | ami-013ab940c2c941b82 |
| eu-central-2 | Zurich | ami-0a897a7aa705a65c9 |
| eu-west-1 | Ireland | ami-03689c1db39af98d5 |
| eu-west-2 | London | ami-09e1528cce0fae8d5 |
| eu-west-3 | Paris | ami-0d04800bba382f03d |
| eu-north-1 | Stockholm | ami-0c7988b36ed23064e |
| eu-south-1 | Milan | ami-0a9f4129fa074b207 |
| eu-south-2 | Spain | ami-057366e85db406ce8 |
| Middle East | ||
| me-south-1 | Bahrain | ami-003fd8df2ef4769b6 |
| me-central-1 | UAE | ami-0da3404d1e8d54613 |
| Israel | ||
| sa-east-1 | Tel Aviv | ami-0cc2c6aee3c2345ac |
| South America | ||
| sa-east-1 | Sao Paulo | ami-0a648c8df6b7faca3 |
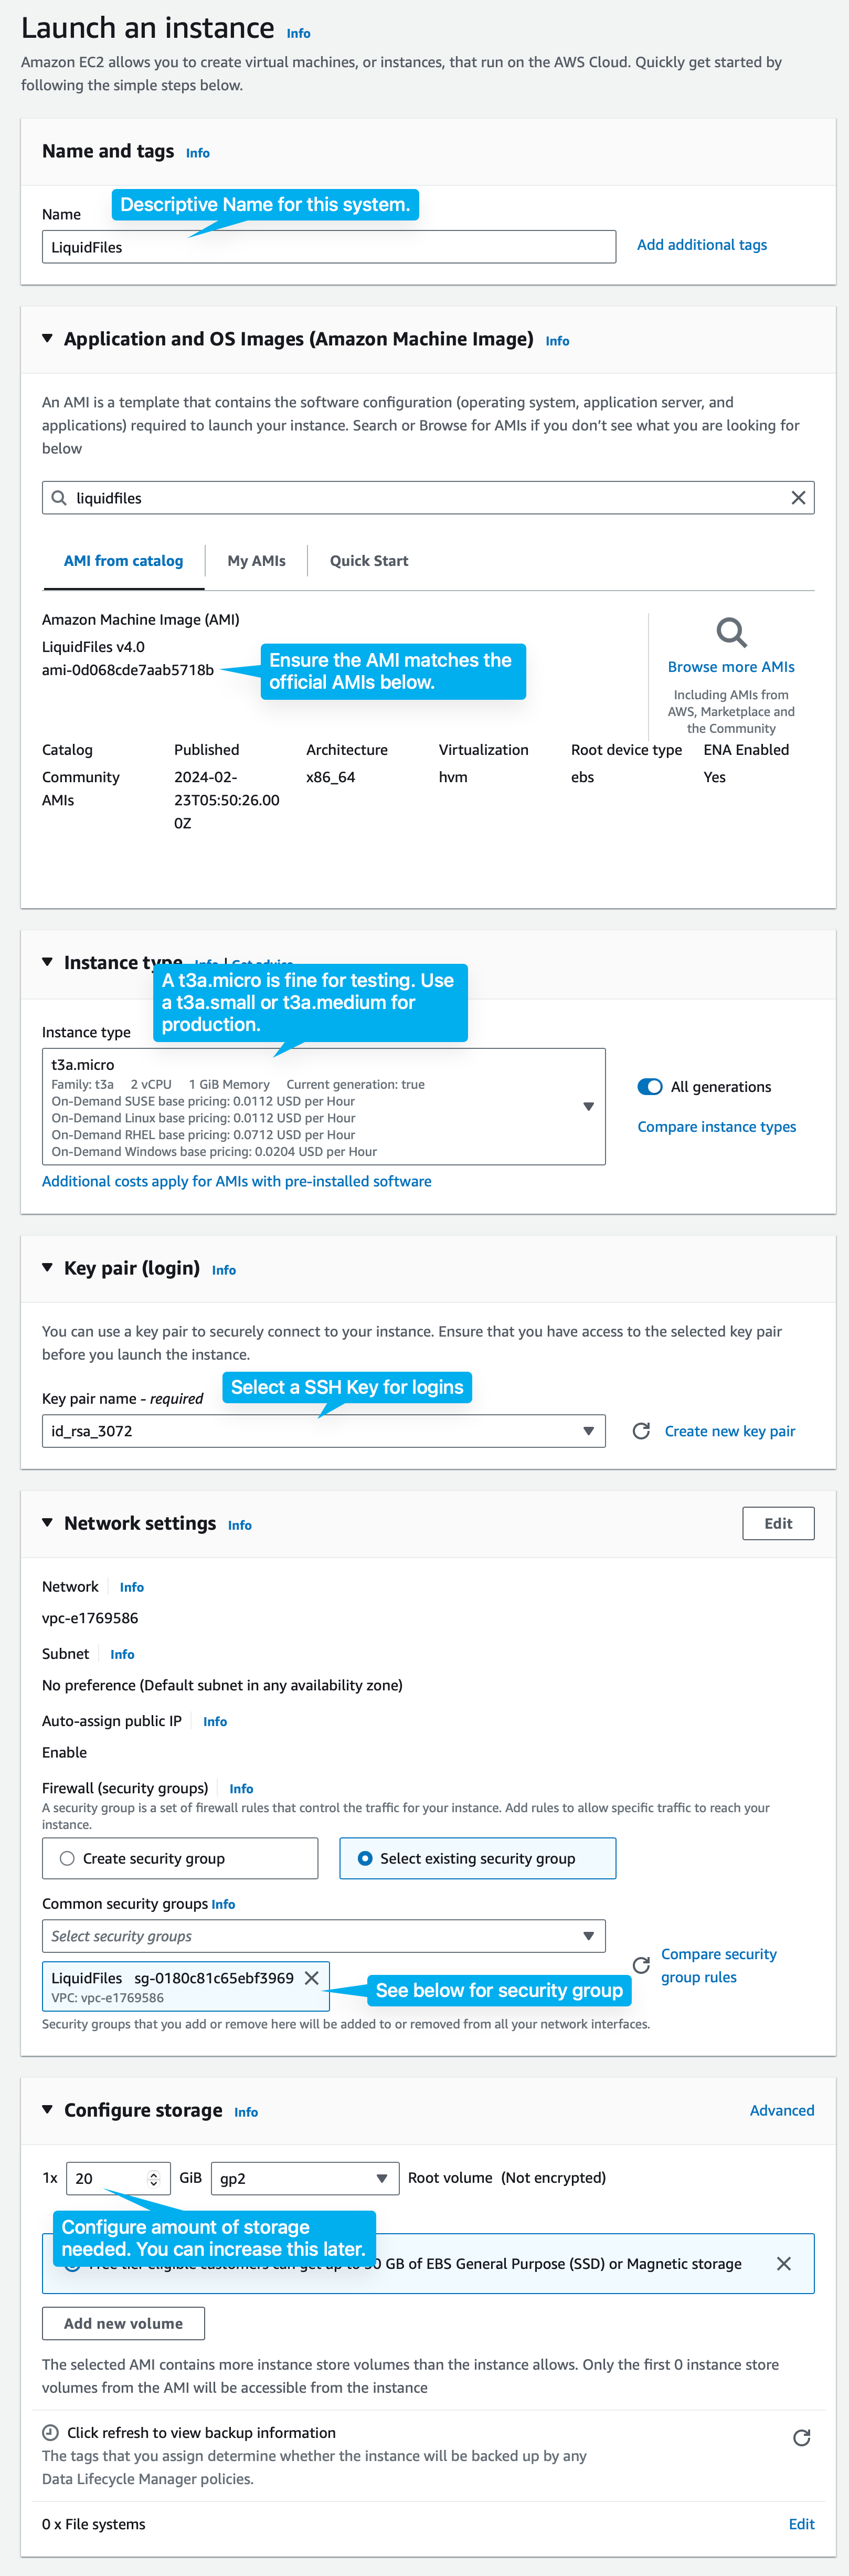
With the Instance Type, a t3.micro (or t3a.micro) instance is fine for testing. With a t3.micro you won't have access to AV scanning. For production a t3.small is fine to start with and you may want to move to a t3.medium if you have more than about 20 users (depending on usage).
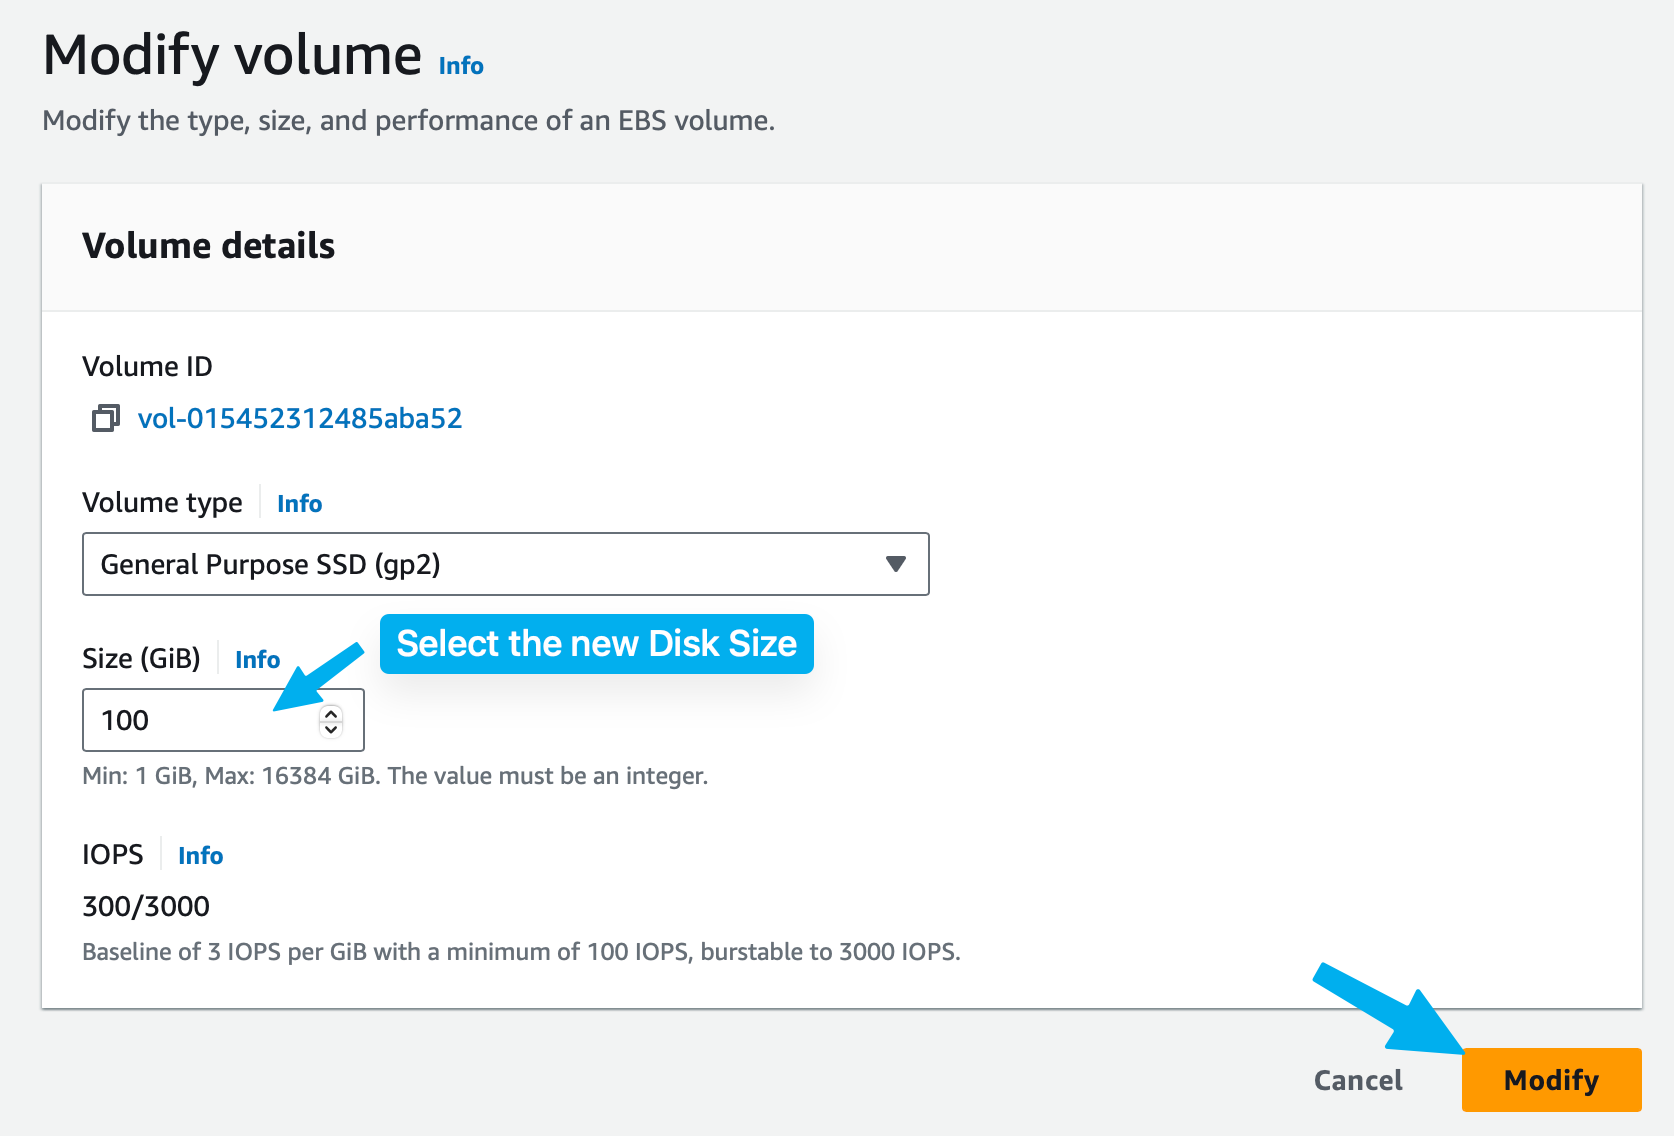
The default disk size is 20GB. You can increase this as much as you need for your requirements.
The following Security Group is a complete list of ports if you enable all features in LiquidFiles. A couple of notes:
- The four ICMP rules at the top of the list are strictly not needed for operation but are generally considered safe and will improve stability, operation and troubleshooting.
- 192.1.2.0/26 in the TCP/222 port section should be replaced with your own external admin network.
- Please see the: System & Firewall configuration for more details on the required ports.
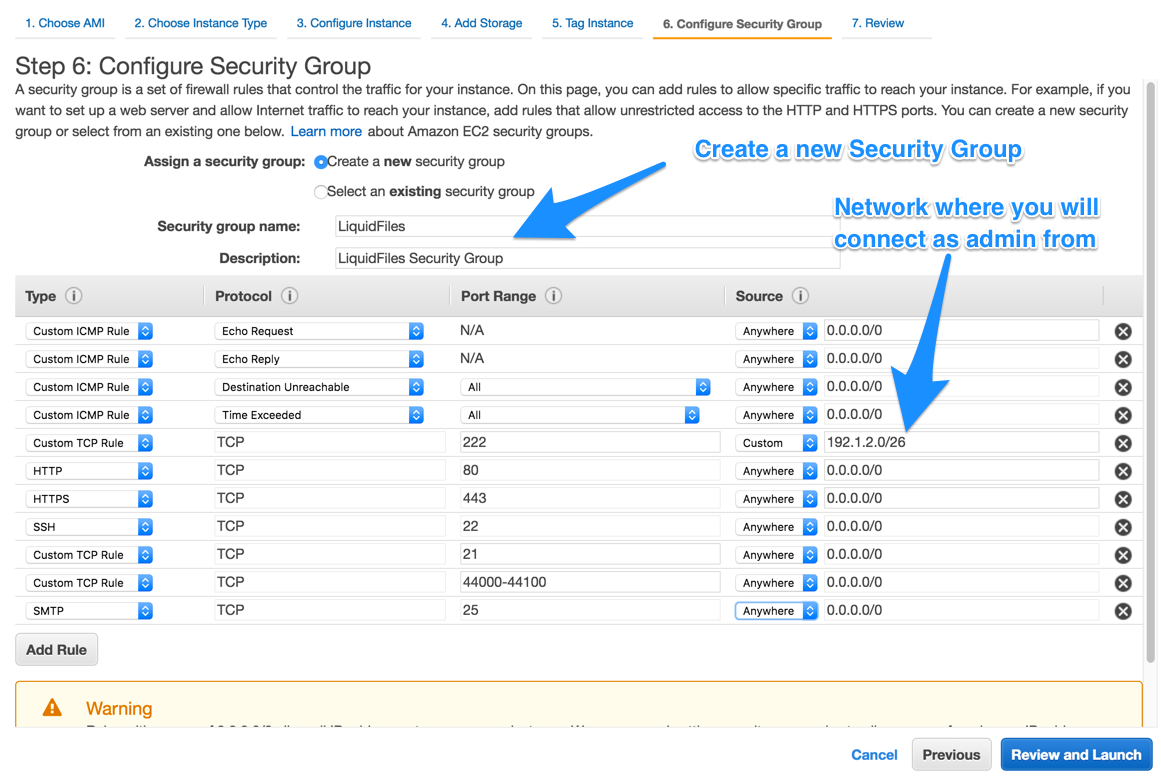
This is the old style AWS config, but it shows the information you need better.
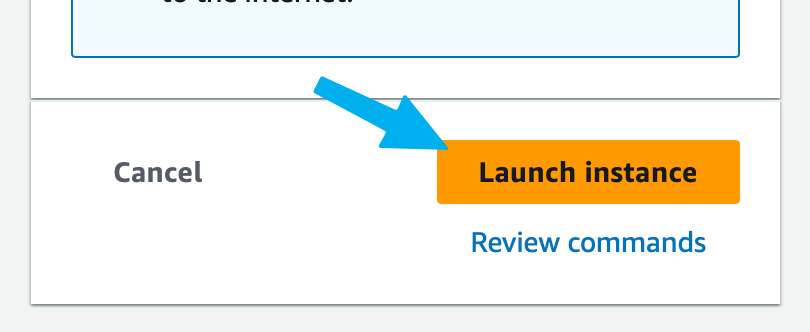
At this point the LiquidFiles system is booting (after you've hit Launch Instance) and you can continue that part in the Getting Started section.
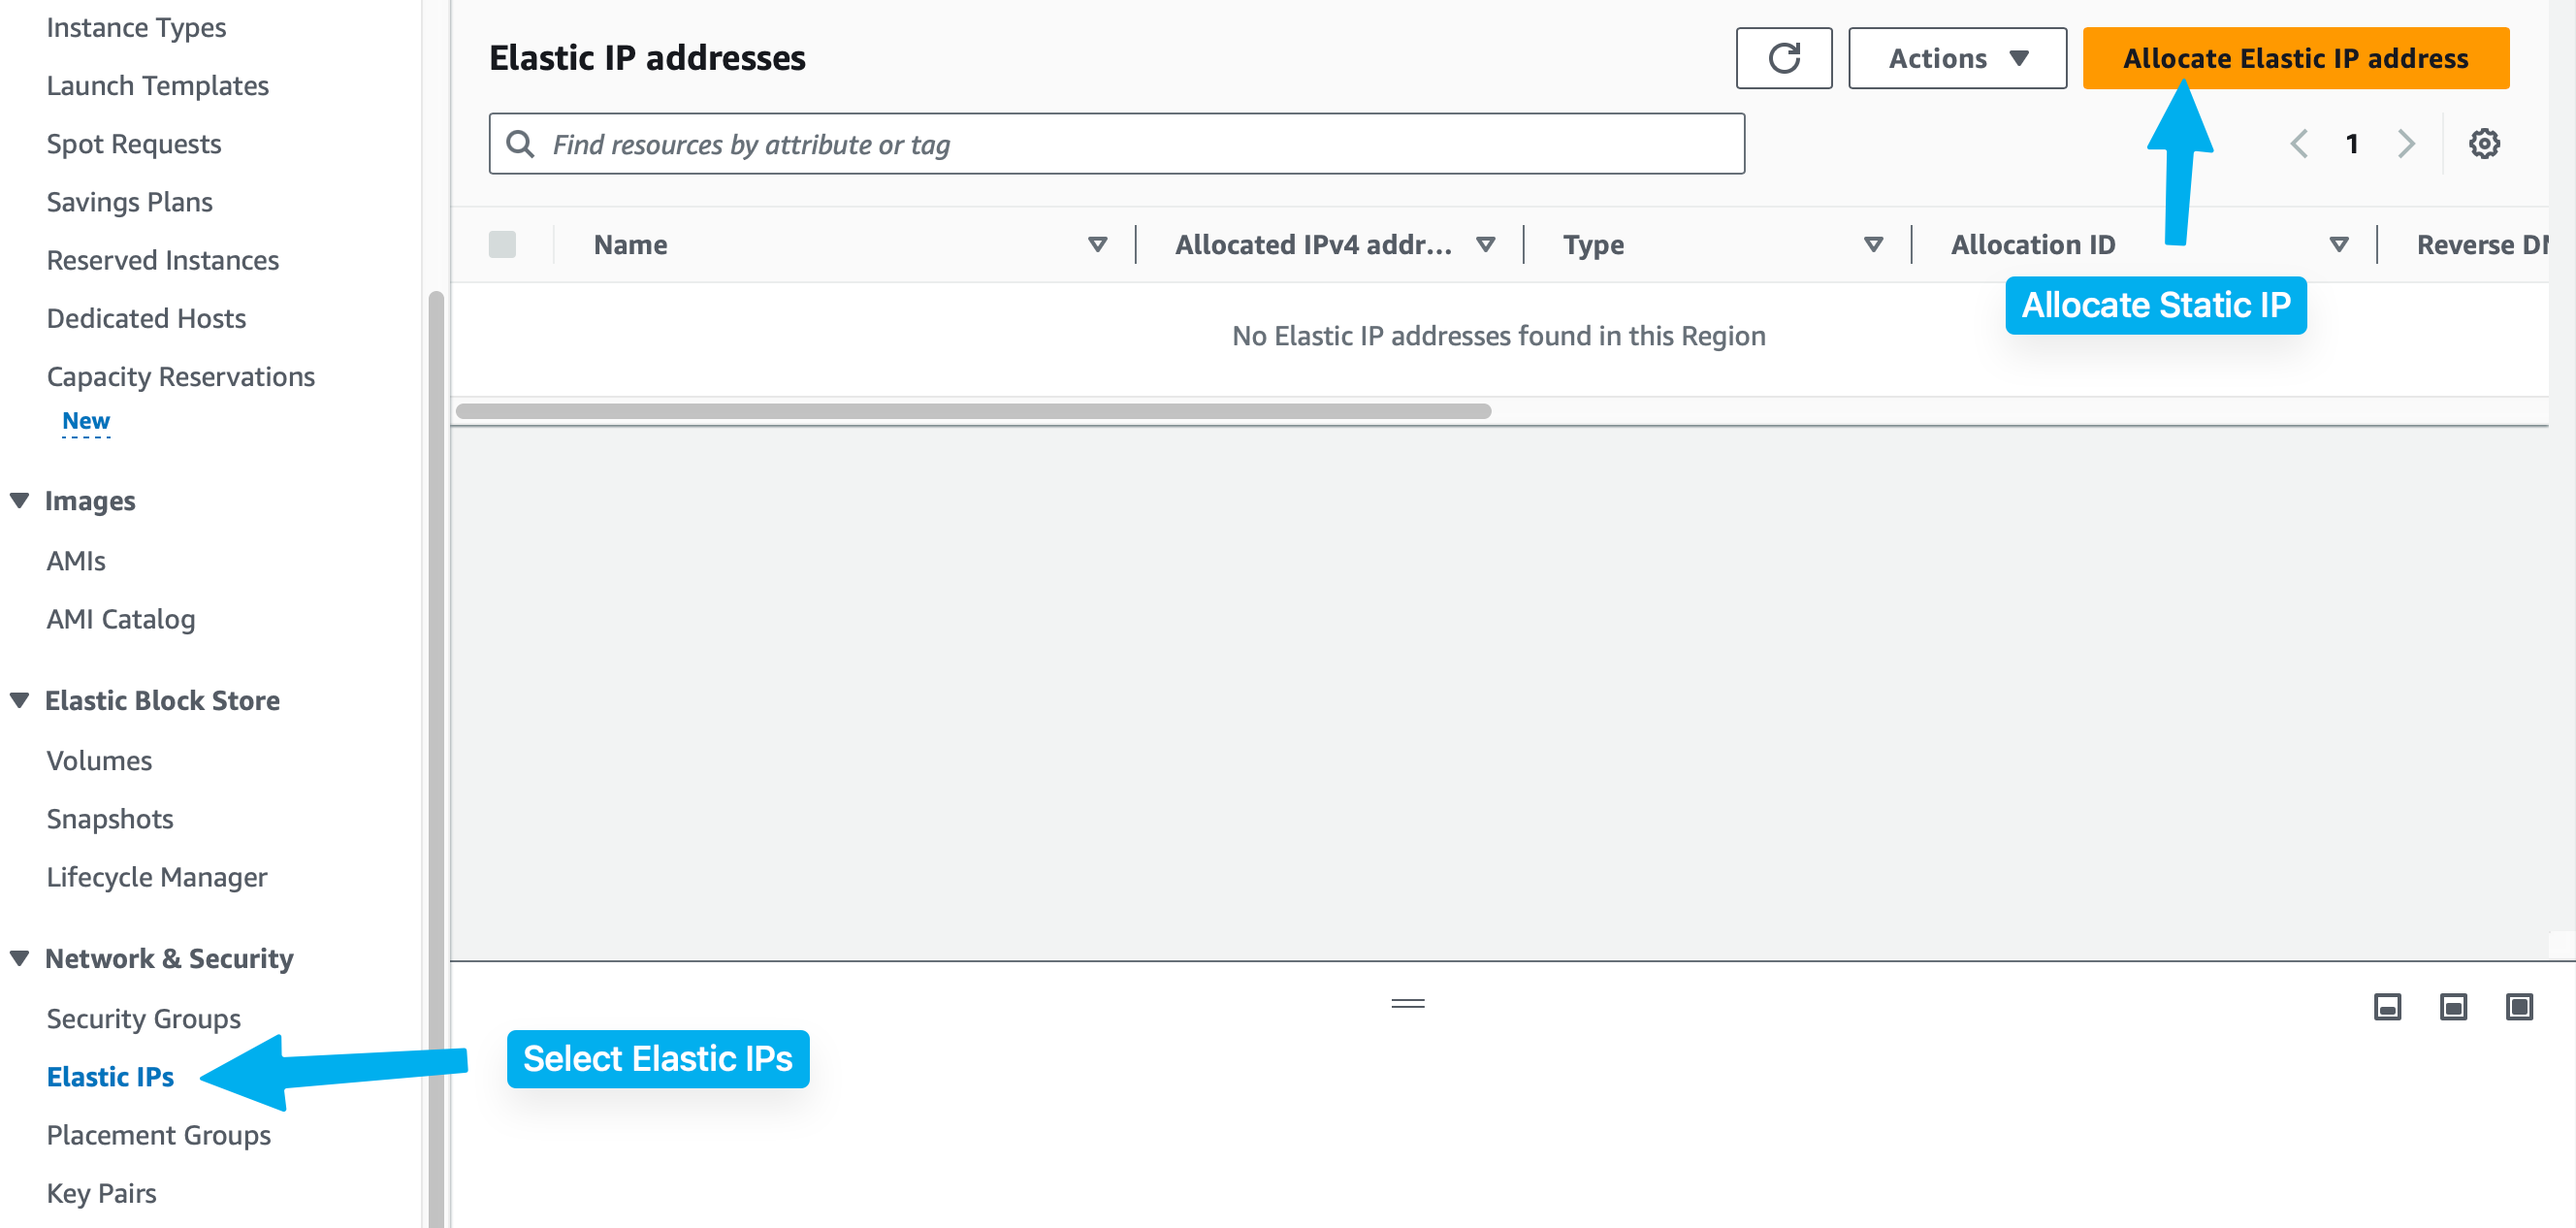
Next Steps — Static IP, DNS & Reverse DNS
For production systems, it's a good idea if we can to configure Static IP addresses as that make DNS configuration easier and more reliable.
Configure Fixed IP / Elastic IP
Please login to the AWS management console and go to EC2 → Elastic IP

After we've allocated our Elastic IP, we need to associate it with our LiquidFiles instance.
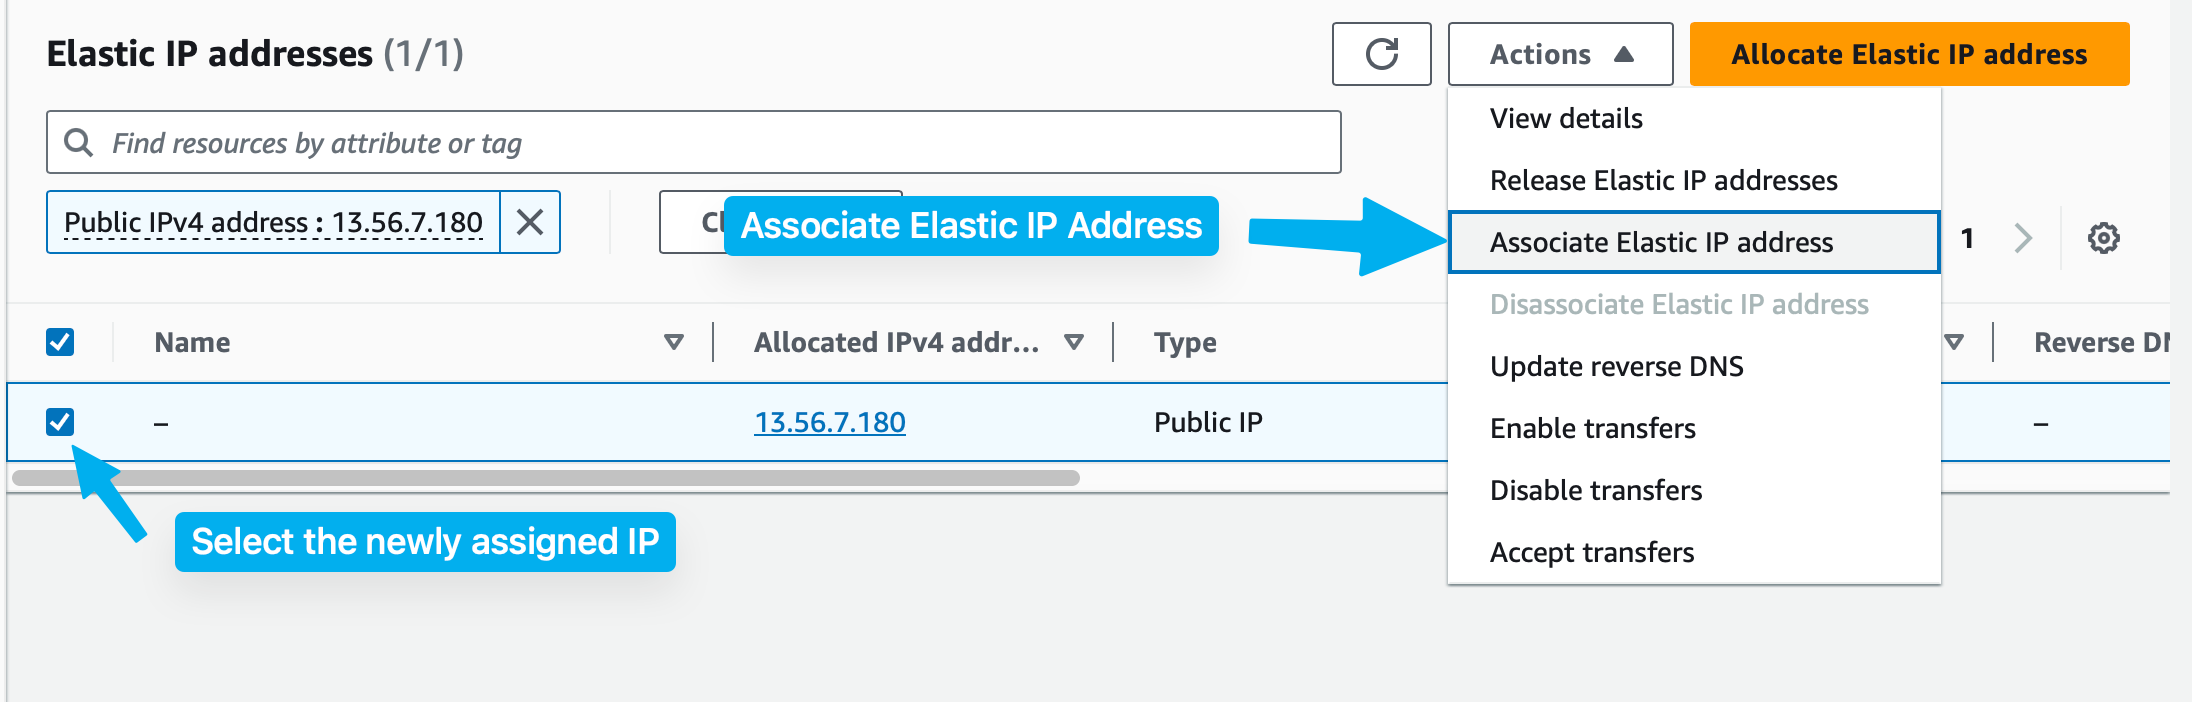
When the Elastic IP has been successfully associated with our LiquidFiles instance, we can copy the address and use that for our DNS server configuration.

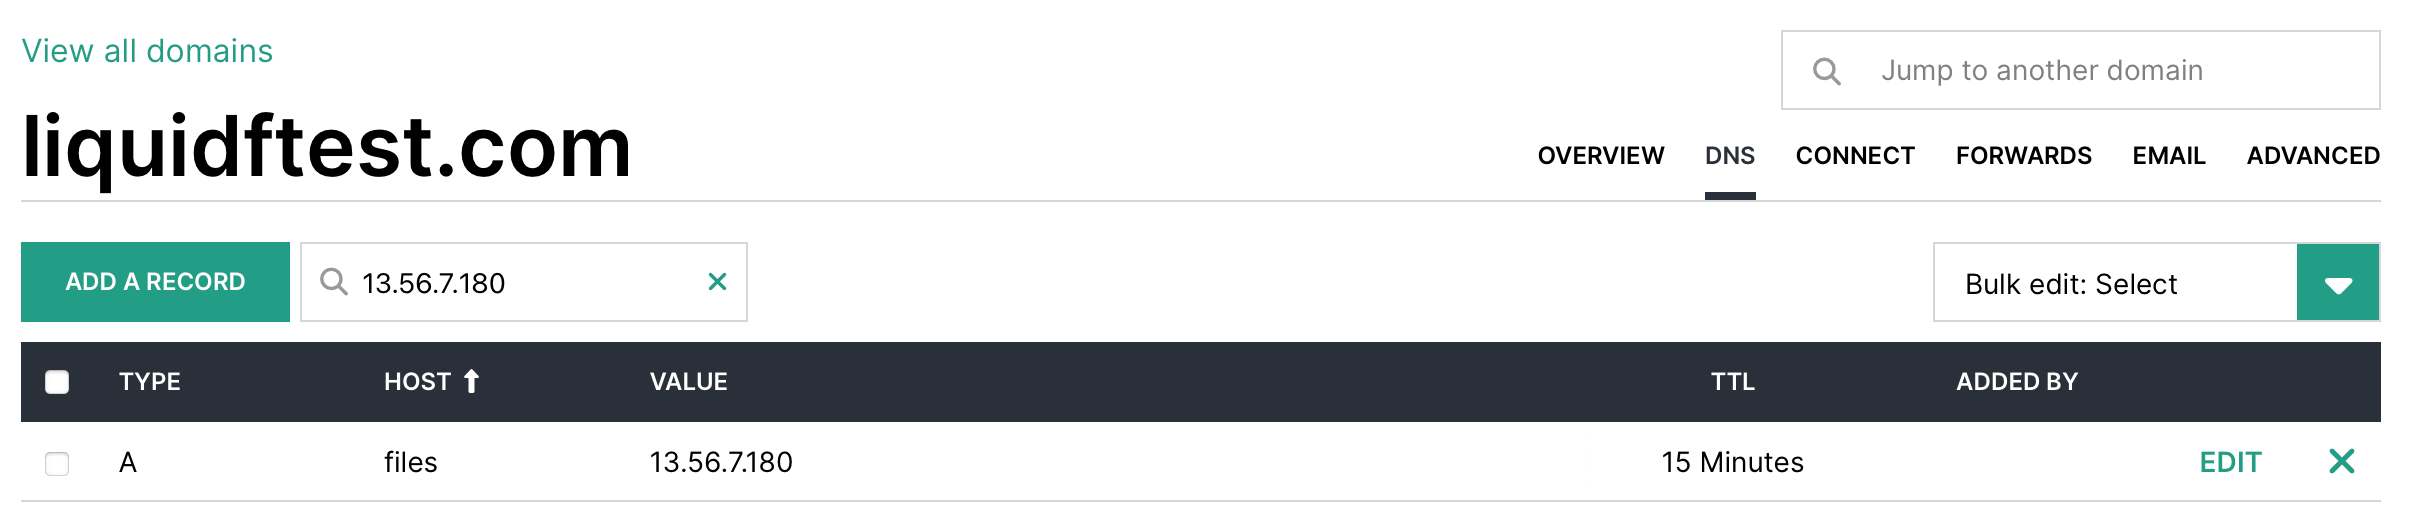
Depending on your DNS Server/Service, the configuration is going to be a little bit different, and somewhere you will have the ability to add a name with an A record that has the value from the Amazon Elastic IP address we just allocated ourselves.
In our example, we use the name: liquidfiles.liquidftest.com that is mapped to 13.56.7.180.
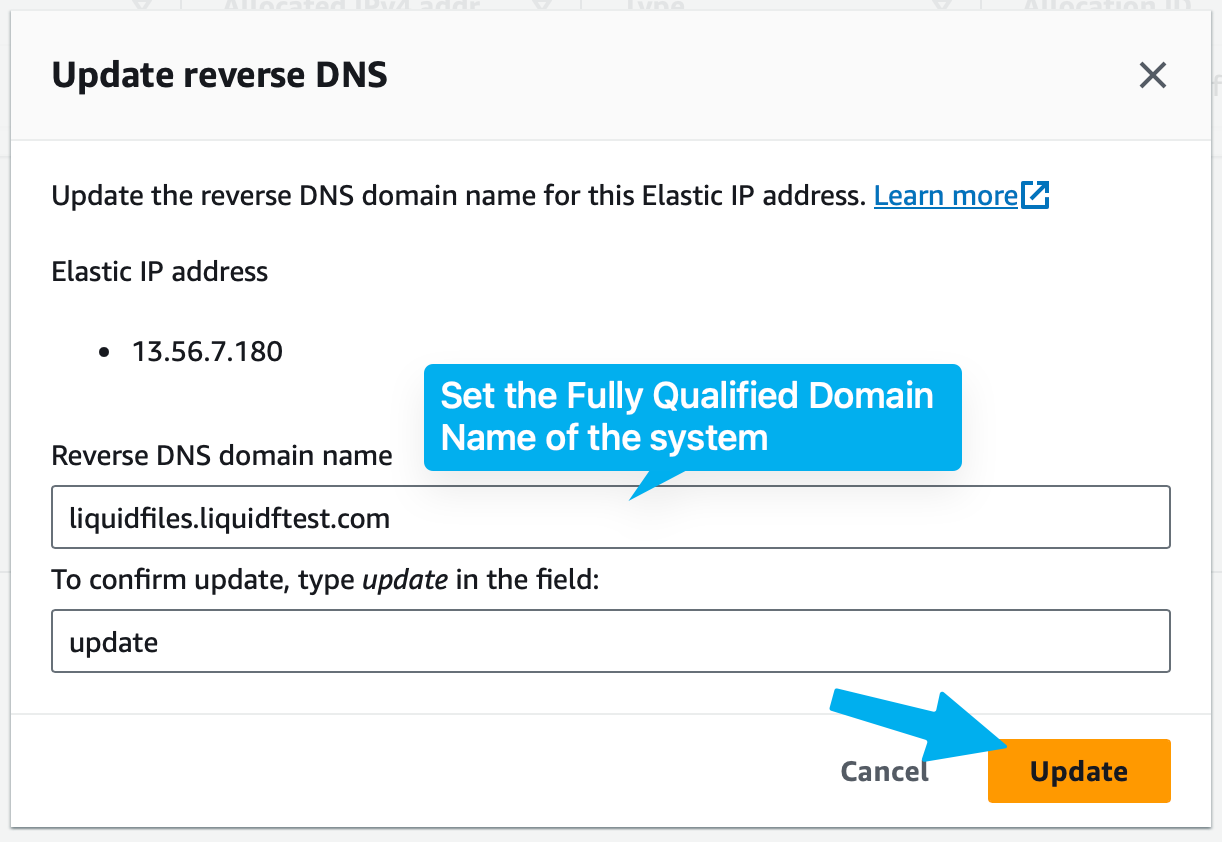
Configure Reverse DNS
Once the DNS is configured, you can configure the Reverse DNS in the AWS console. There is a validation that the DNS configured matches the Reverse DNS you want to configure so you'll need to make sure your DNS is configured properly first.
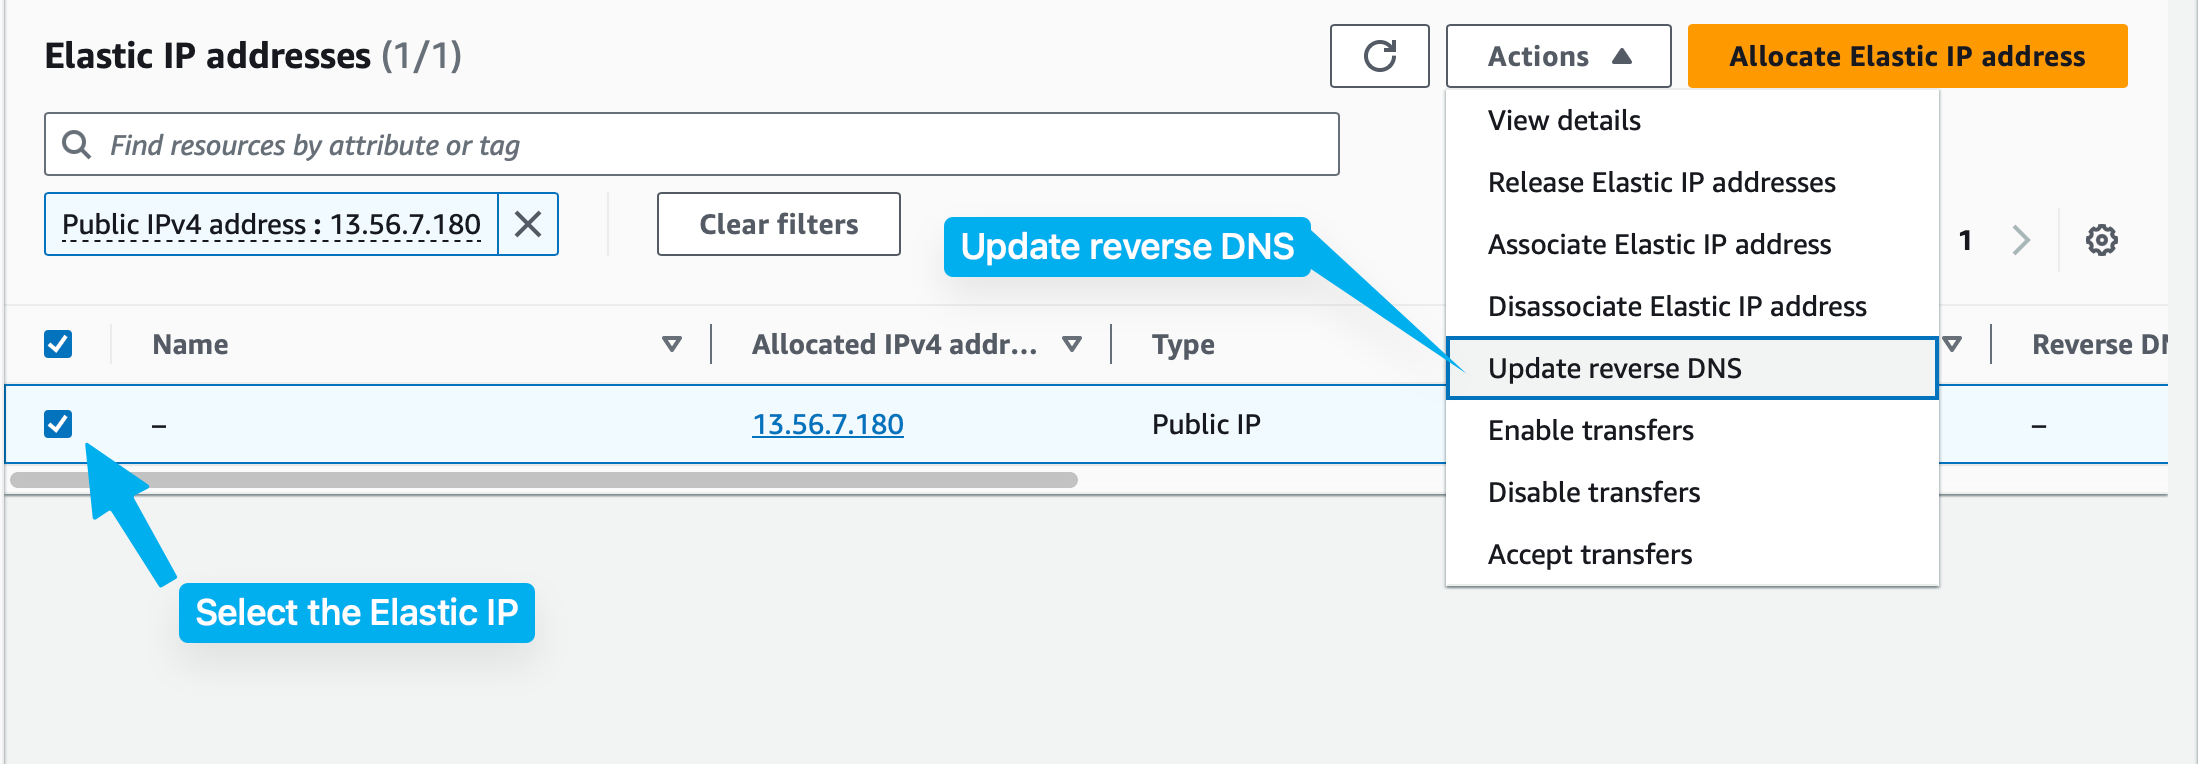
Above we configured files.liquidftest.com mapped to 13.56.7.180, here we're configuring 13.56.7.180 mapping to files.liquidftest.com.
Please continue on the Getting Started page.