Migrate from LiquidFiles v3.x to LiquidFiles v4.x
When migrating from LiquidFiles v3.x to LiquidFiles v4.x, we're changing the underlying operating system from CentOS 7 to Ubuntu 22.04 LTS. This means that it's not possible to do an in-place upgrade. In order to migrate from LiquidFiles v3.x to LiquidFiles v4.x, you will have to do a fresh install of LiquidFiles v4.x and migrate your data across.
Or alternatively, if you're using a physical server and wishes to use the same hardware, it is also possible to use the builtin backup and restore functionality to restore a LiquidFiles v3.7.x backup onto a LiquidFiles v4.x system. Please see this section for more information.
Also please note that migration is only possible from LiquidFiles v3.7.x. If you're currently using an older release, you will first need to update to LiquidFiles v3.7 and then migrate to LiquidFiles v4.x.
Overview of steps involved
The preferred method is that you install a new LiquidFiles system and migrate the data across. This is the safest migration method as it will give you an automatic fallback option. If the migration for whatever reason is not successful, you can just simply continue using the previous LiquidFiles v3.x system until you can retry the migration. Using this method, it's also easy to do a staged migration, you can try out the migration but still keep using the older v3.x system. Once you've verified that everything works as expected, you can repeat the migration and move the v4.x system into production.
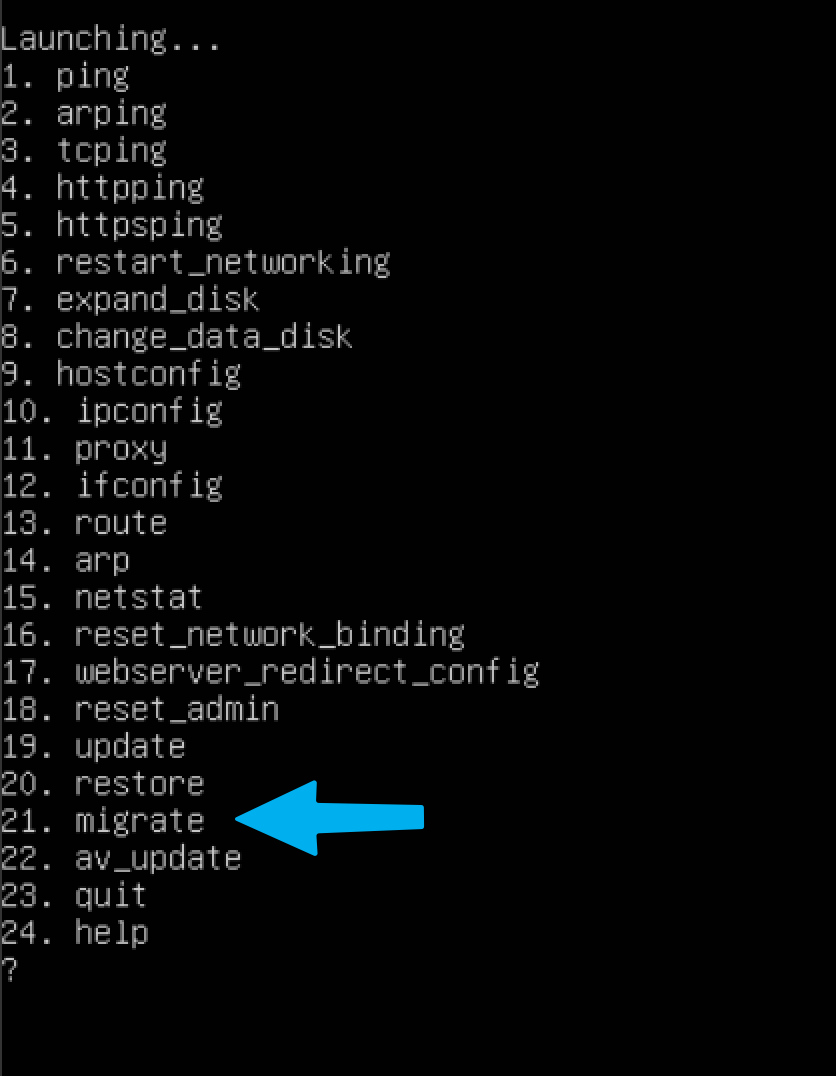
The steps involved are:
- Update the source LiquidFiles v3.x system to the latest v3.7.x version.
- Make sure you have a fallback sysadmin account ‐ if there's an issue with LDAP, SAML or 2 Factor Authentication on the destination system after migration you won't be able to login and troubleshoot. Please make sure you have at least one sysadmin account on the source system before you start migration that is locally authenticated (no LDAP/SAML), has no 2 factor authentication and no network login restrictions so you can login to the destination system without any external resources required to authenticate.
- Download the latest LiquidFiles v4.x version from https://license.liquidfiles.com/download and install using the Installation Instructions.
- Follow one of the guides below to migrate your data.
- After migration and the destination system should be made the production system, you have two
options:
- Change the destination IP address to the source IP address (after shutting down the source system).
- Update your DNS and change the Public Hostname to point to the destination IP address.
Migration Guides:
- Web Based Migration — This is the guide for most migrations.
- Console Based Migration — A very similar alternative to the Web based migration, if you have access and prefer to use the console.
- Installation First Migration — If you want your destination system
to use a separate data disk or use NFS storage as data storage, you have to install the
LiquidFiles system so you can configure the data storage options first, before running the
migration.
You can also use this if you've previously run another migration to test and then do the final migration using this method. - Restore From a Backup — If you're running LiquidFiles on dedicated hardware and want to continue using the same hardware, or if you cannot establish a network link between the source and destination system, follow this guide.
What's not migrated
As a general rule, all LiquidFiles application related data is migrated across and system related configuration is not migrated. Specifically, the following things are not migrated:
- IP Address configuration including default gateway.
- DNS servers.
- NTP servers.
- Static routes.
- root password.
- System email notification address.
- System Hostname (the system hostname will be set to the Public Hostname).
Web based migration
The simplest way is to use the web based migration. This migration will work best for most migrations.
Source System
On the source system, please make sure you have access to a sysadmin account with no LDAP/SAML or 2 Factor Authentication before you start the migration.
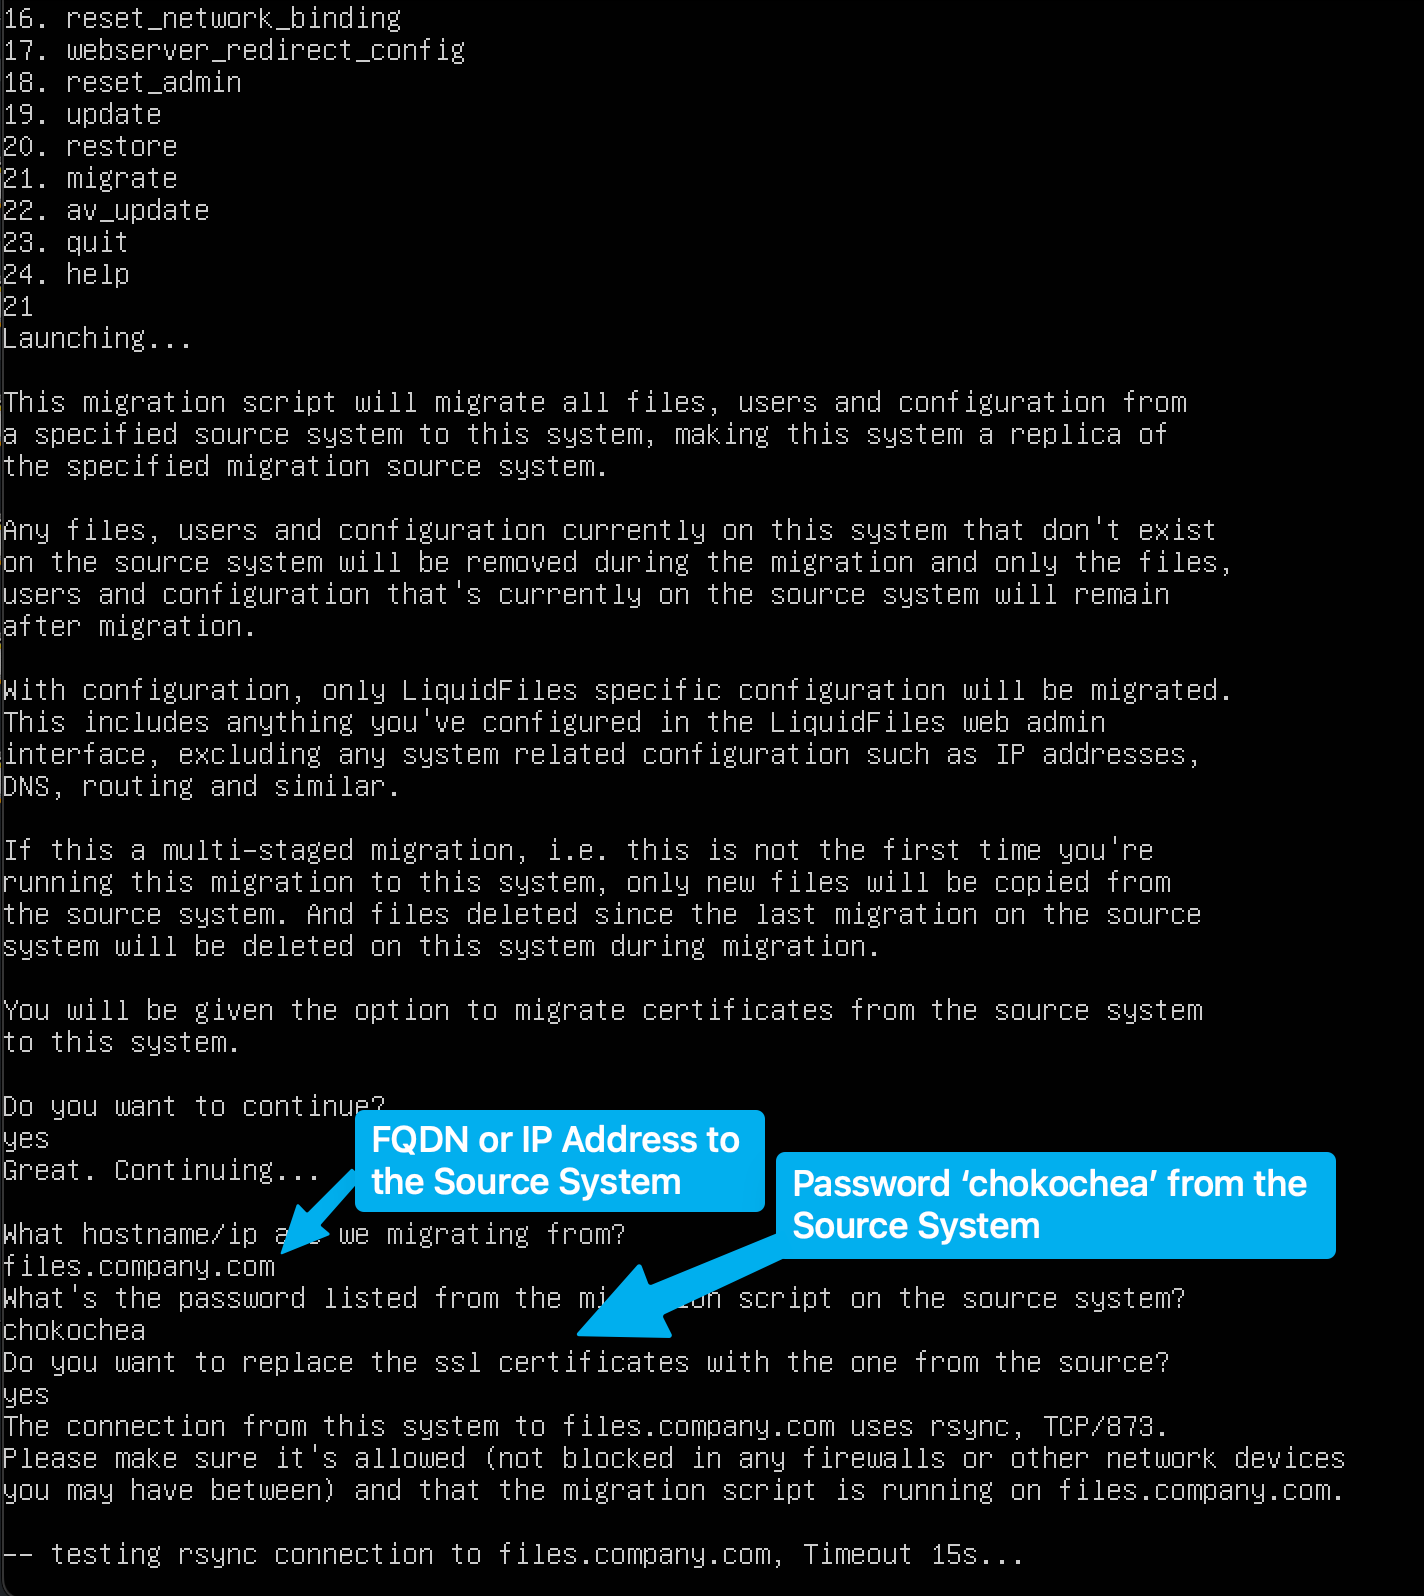
To start the migration, login as root on the console and run the ft migrate command. It will look similar to this:
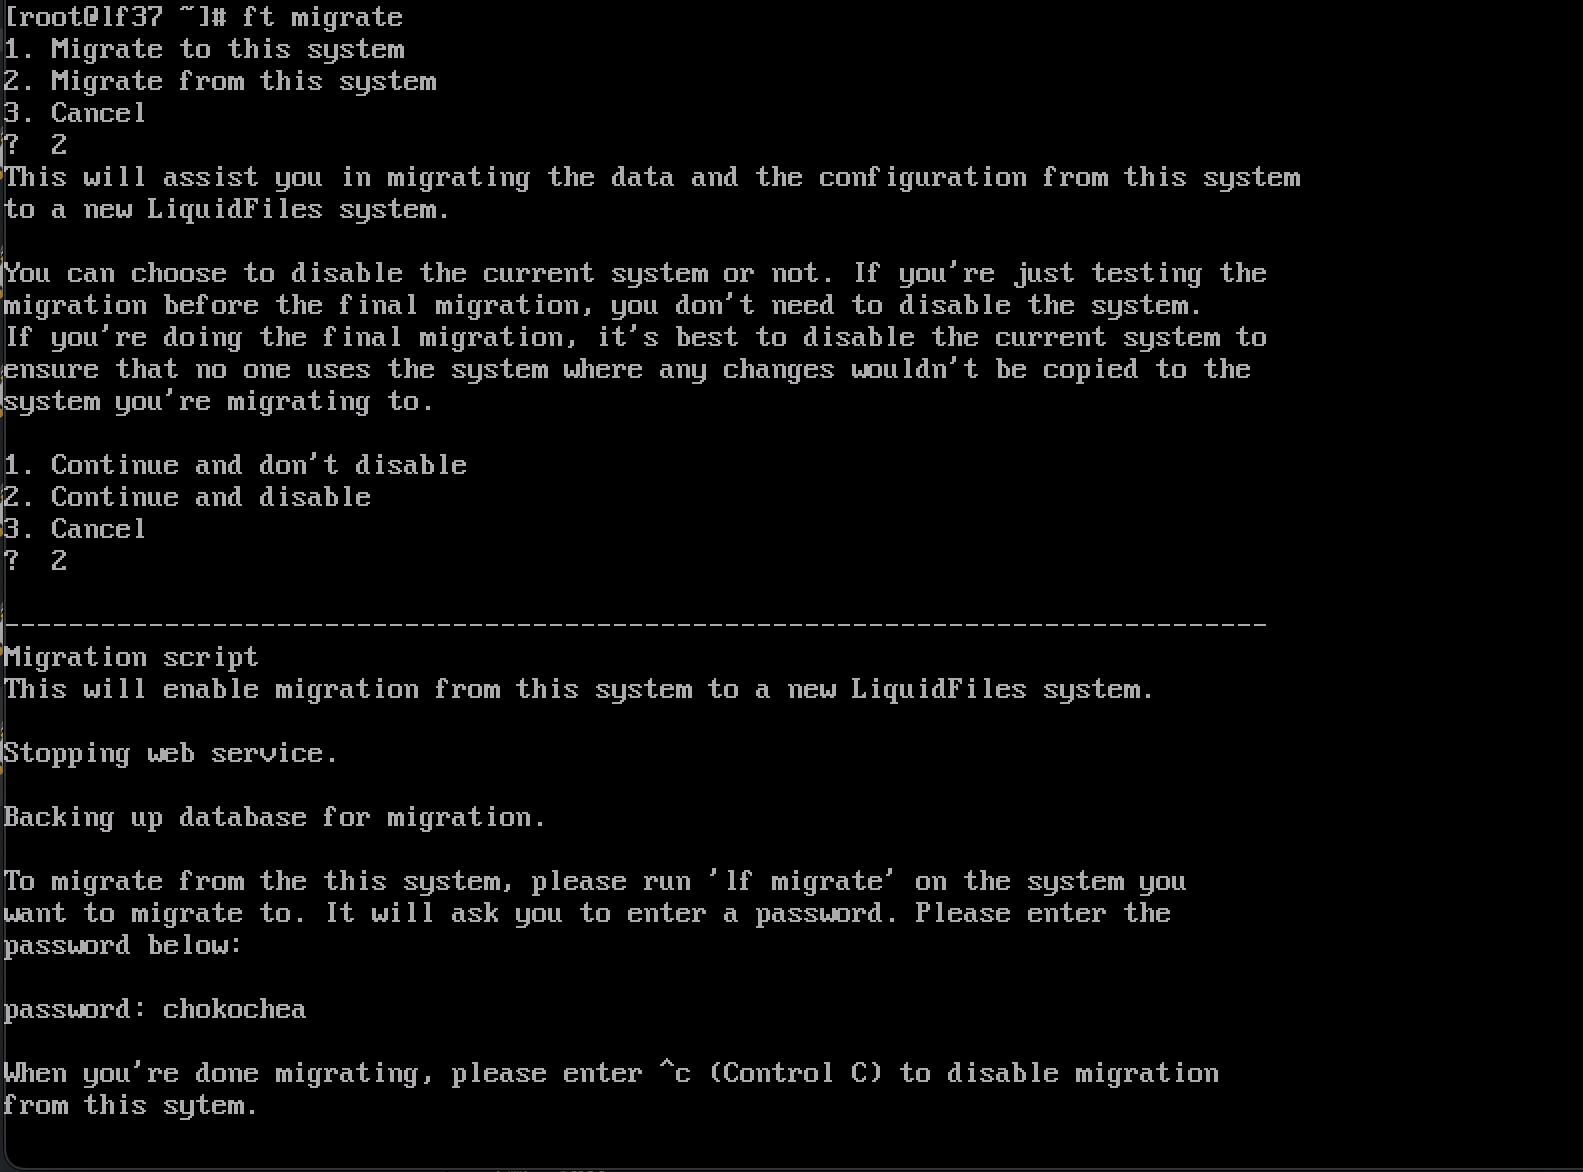
Please note the password chokochea in this screenshot that you will need to use on the destination system in the next step.
Destination System
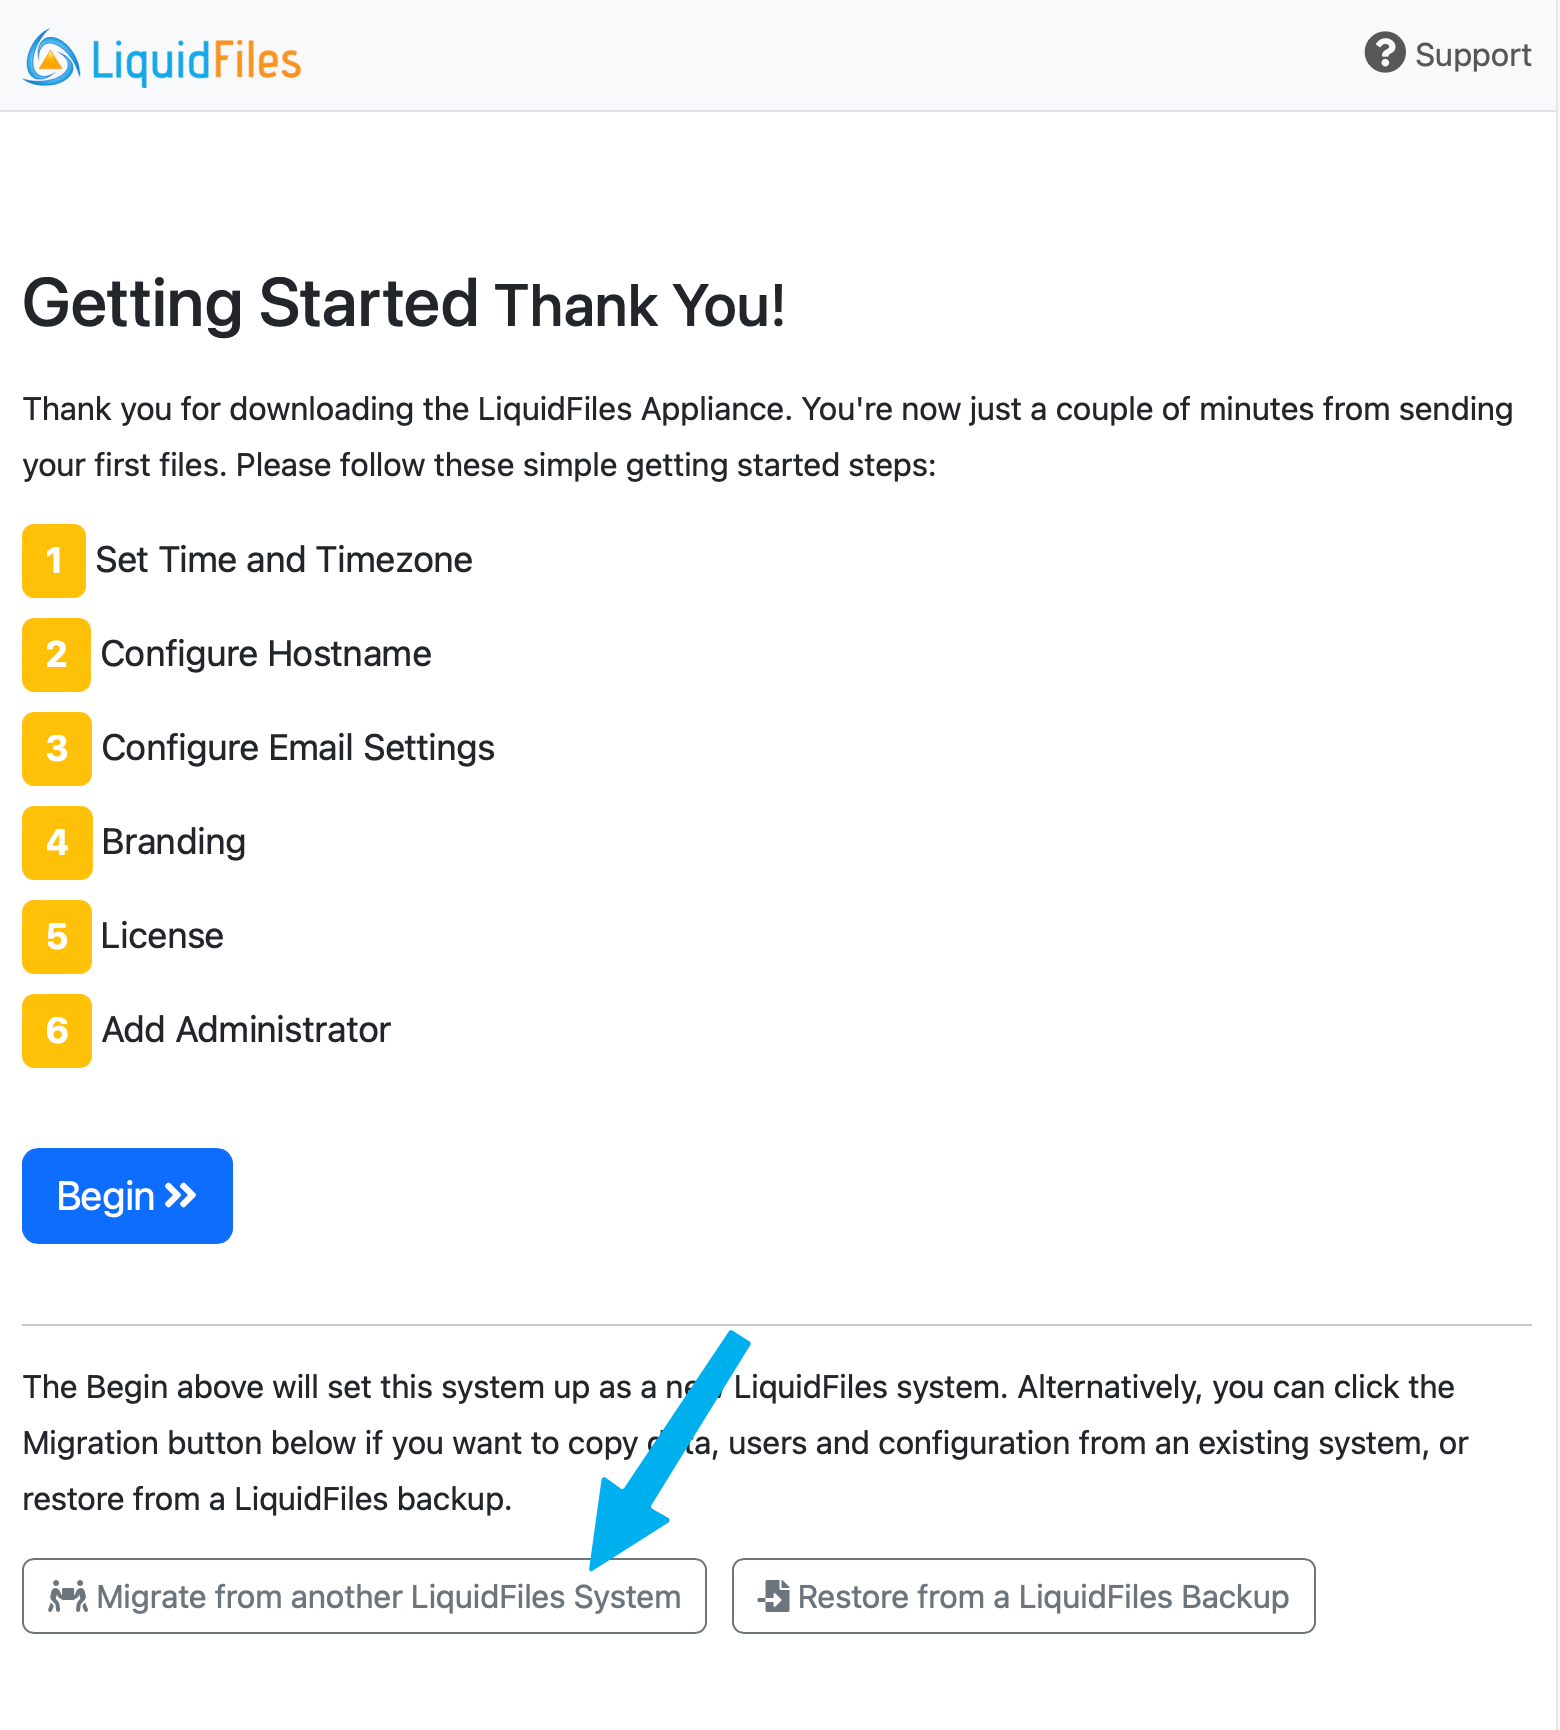
Complete one of the Installation options to create a new destination system. When you first point the browser to the freshly installed LiquidFiles system, you will see the Getting Started page. On the Getting started page, select to Migrate from another LiquidFiles system.
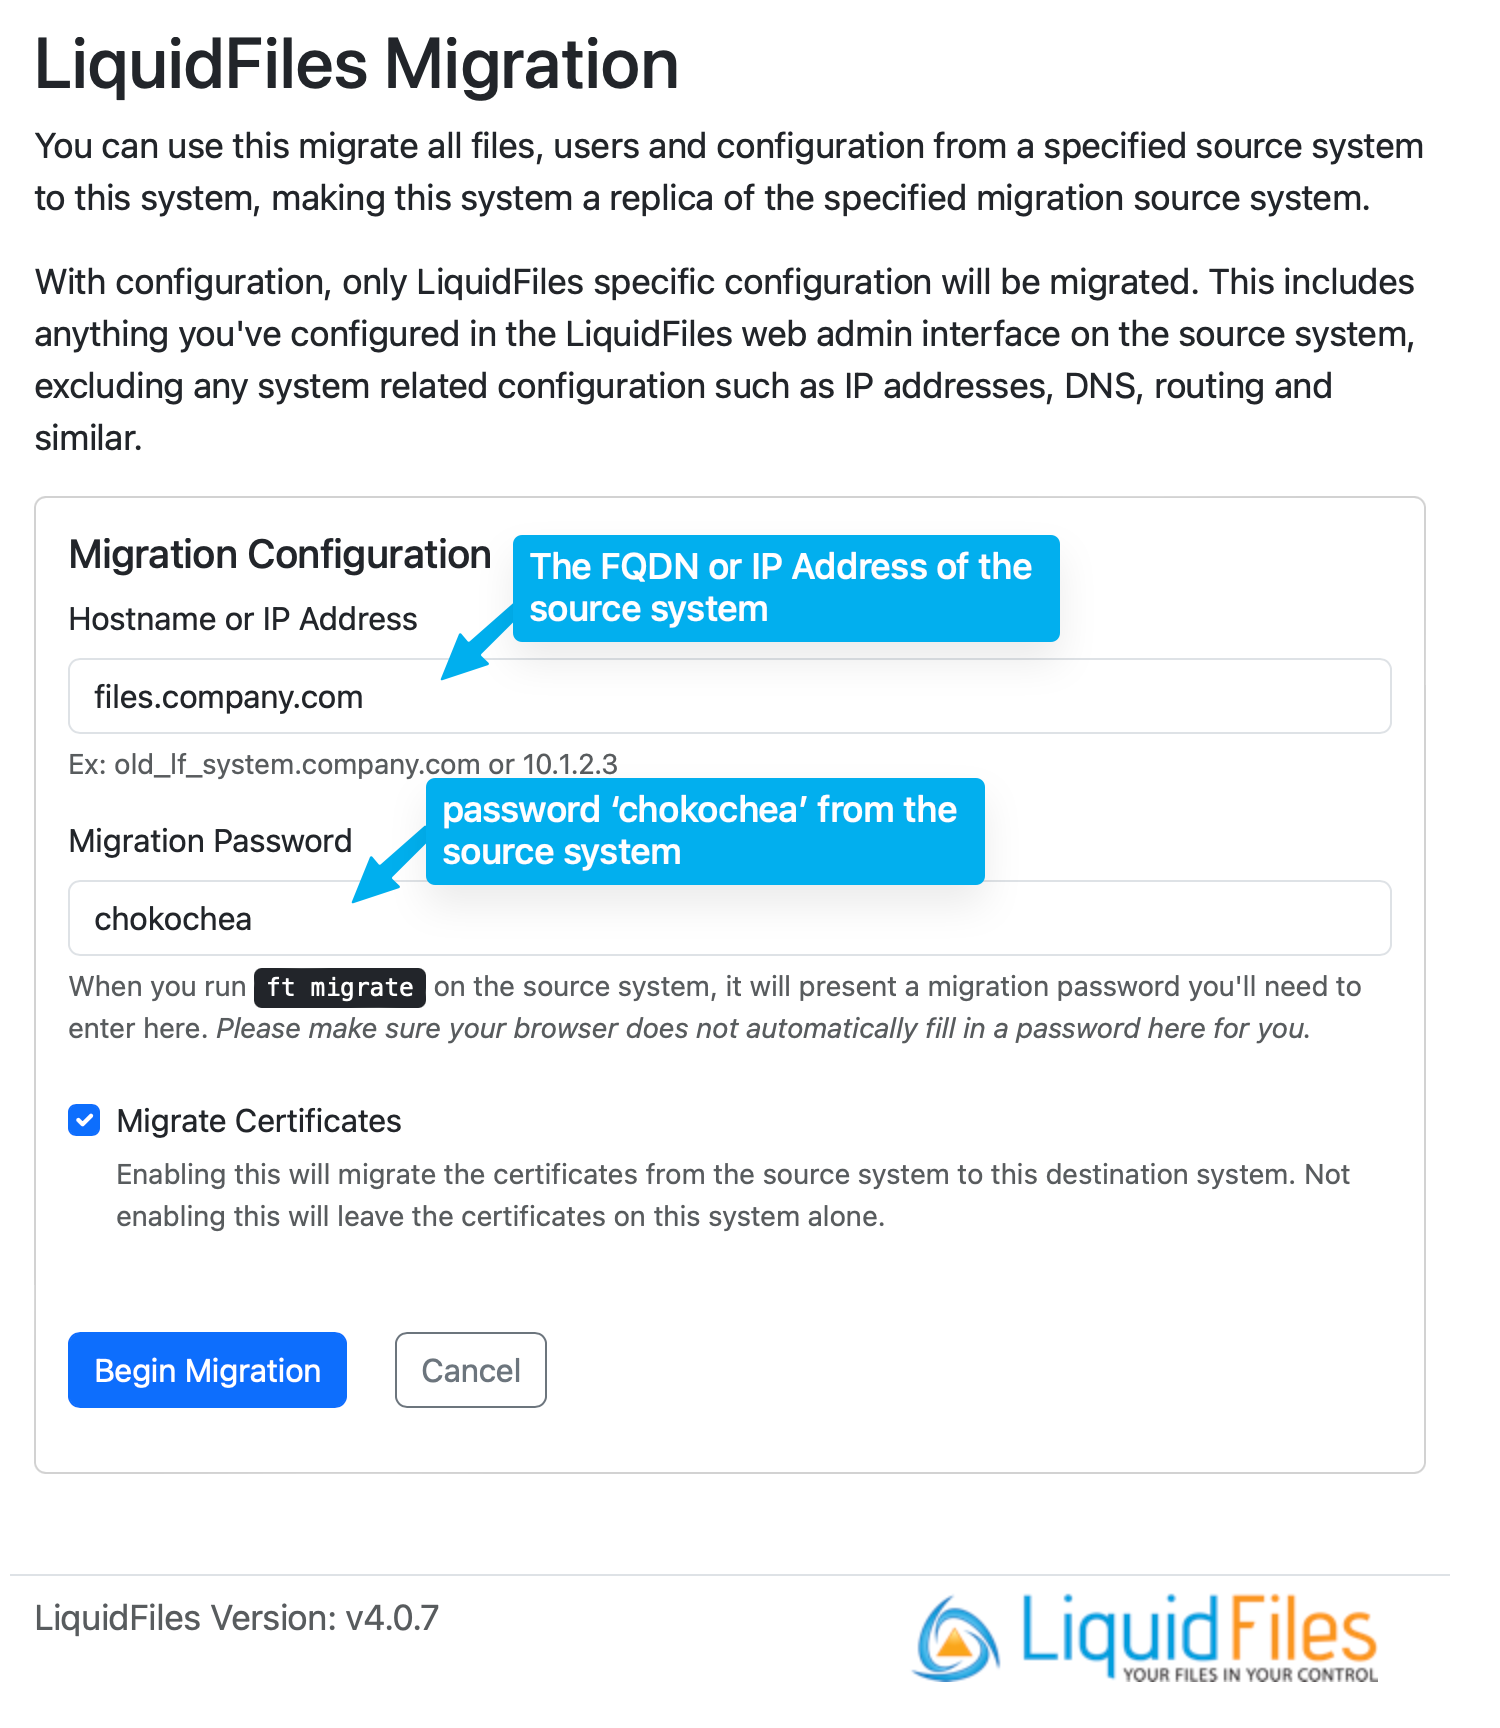
This will take you to a configuration page where you fill in the details and the migration function will connect to the source system and copy all the data from there.
Video Walkthrough — Web migration
Console based migration
Source System
On the source system, please make sure you have access to a sysadmin account with no LDAP/SAML or 2 Factor Authentication before you start the migration.
To Start the migration, login as root on the console and run the ft migrate command. It will look similar to this:
Please note the password chokochea in this screenshot that you will need to use on the destination system in the next step.
Destination System
Complete one of the Installation options to create a new destination system.
If you have access to the console, i.e. you're running LiquidFiles in something like VMware, Hyper-V or any system where you have access to the console, that will look something like this:
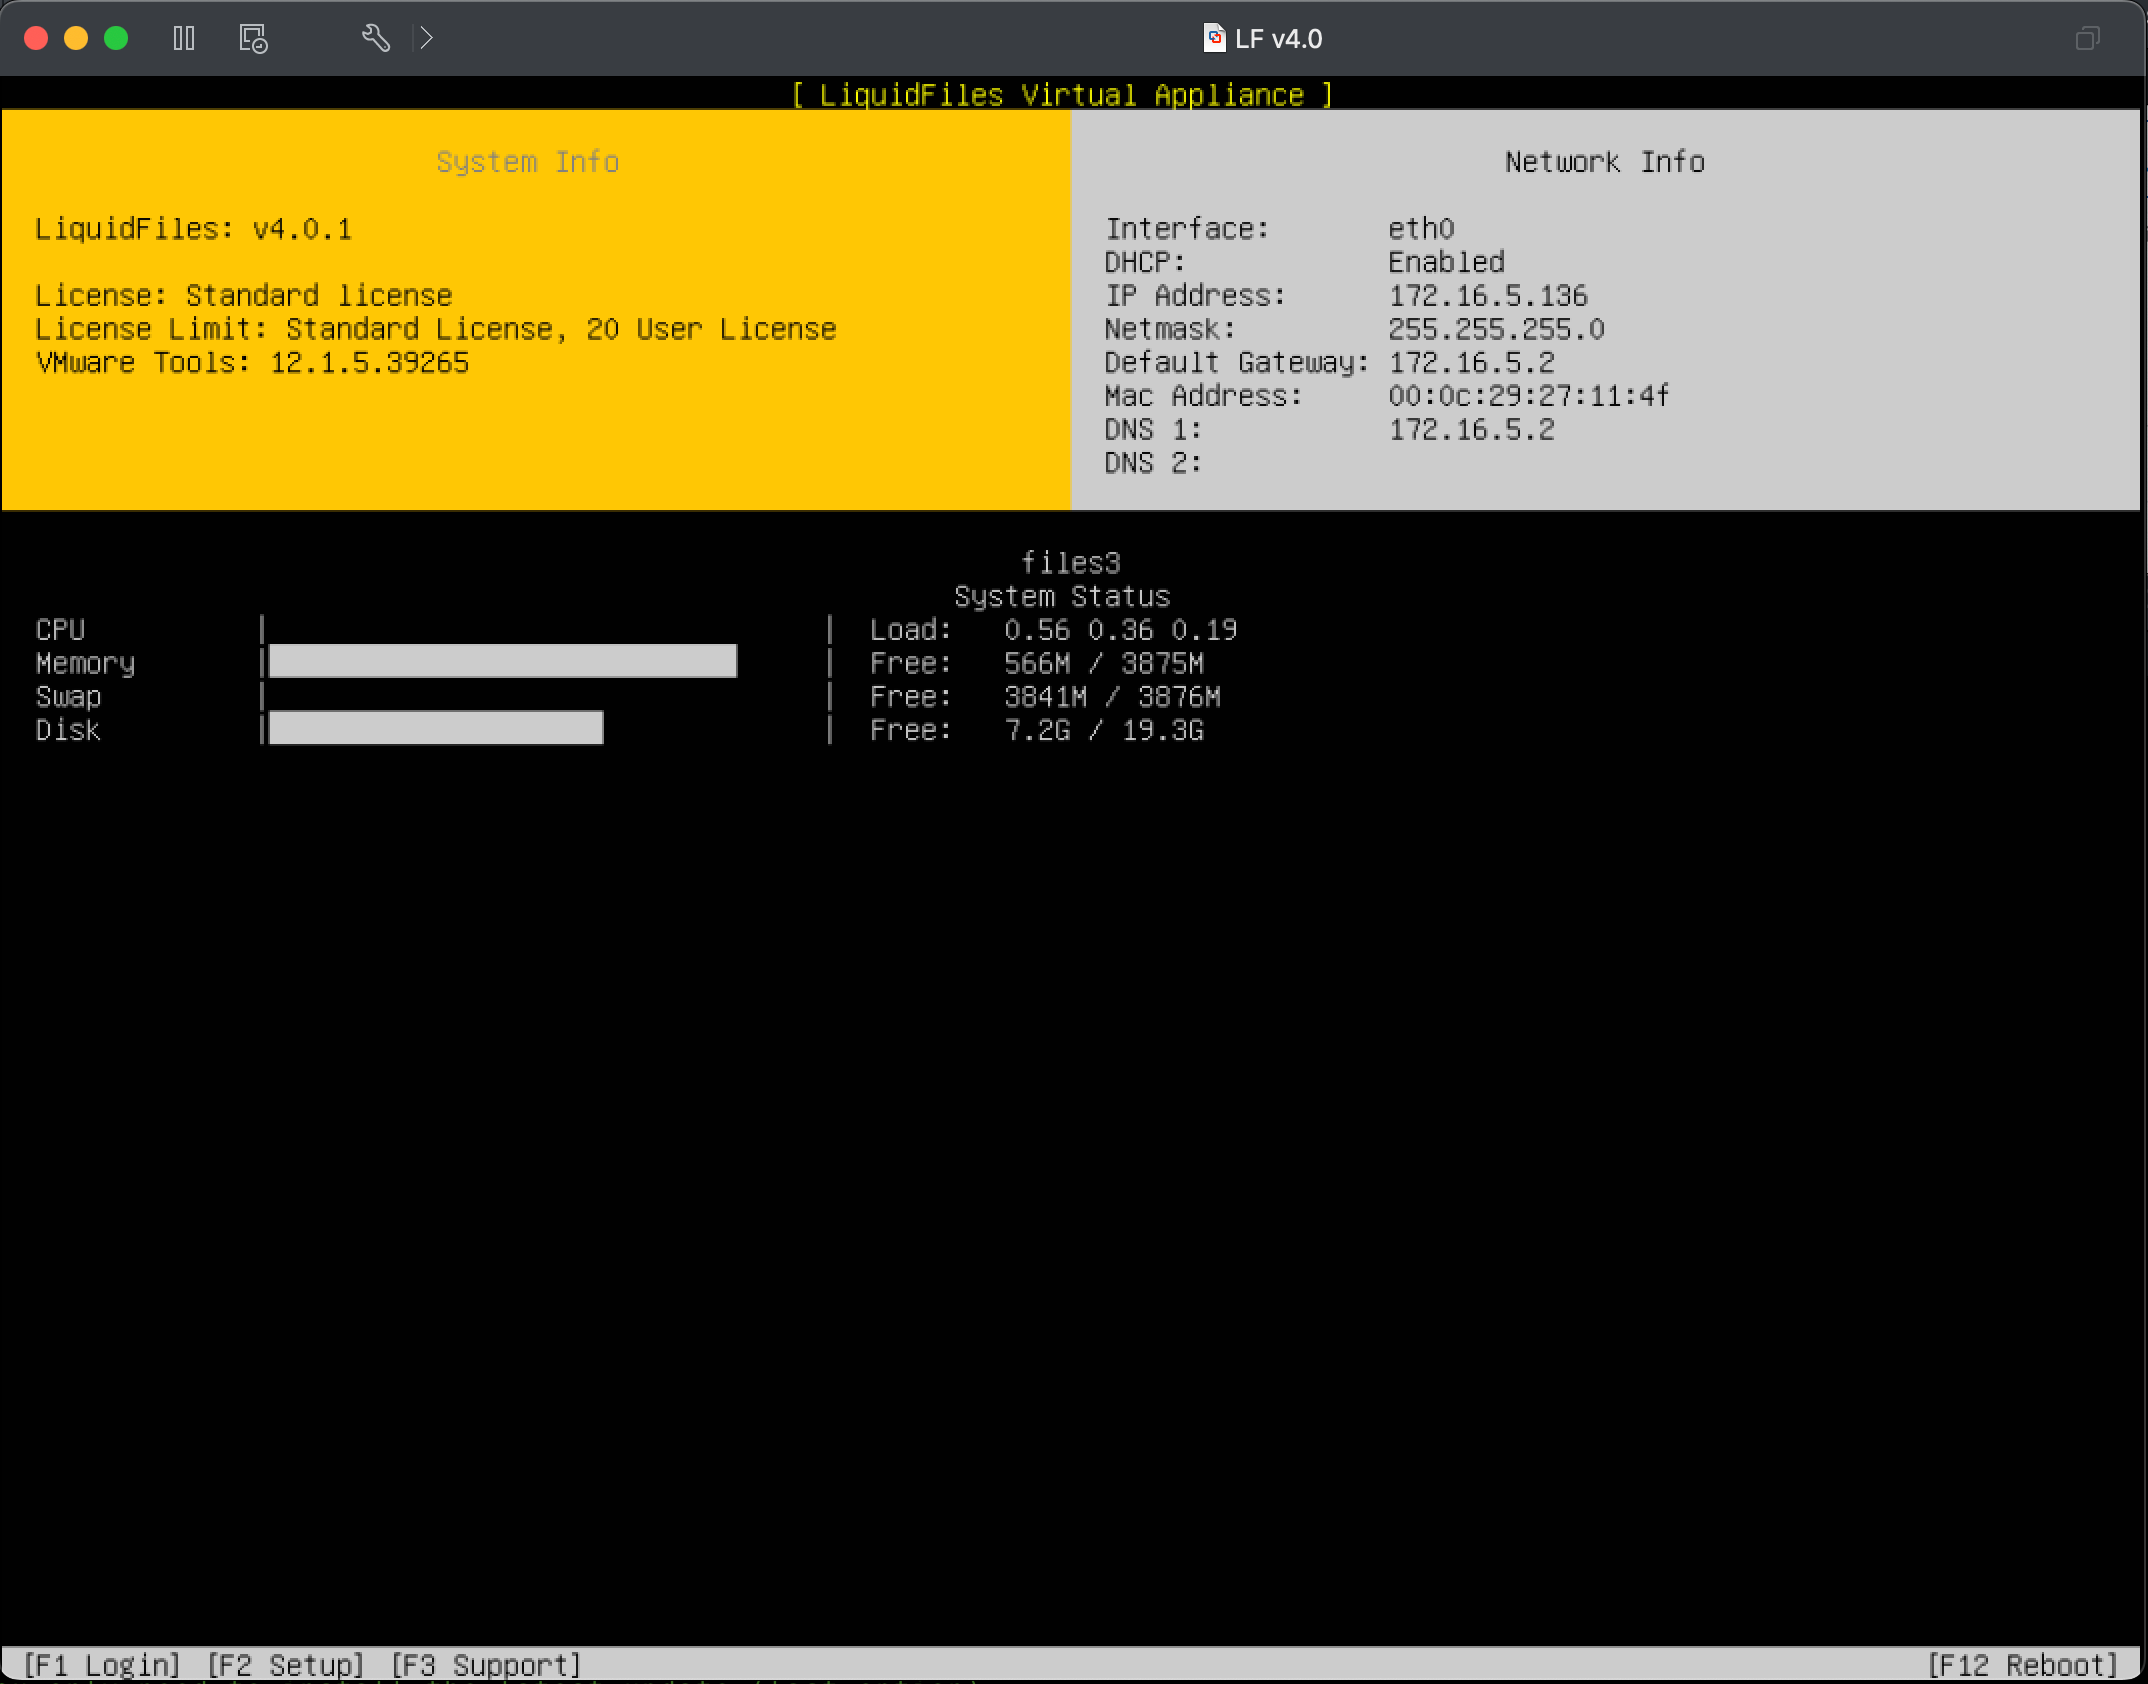
From this console, on a freshly installed system (i.e. you haven't gone through the Getting Started function), you can hit F2 Setup, and select the migrate option:
Video Walkthrough — Console migration
Installation First migration
If you want to use a separate data disk, use an NFS server or use full disk encryption for data storage on the destination system, you first need to Install the new destination system. After the installation complete the installation by going through the Getting Started function.
Once the system is installed you can add the data disk or NFS configuration as needed before starting the migration.
One important thing to note when going through the Getting Started configuration is:
If your source system has the following configuration:
- Public Hostname: files.company.com
- License Code: 5ed230b1604e77a3fc6e4a59720400655285239c
You will need to use the same details on the destination system when installing the system.
You can also use this method if you want to do a staged migration where you've already migrated your system using another method to test the migration, and then finalize using this method.
Video Walkthrough — Installation First Migration
Restore a LiquidFiles v3.7 backup to LiquidFiles v4.x.
The only reason to use this method is if you're running LiquidFiles on dedicated hardware, and you want to continue using the same hardware. Or if there's some reason where you cannot create a network link between the source and destination system.
You have to run full backups. If you use configuration backups only, you cannot use this method.
If you haven't currently configured periodic backups, the procedure to migrate to LiquidFiles using the same system would be:
- On the LiquidFiles v3.x system: Update to the latest v3.7.x version
- On the Liquidfiles v3.x system: Configure backups in Admin → Backup
- On the LiquidFiles v3.x system: Login to the console and run the command: ft backup to run the backup job immediately. Please make sure you don't receive any errors.
- Install LiquidFiles v4.x using the latest version from https://license.liquidfiles.com/download/.
- Use the same hostname as the LiquidFiles v3.x system and install the same production license.
- Enable Console Access in Admin → System → Console Access.
- Login to the console and run ft restore and follow the prompts.