LDAP configuration
Overview
Setting up LDAP when it's available is a very good step in setting your LiquidFiles system in a way with minimal ongoing administration needed.
You can reach the LDAP configuration in Admin → LDAP in the web interface. The basic overview screen will look something like this:
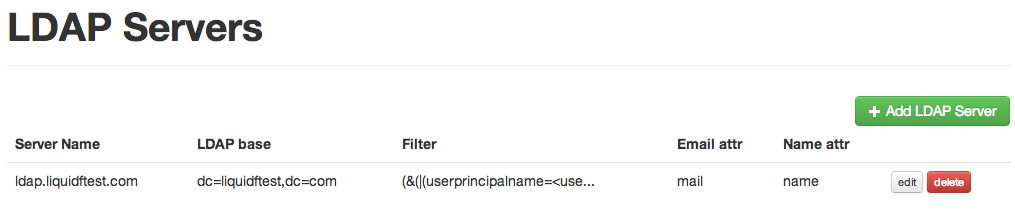
A couple of things to note about LDAP Configuration in LiquidFiles:
- You can add as many LDAP servers as you need.
- When searching for users, the LDAP servers are searched in the order listed on this page. Please rearrange accordingly.
- Usernames are assumed to be unique. Only the first user will be used should there be overlapping usernames.
Add an LDAP server
The following steps needs to be completed to use the LDAP server in LiquidFiles:
- Connect to the LDAP server
- Authenticate to the LDAP server
- Outline how users are found in the LDAP tree
- Set the User attributes for the user
Connect to the LDAP server
The connect part of the LDAP server configuration looks like this:
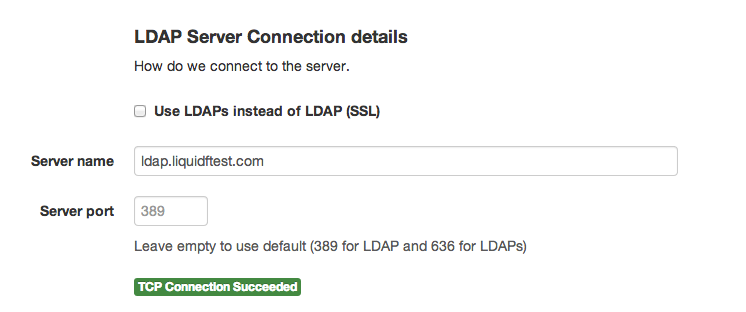
This is just the standard TCP/IP connection details. You can either use a hostname (ad.company.com) or an ip address (10.2.3.4).
LDAPs information
If you want to connect using LDAPs (LDAP over SSL), please note that you need to match the hostname with the Common Name (CN) in the certificate. If your LDAP Certificate has a Common Name: CN=ad1.company.com, you have to use ad1.company.com as the hostname. If you use the ip: 10.2.3.4, certificate validation will always fail. This is standard SSL certificate behaviour and you can see the same thing if you connect to a https server using the ip address. You will always get a browser warning.
Also, please note that the underlying LDAP library LiquidFiles uses does not support validating the certificate against a Certificate Authority. Only basic Certificate validation is performed.
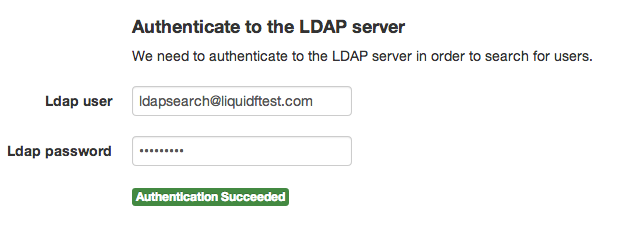
Authenticate to the LDAP server
This step is required to be able to search for users. This is not authenticate the end user, this is to authenticate LiquidFiles to be able to search for users.
Finding Users
This is usually the first tricky step.
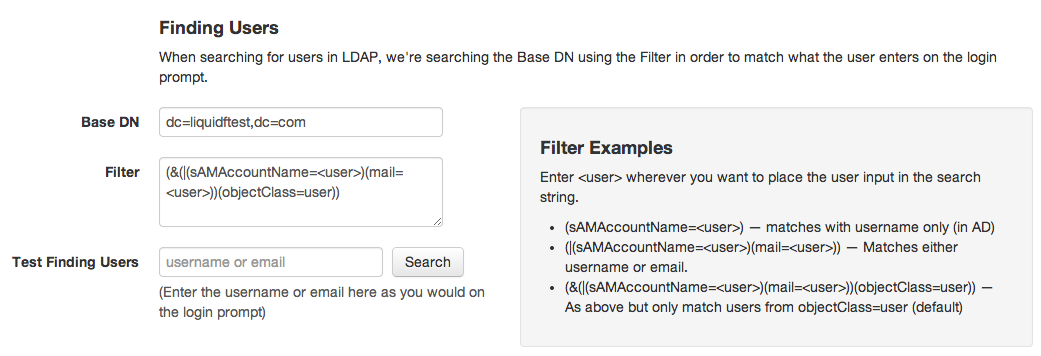
As you can see, there are two configuration parameters here:
- Base DN: This is usually something like
dc=company,dc=comin the default Active Directory LDAP structure. - Search Filter: the filter code that tells how you find users in your LDAP tree.
The search filter is how we find the user in the LDAP tree.
When the user enters the login name on the login prompt in LiquidFiles, this is what we use to search for in the LDAP tree. Lets look at an example using the default configuration:

In this case, the user has entered: test@company.com as the username/email.
The default LDAP Search Filter is: (&(|(sAMAccountName=<user>)(mail=<user>))(objectClass=user))
When the search is performed, the search performed would be:
(&(|(sAMAccountName=test@company.com)(mail=test@company.com))(objectClass=user))
Or written in english: Find me all users (LiquidFiles will use the first users in case multiple are found) where sAMAccountName is equal to test@company.com, or mail is equal to test@company.com and objectClass is equal to user (excluding groups and other types of objectClasses).
In a default Active Directory LDAP tree, the sAMAccountName is the users shortname (like flastname) and the mail is the users email. In this case, the user is found because mail=test@company.com.
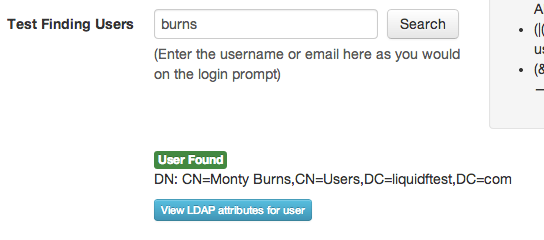
sAMAccountName, mail and objectClass are called "attributes". You can use any attributes when searching for users. To see what attributes are available, please find a user using the "Test Finding Users" field. When you have found a user, you will see something like this:
And if you click on the "View LDAP attributes for user" button, you will see something like this:
All attributes available for this user are listed in the left hand column, and the respective
value is listed in the right hand column. You can use any attributes (left hand column) when search for users
and while the default will suit most default Active Directory installations, you can be as creative
as you need to be. For instance, lets say that you change the Search Filter to:
(displayname=<user>)
With this configuration, in order to find this user, the user will have to enter on the login prompt: Monty Burns
We can see in the listed LDAP attributes that this user has a displayname=Monty Burns, and we can therefore authenticate this user.
This is obviously not very practical as we cannot assume that a users name is unique, so sticking with the users shortname/sAMAccountName and/or email address is probably best in most cases.
Setting User Attributes
Once we have found a user object, we need to set the users attributes: Name and Email Address.
This is done by specifying the attributes in the following configuration:
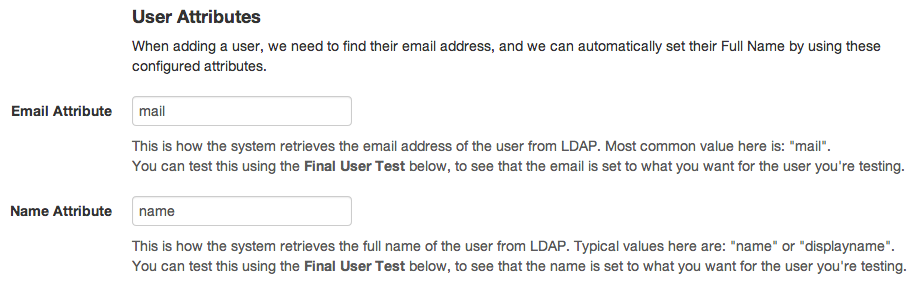
The default mail attribute is "mail" and the default name attribute is "name" or "displayname". The best way to see available attributes is to use the test user functions above and click on the LDAP attributes.
Testing the configuration
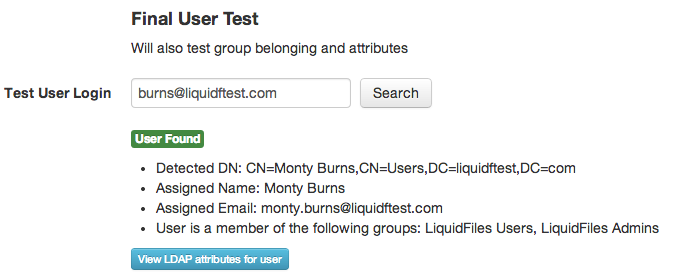
The best way to see if everything is working as expected is to use the Final User test at the bottom of the LDAP edit page. There you can enter a users login details as they would on the login prompt, and see if the user is found correctly, and if the name and email attributes are configured correctly:
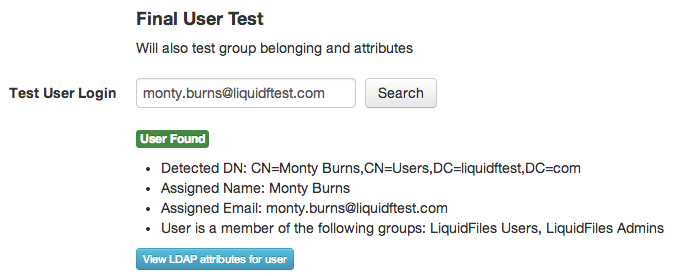
Here we can see a few things:
- If a user enters as their login name: monty.burns@springfield.com, the user will be found and their Distinguished Name (DN) is listed.
- LiquidFiles would set this users name as: Monty Burns
- LiquidFiles would set this users email address as: monty.burns@liquidftest.com
- The User belongs to the LiquidFiles Admins and LiquidFiles Users groups (we can use these groups to automatically assign users to different LiquidFiles groups).
There should be no surprises in these results.
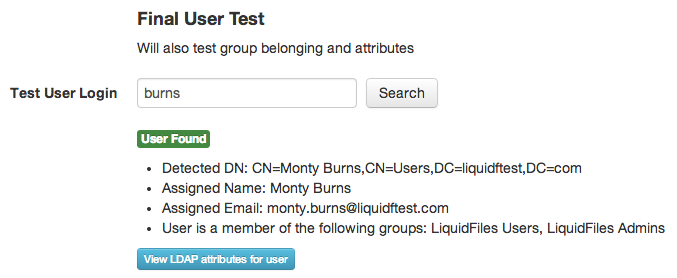
The user can also login with their shortname burns:
With the exact same result. And if you try with an invalid name:

A special note on setting the Email address
LiquidFiles does not support that an account has multiple email addresses, or rather, the email address is the account in LiquidFiles.
Lets see what would happen. In user example above, if we look at the LDAP attributes, we'll see if we scroll to the bottom:

We can see here that we have two attributes that look like email addresses: userprincipalname=burns@liquidftest.com and mail=monty.burns@liquidftest.com.
Lets say that we change the configuration in the search filter to read:
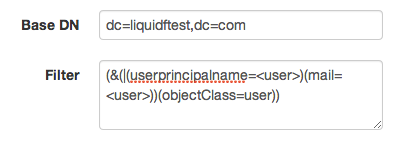
With this configuration, the user will be searched for either with what's listed in the userprincipalname attribute or in the email attribute (they won't be able to login with their shortname any more). If we login with monty.burns@liquidftest.com, the result is exactly the same as above, but if we login with the userprincipalname: burns@liquidftest.com the result may be surprising:
What's perhaps surprising is that the users email is still: monty.burns@liquidftest.com eventhough burns@liquidftest.com also looks like an email address that was successfully searched for in the LDAP directory.
What happens is simply that searching for a user is different than assigning user attributes (name and email). The email address is set as per the configuration in the attributes section, not from what the user enters on the login prompt.
This then becomes a problem if a message is sent to burns@liquidftest.com with the download permission that only specified recipients can download. And while the user will be able to login with the address: burns@liquidftest.com, the email address set and used will be monty.burns@liquidftest.com and the user will not be able to download the files.
The available options if you have this scenario with users with several different email addresses are to either force the download permission to be less restrictive, like setting it so that all messages are sent with "Specified Recipients and Local Users" (or removing the option of using Only Specified Recipients) which will allow all local users (that know the URL) to download the files after authentication. This configuration is done on a per group basis in Admin → Groups.
Or alternatively, you can setup two (or more) LDAP server configurations with different search filters and different email attributes. So in the second LDAP server for this example, you'd set the search filter to be something like: (userprincipalname=<user>), and the email attribute for that LDAP server configuration to be: userprincipalname. This configuration will enable the user to login with either monty.burns@liquidftest.com or burns@liquidftest.com which will be found by the two different LDAP server configurations. The drawback of this last method is that the user will have two different accounts on the LiquidFiles system.