Recommended Disk Patitioning when using Custom Install
Overview
One of the goals with the default LiquidFiles installation is to provide an as simple and as flexible system as possible. It is for instance assumed that at some point you may want to expand the disk to be able to send more and larger files. In order to facilitate this, the default disk layout is configured as follows:
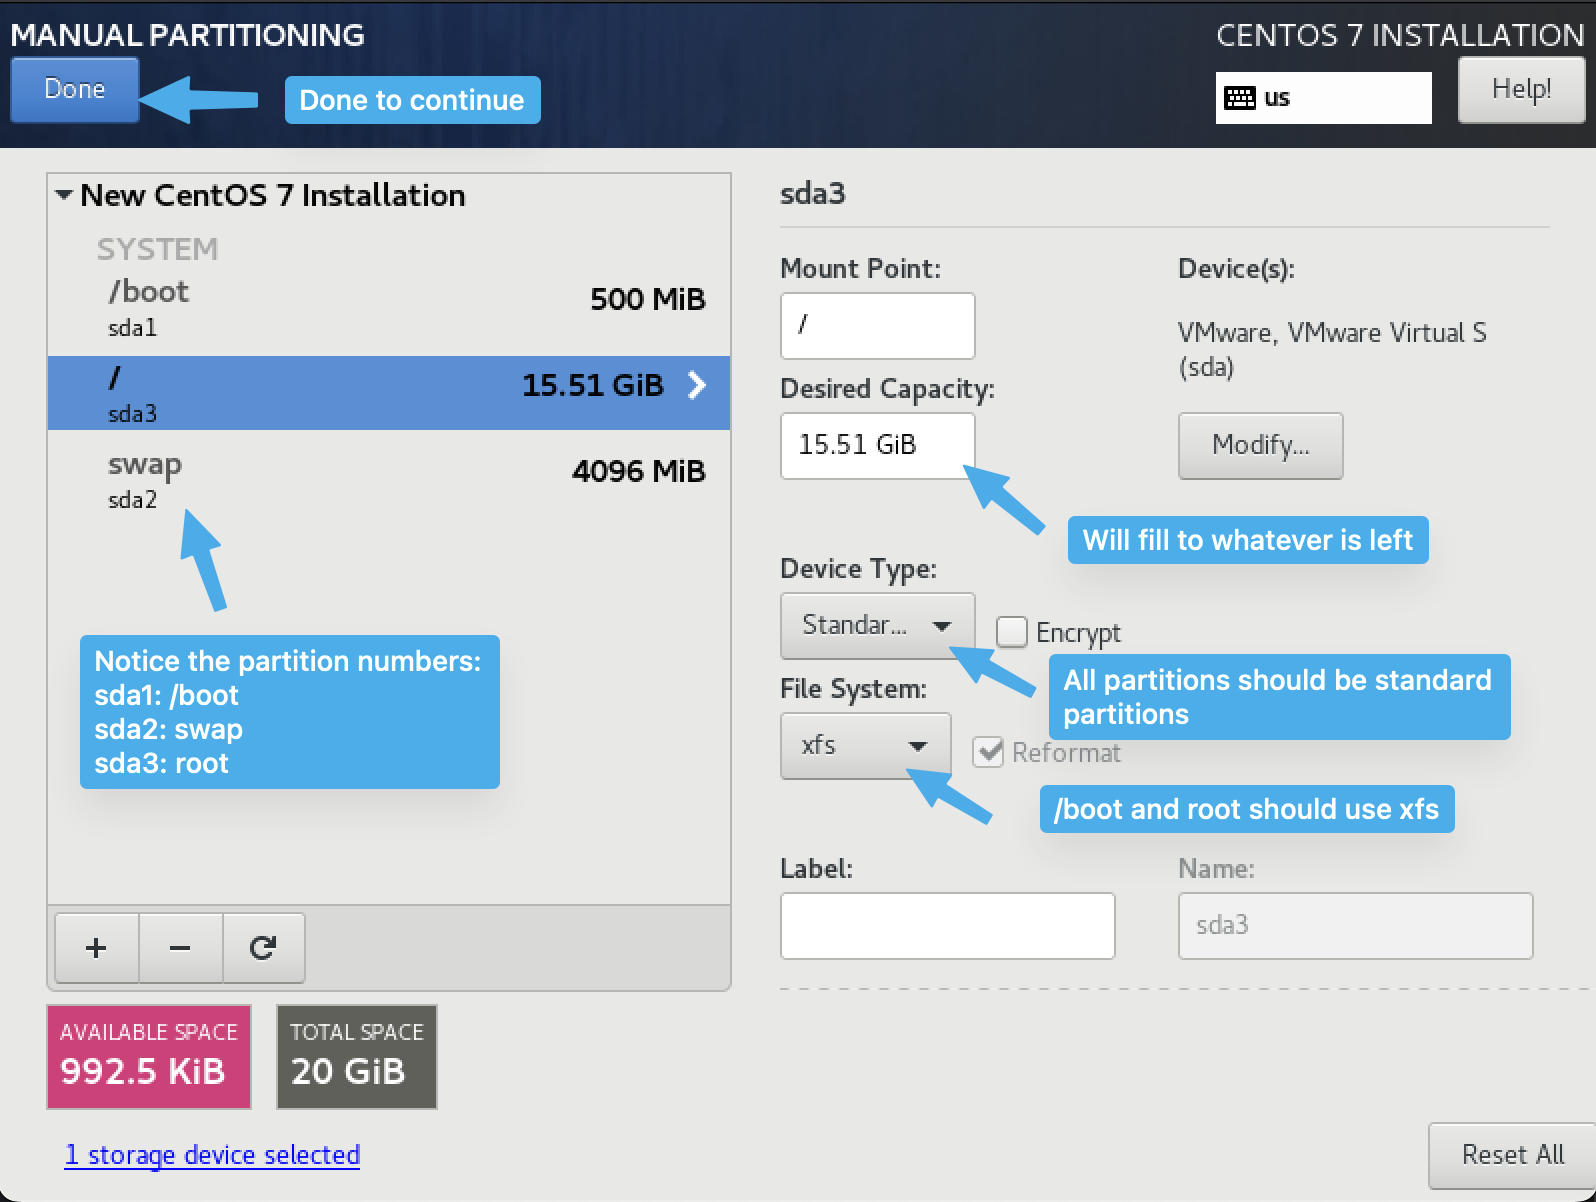
- sda1: /boot (500MB) — a small partition for boot files (this is default from the Ubuntu installer)
- sda2: swap (4GB) — the default LiquidFiles installation has 2GB RAM and we double the RAM size to 4GB.
- sda3: / (the rest) — the rest of the disk holds the operating system and all data.
It's important to note the numbering order of the partitions (the disk name sda can vary from system to system). The / (root) partition is the last partition on the disk because it's only possible to expand the filesystem for the last partition. We cannot insert new empty space in the middle of a disk. Technically it doesn't matter if the boot or swap partition is first as long as the / root partition is the last one.
Partition layouts are either configured using MSDOS or GPT partition table formats. The MSDOS partition table format supports disks up to maximum 2TB of data. GPT supports disks up to 9400000000TB. The default LiquidFiles installation uses GPT but the Ubuntu installer will always select MSDOS if the disk you configure a system with a disk less than 2TB. The fact that you cannot select GPT using the custom install means that you will need to plan ahead and add a disk with more than 2TB during install if you think that you will ever need that, or use the default LiquidFiles installation.
This guide covers two scenarios, either matching the default LiquidFiles installation with a Single Disk or alternatively if you want to install LiquidFiles with a Separate Data Disk.
Custom Installation with a Single Disk
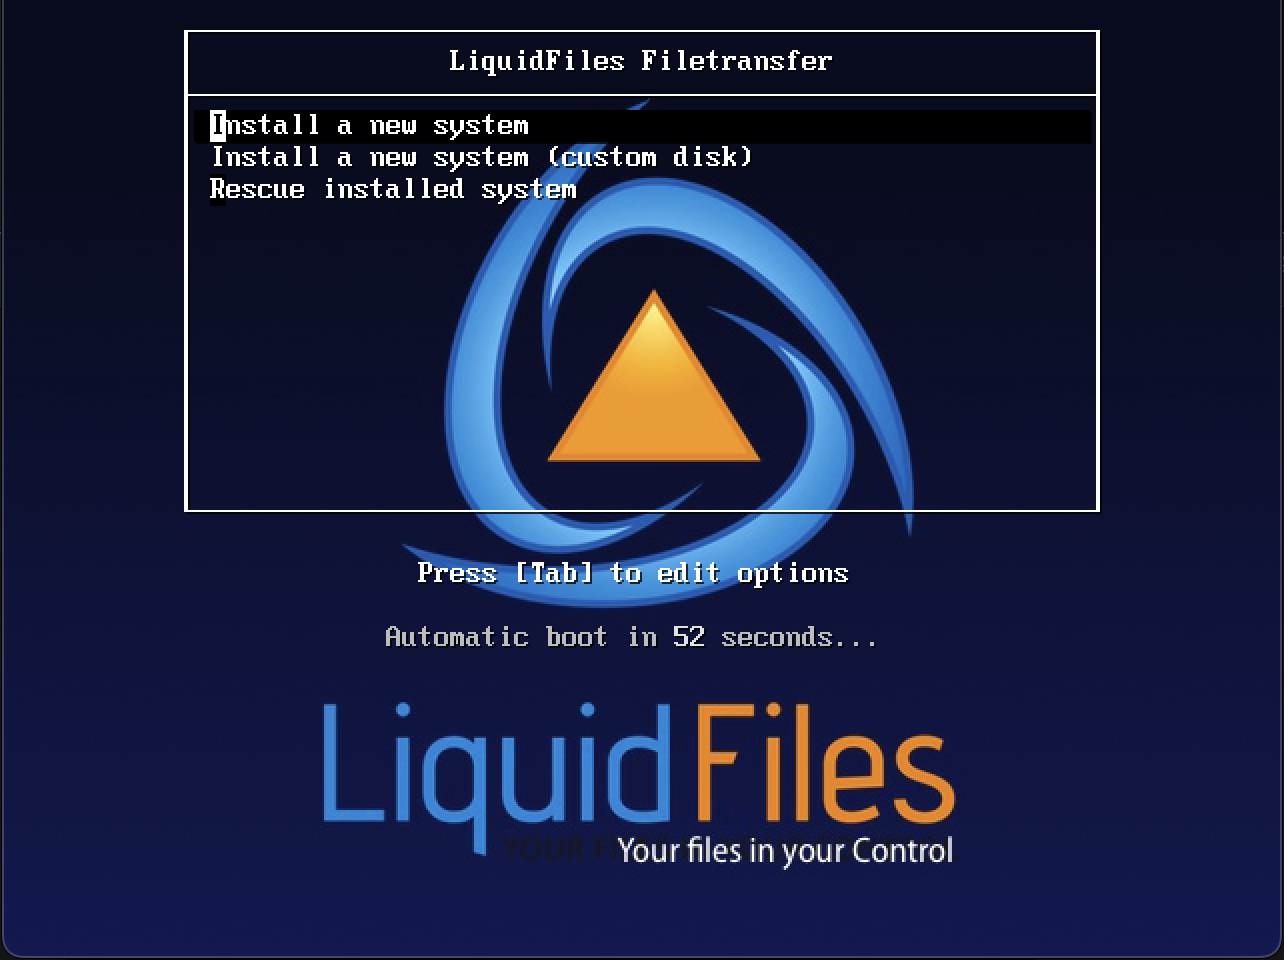
When installing LiquidFiles, you have the option if installing with the default install or a custom install. In order to install LiquidFiles with the custom disk option, you will need to boot from the LiquidFiles ISO image. At the first screen you'll see below, please select the second option, labeled Install a new system (custom disk).
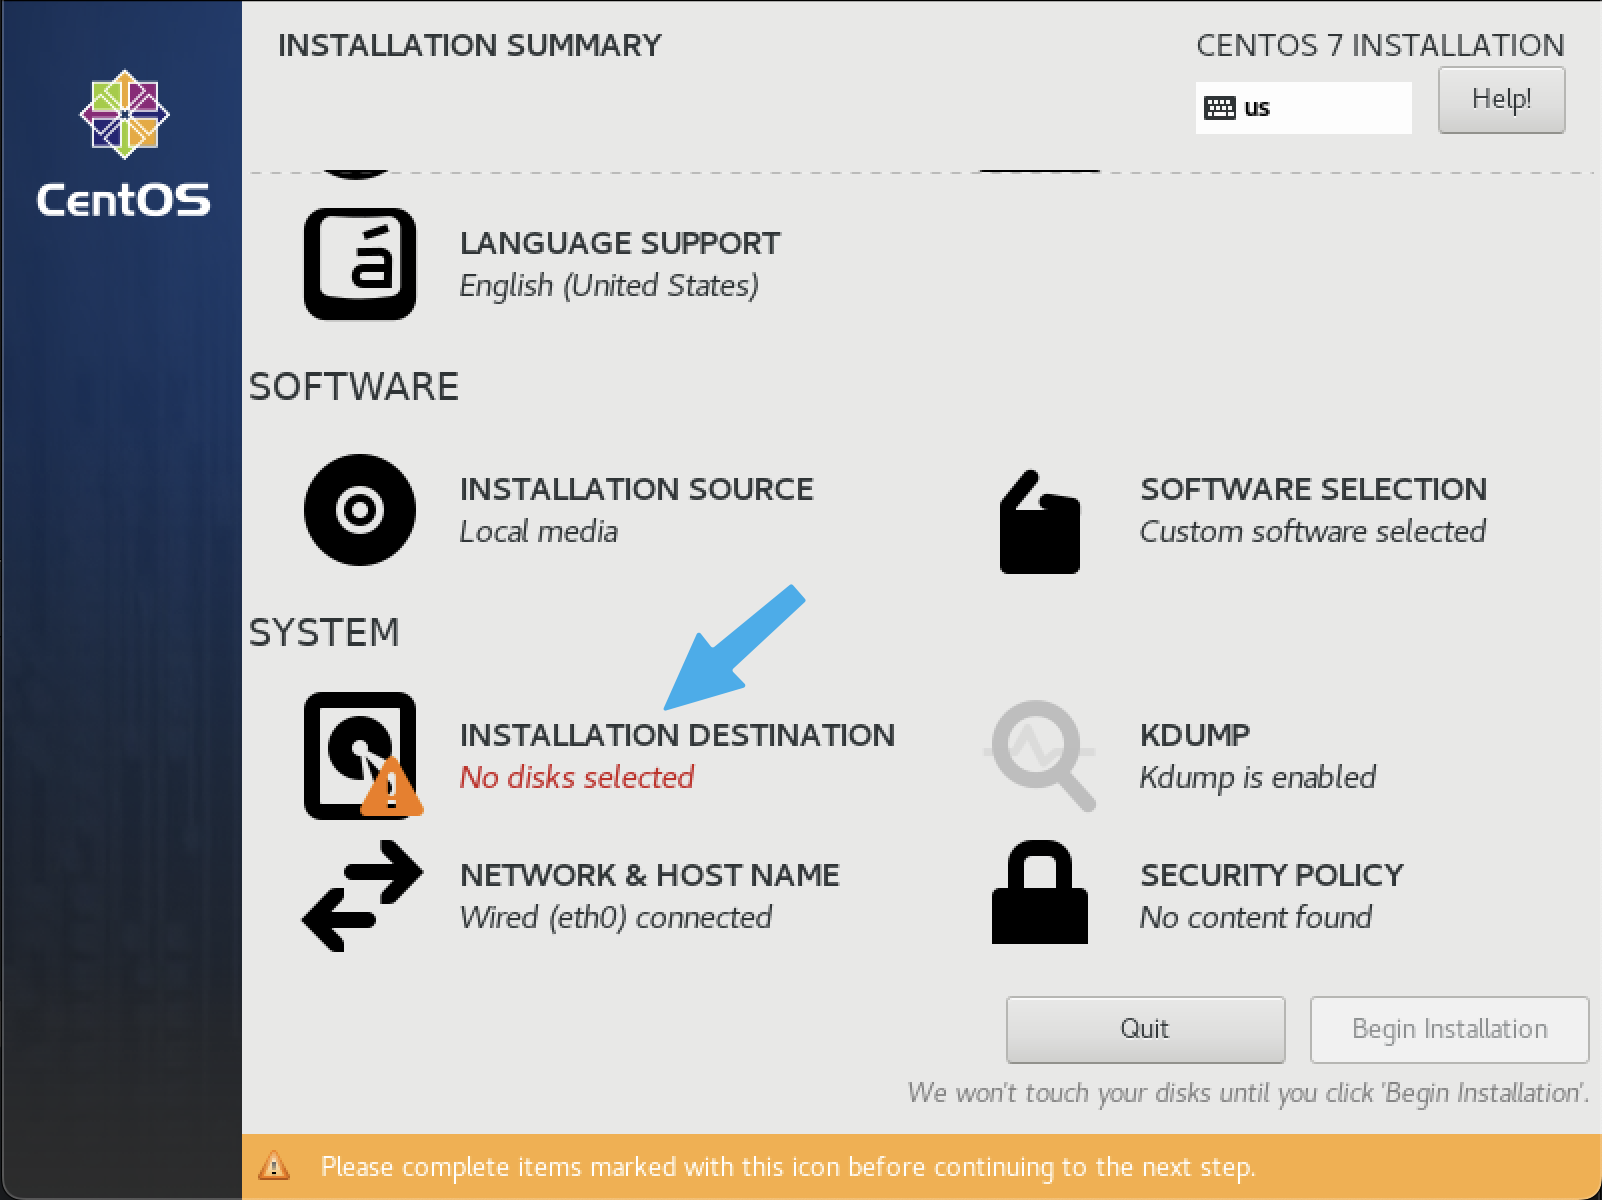
The system will boot from the ISO, there will be a prompt to note if you are ok to continue and the install will then stop at the following screen where you'll need to select Installation Destination.
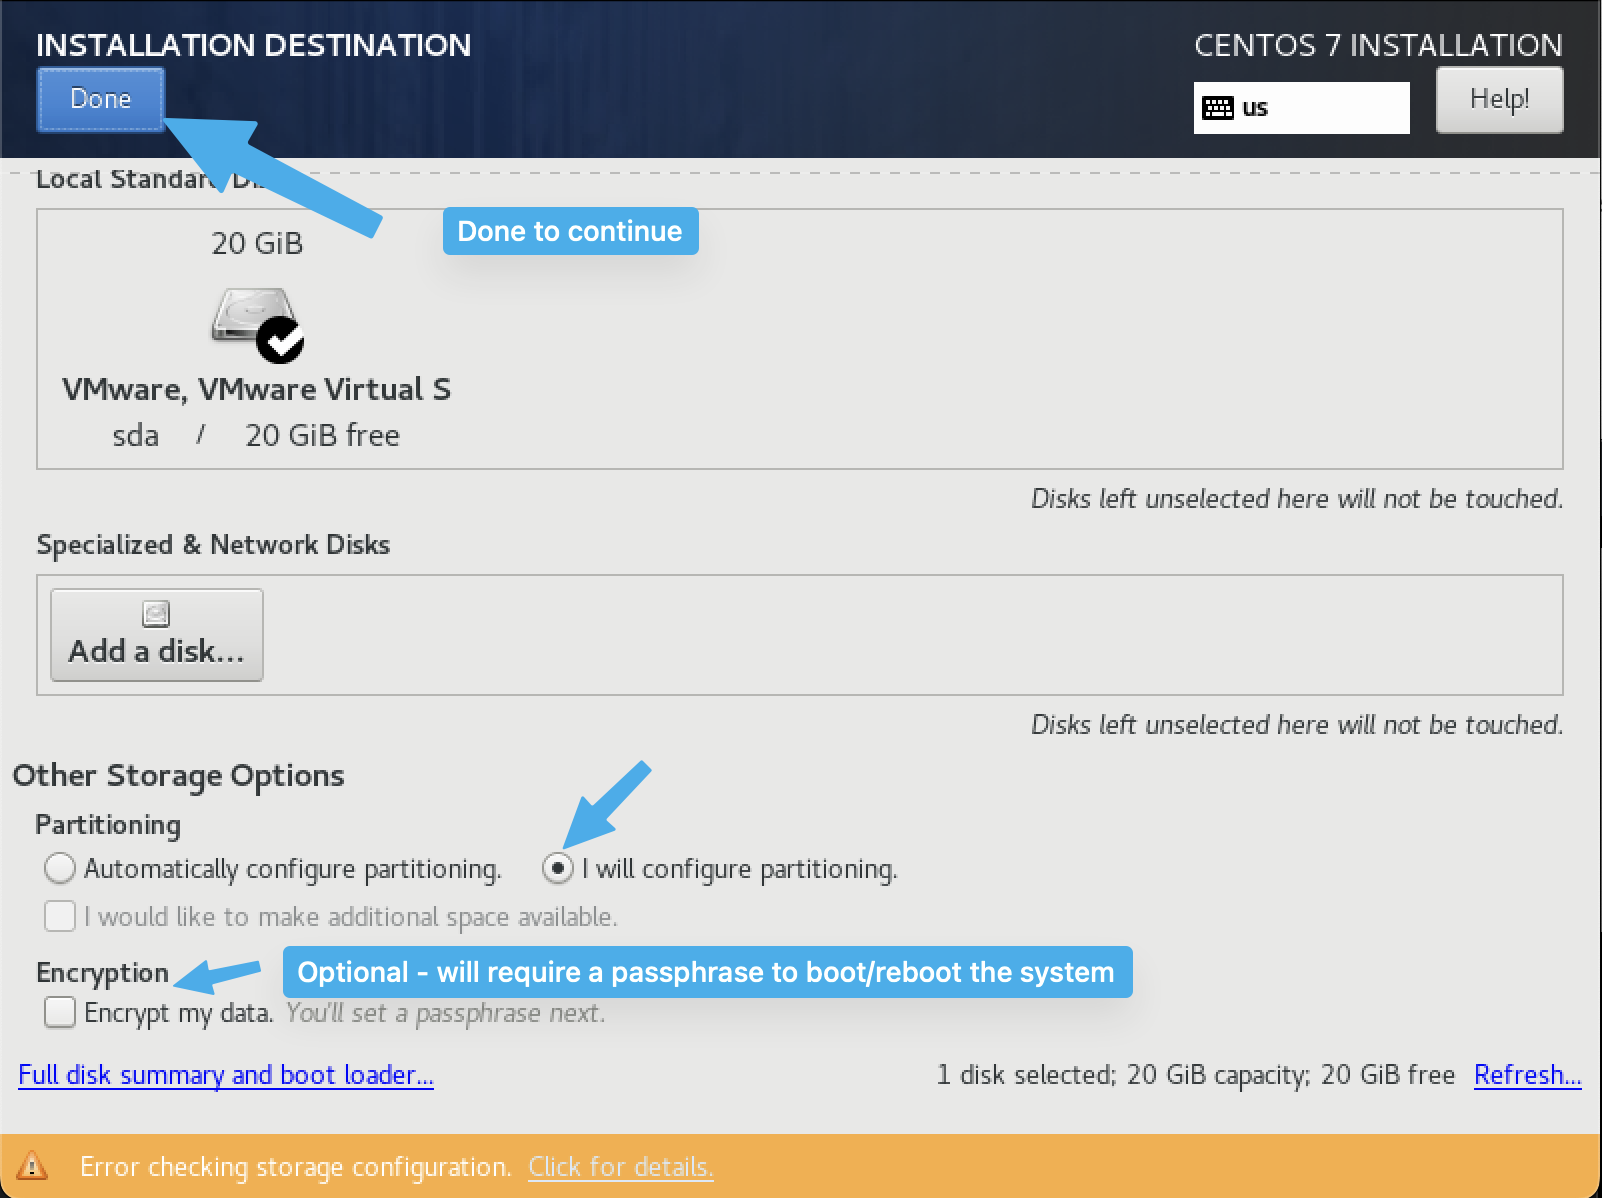
At this point, please select I will configure partitioning and then Done.
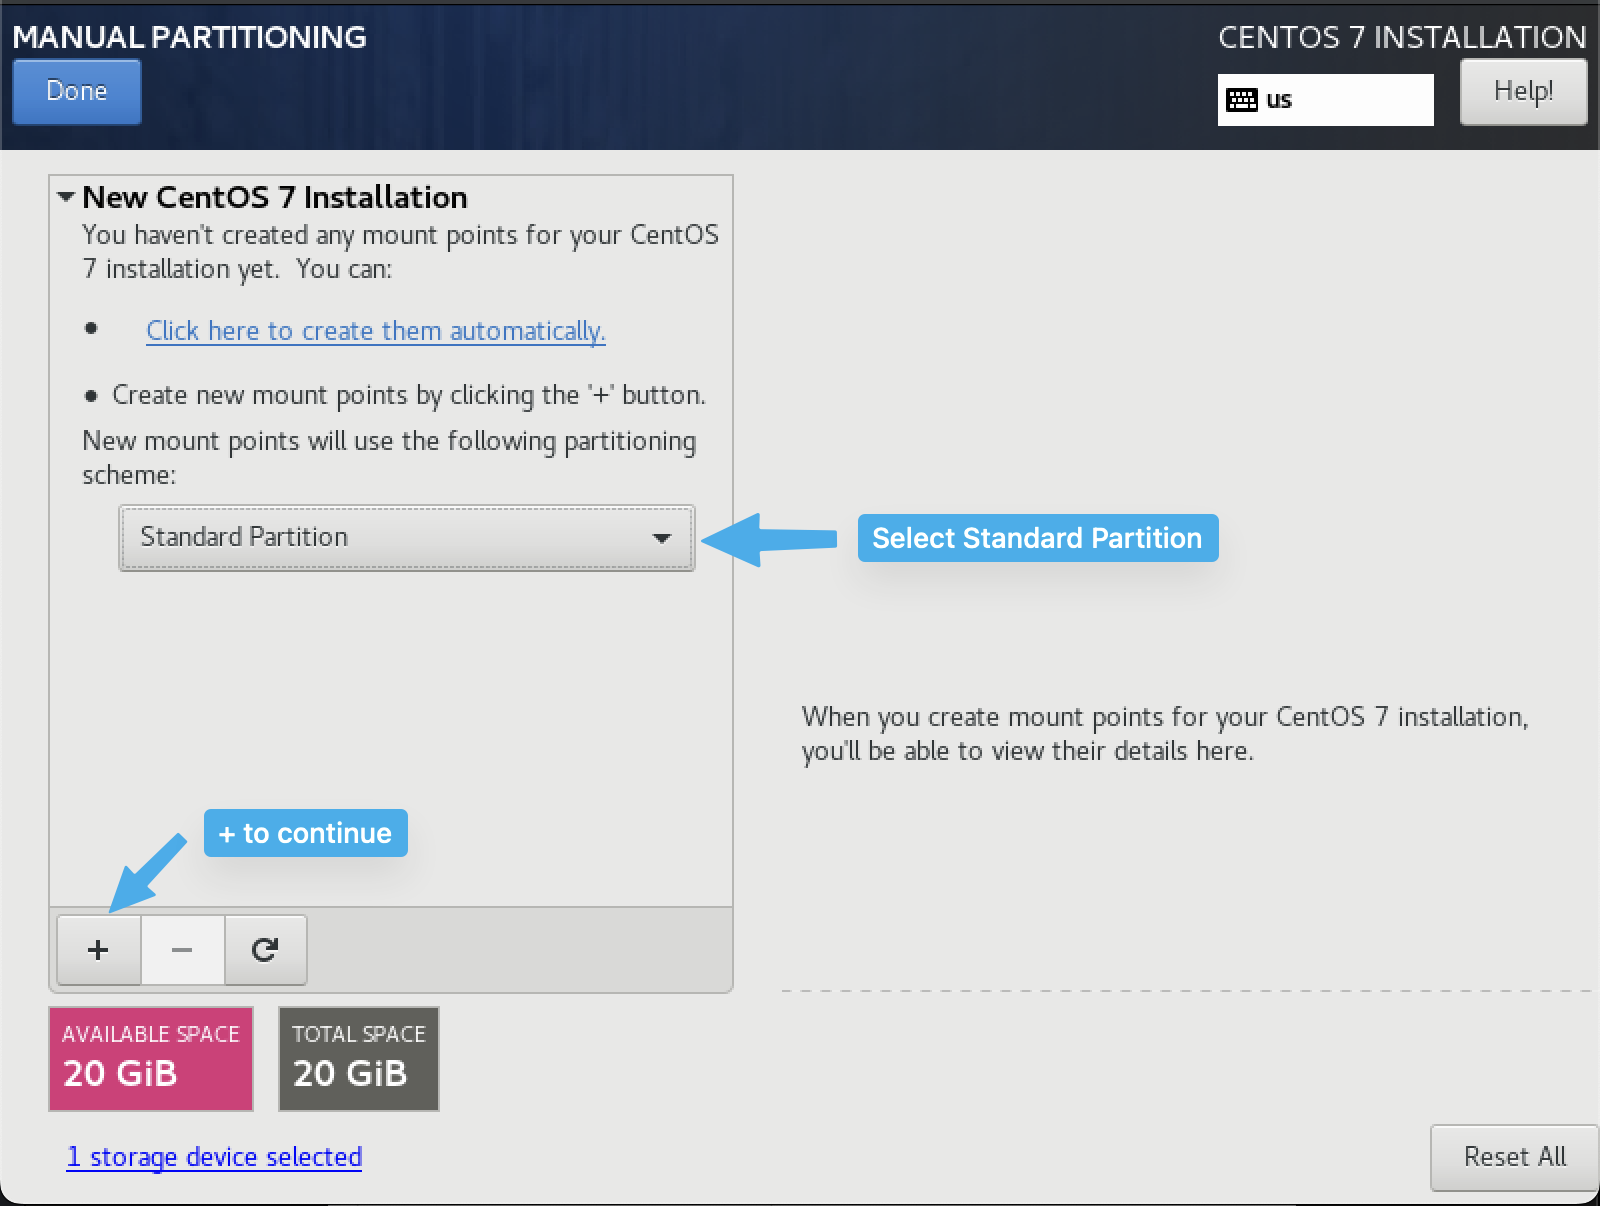
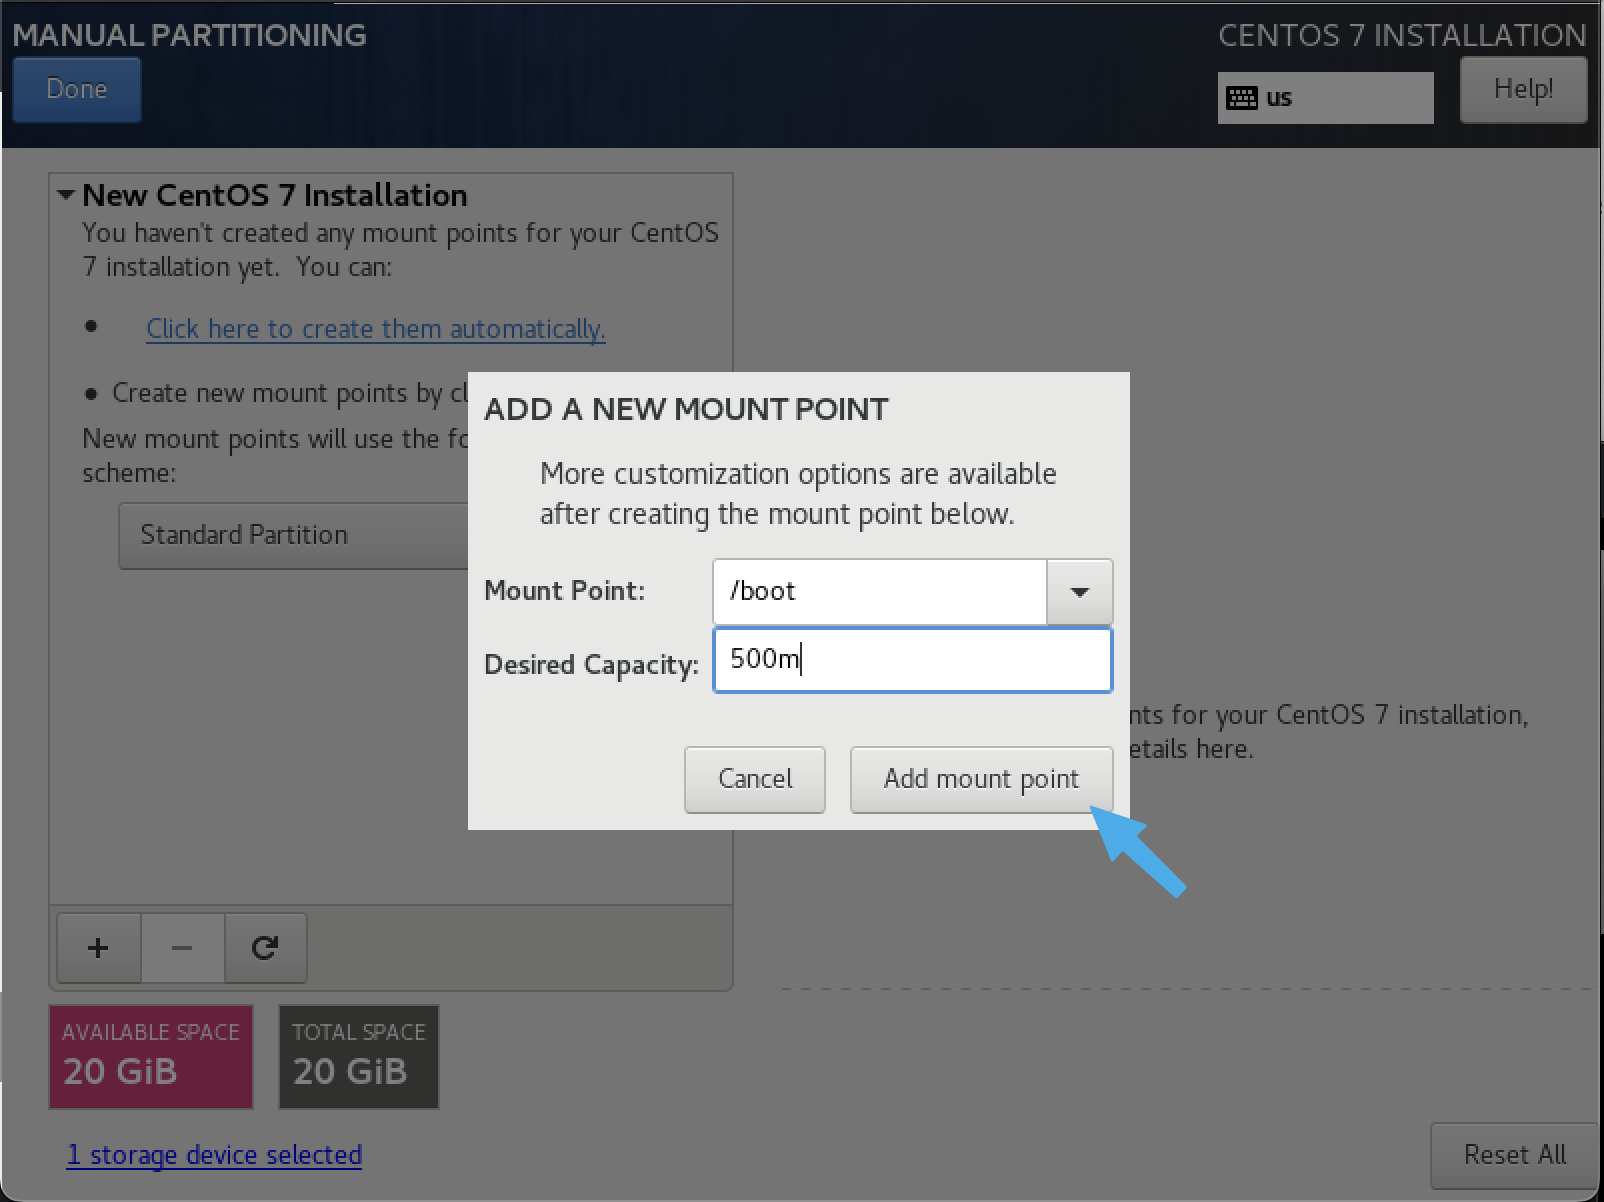
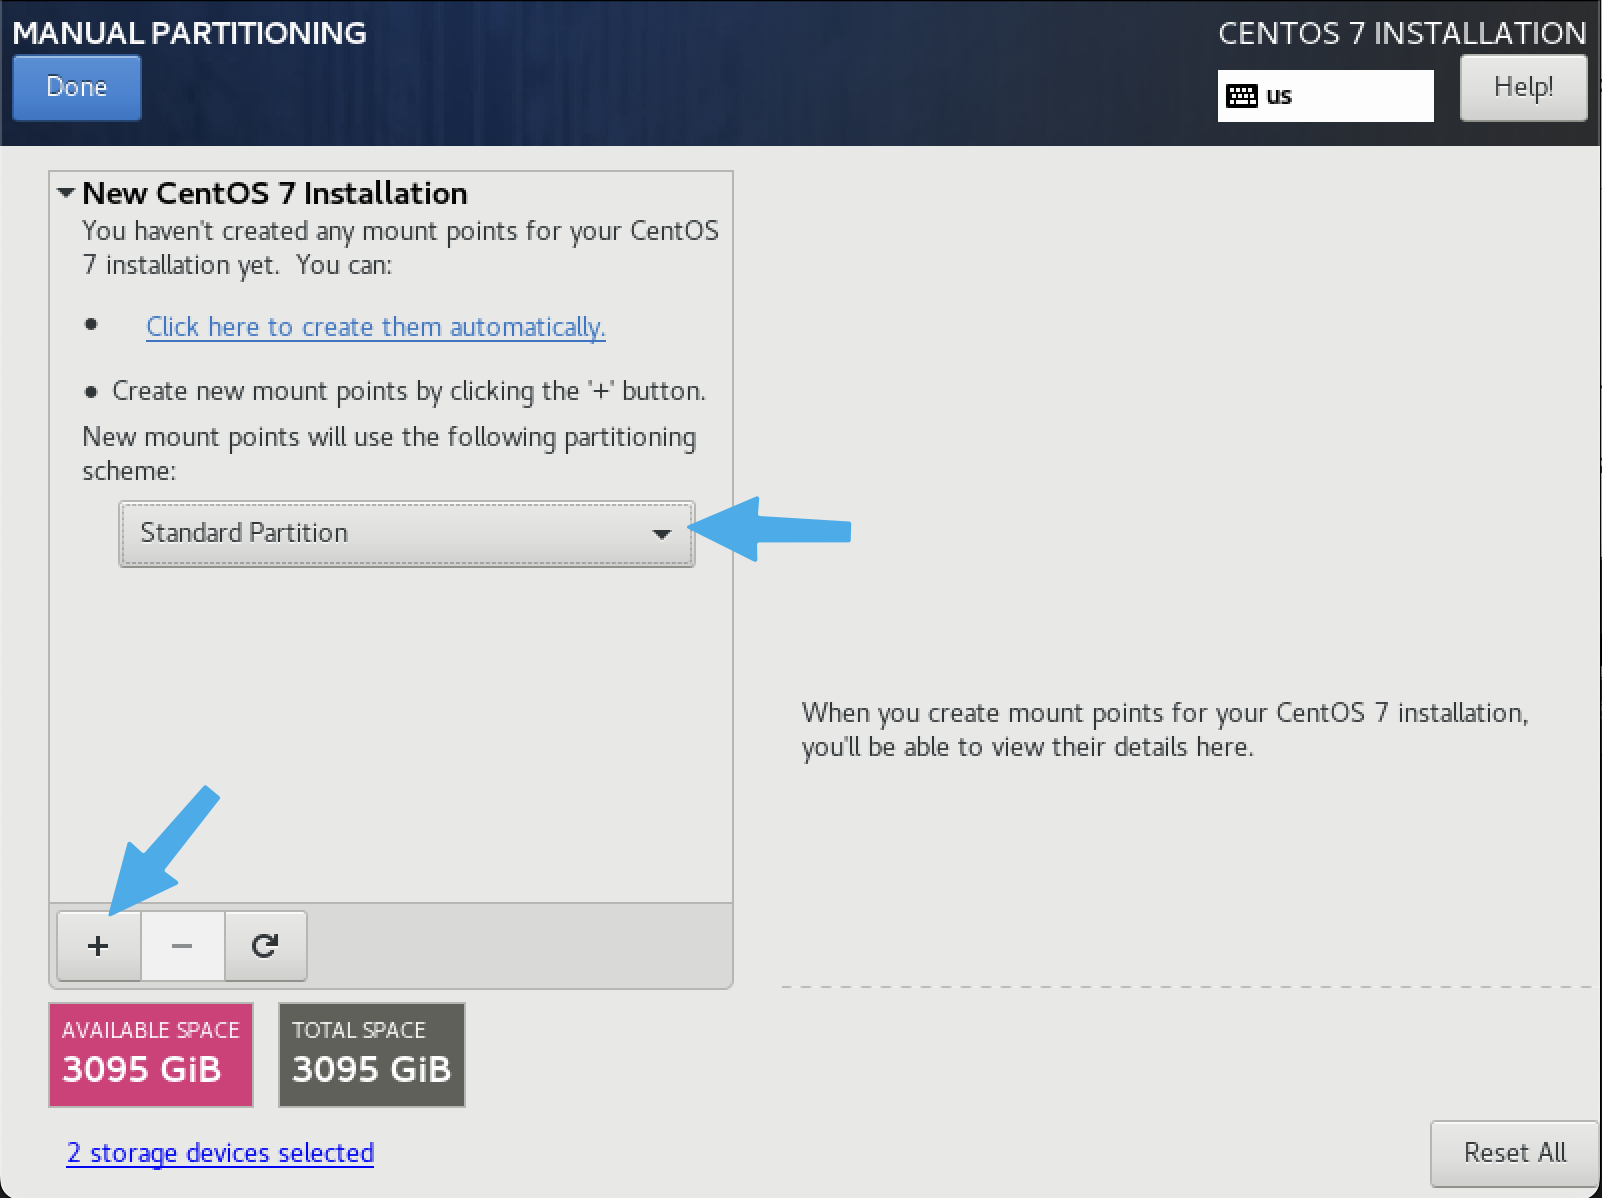
Select the Standard Partition type and add (+) a new partition.
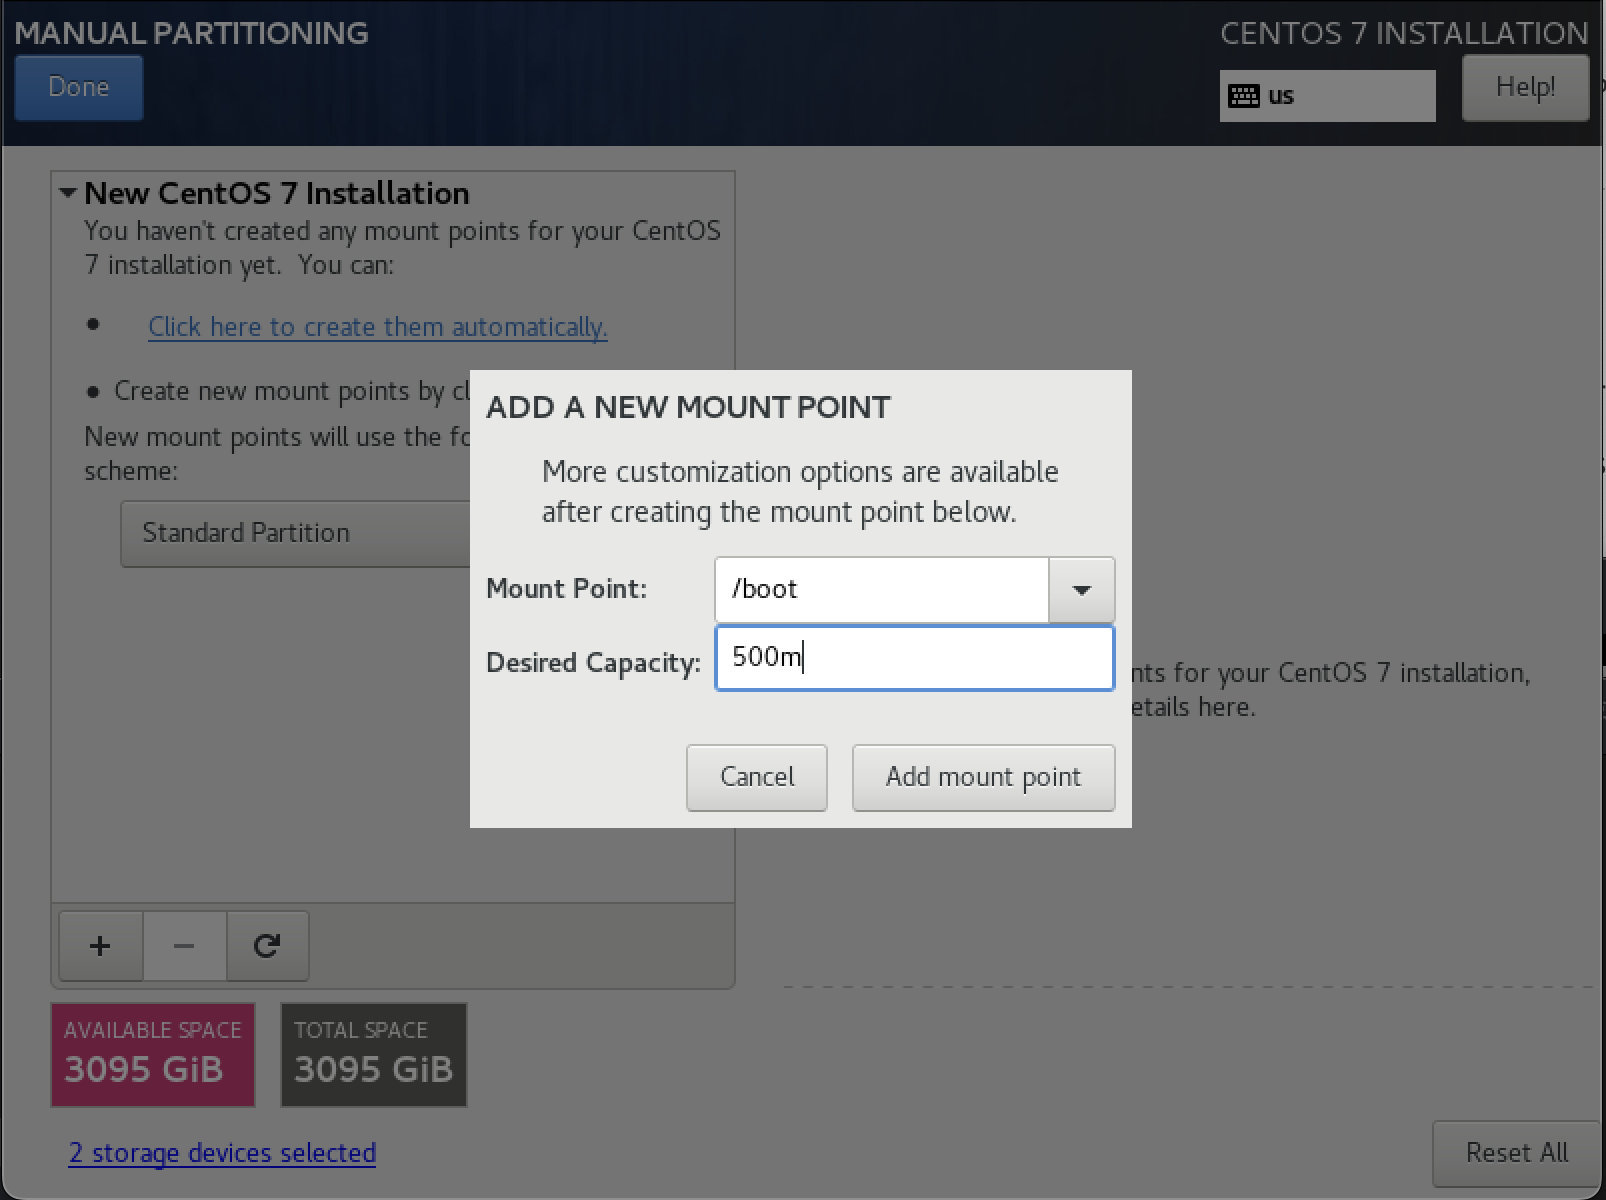
Add the boot partition with 500m (500MB).
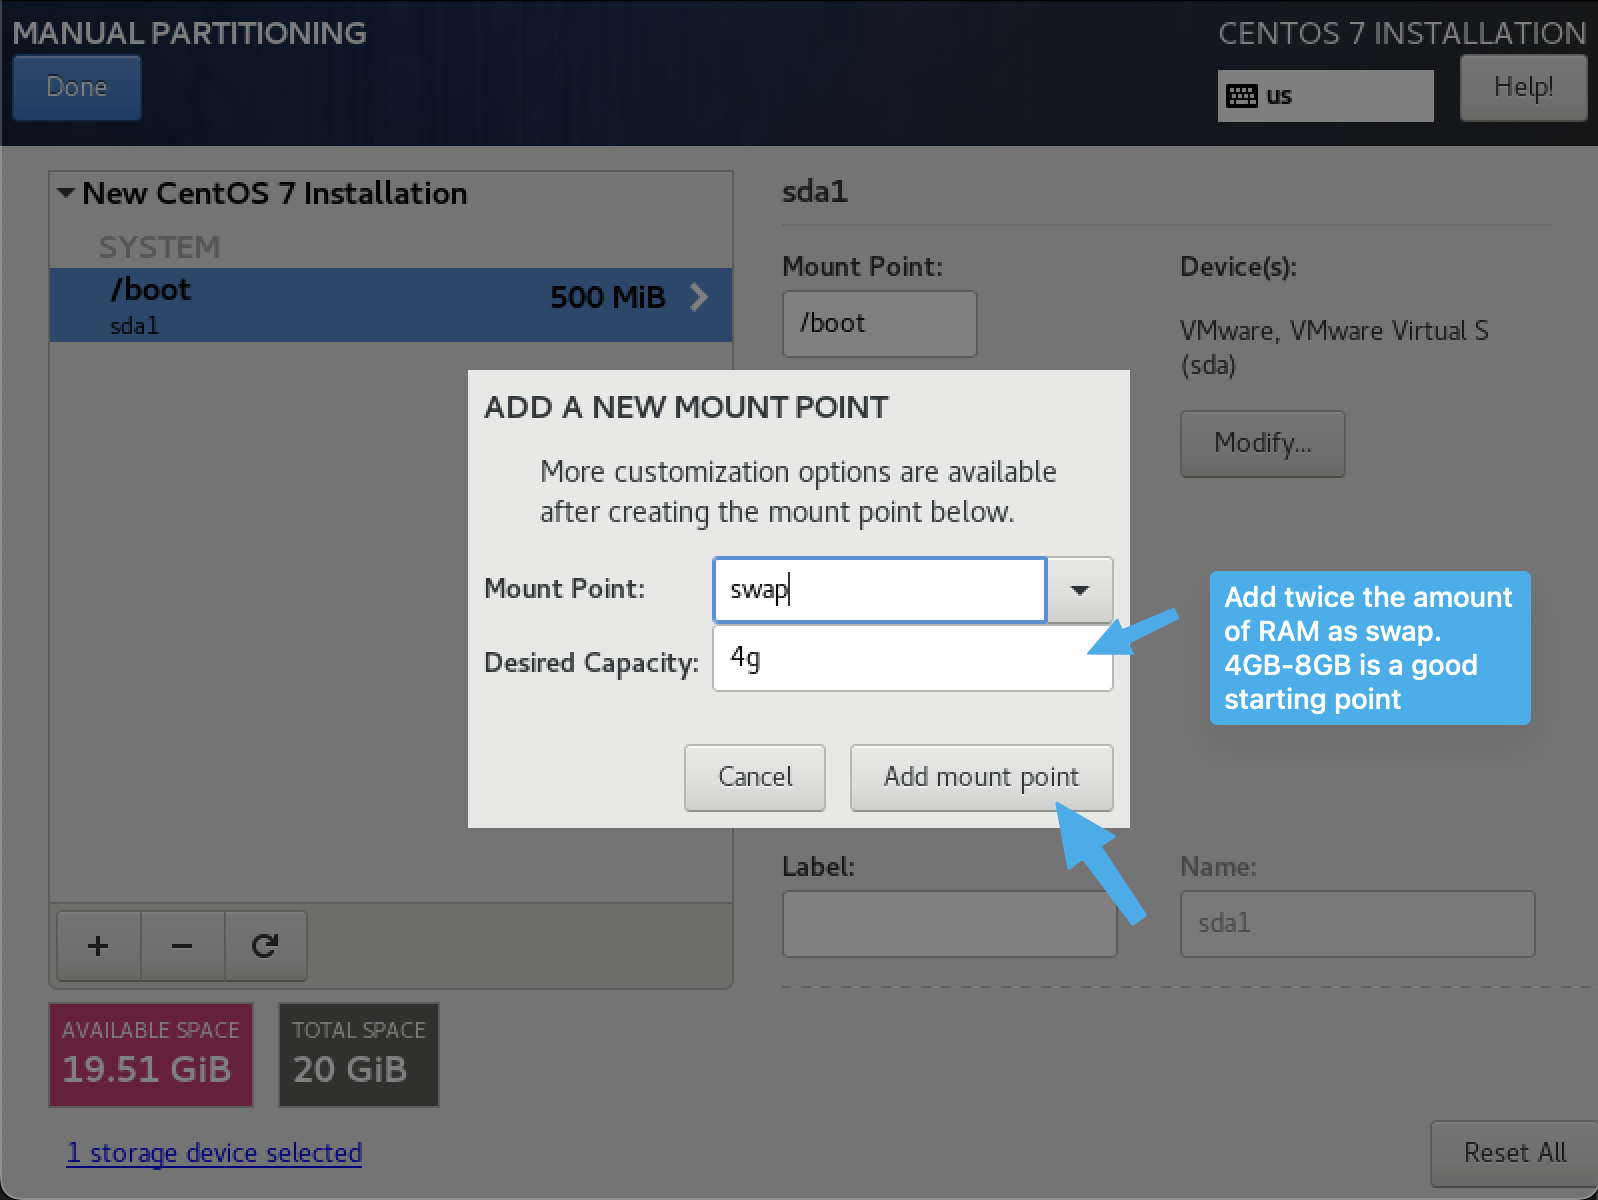
Add another partition.

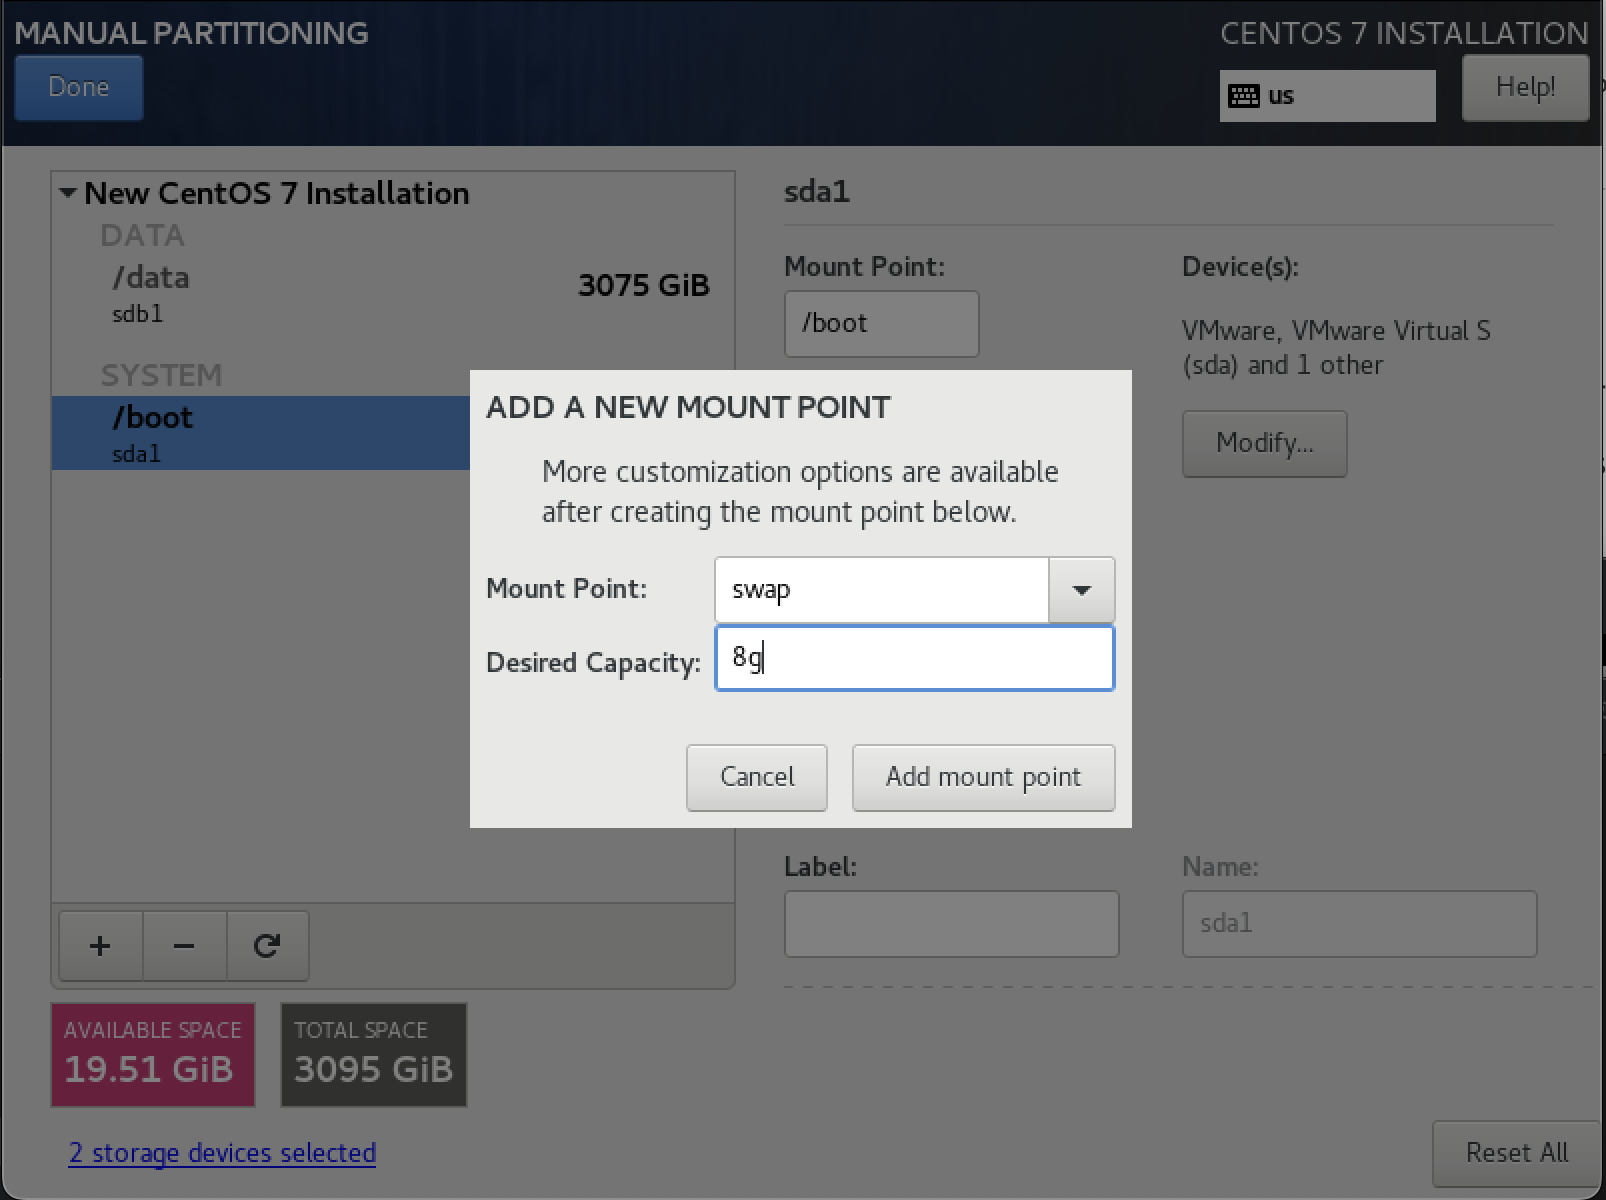
Select swap and give it a size that's double the RAM. Somewhere between 4GB and 8GB is a good starting point.
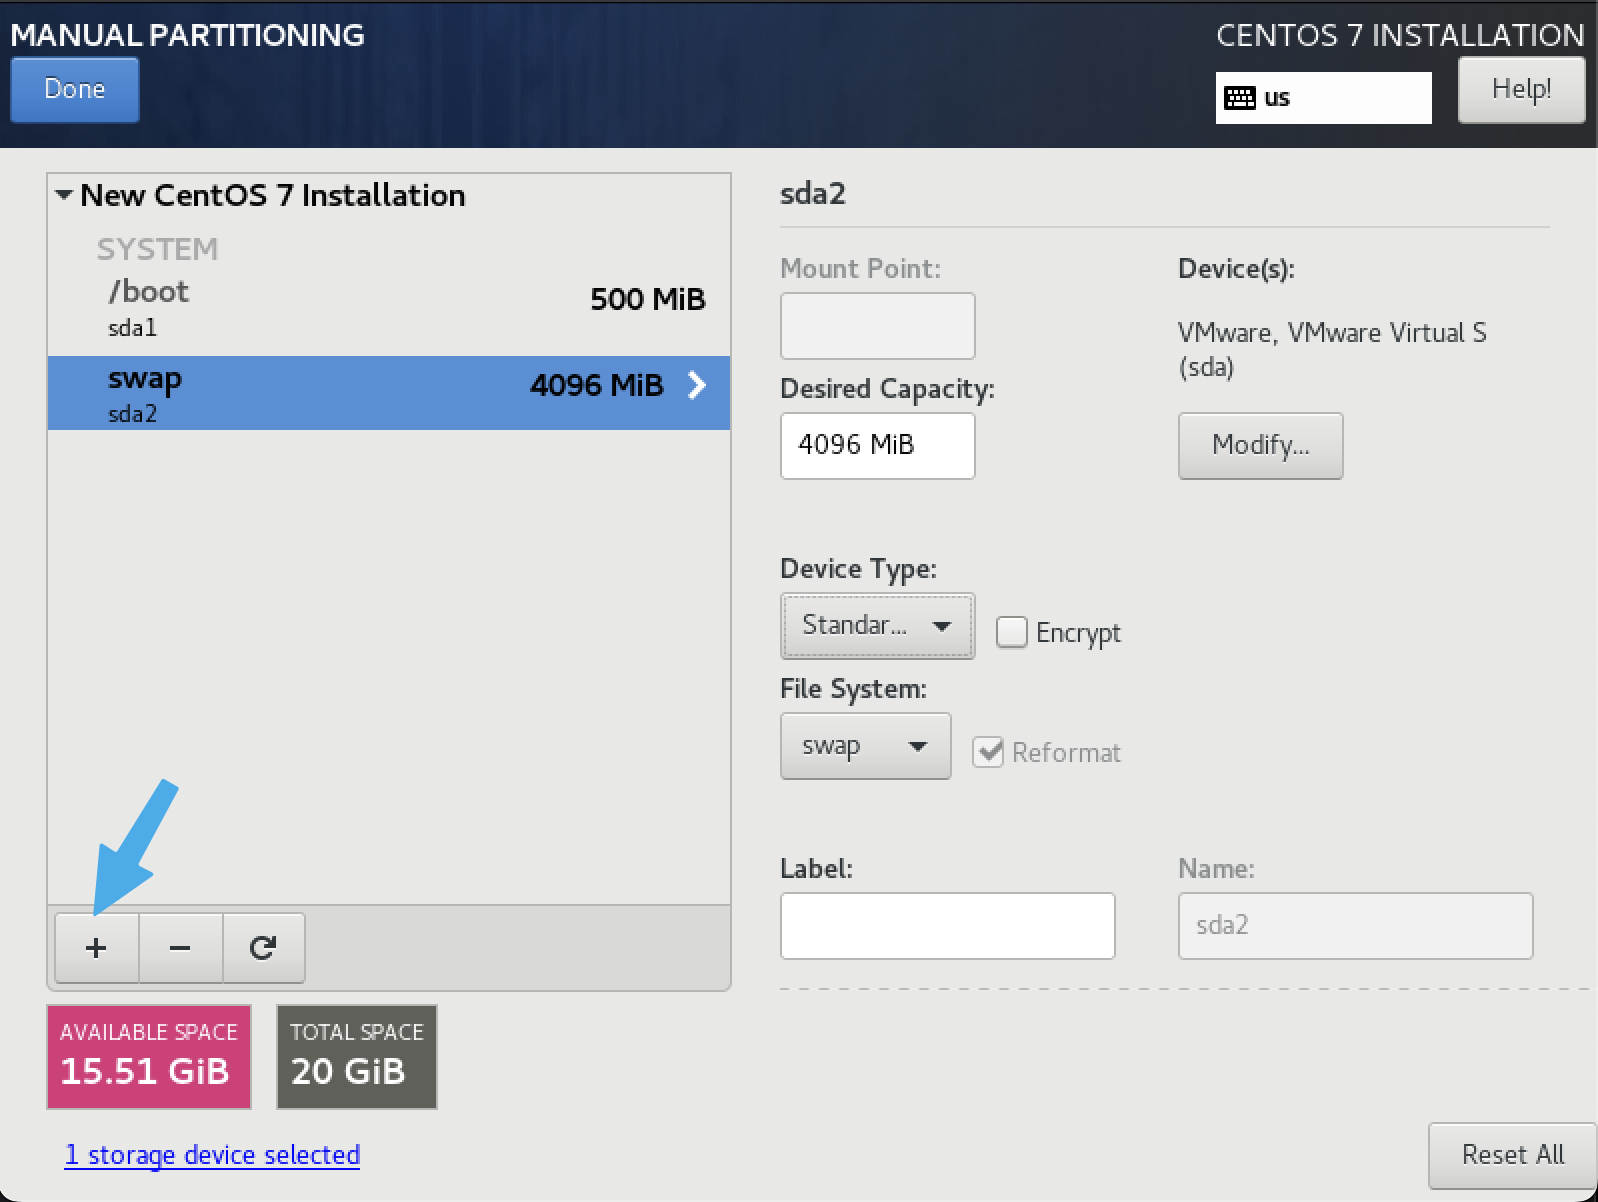
Add another partition.
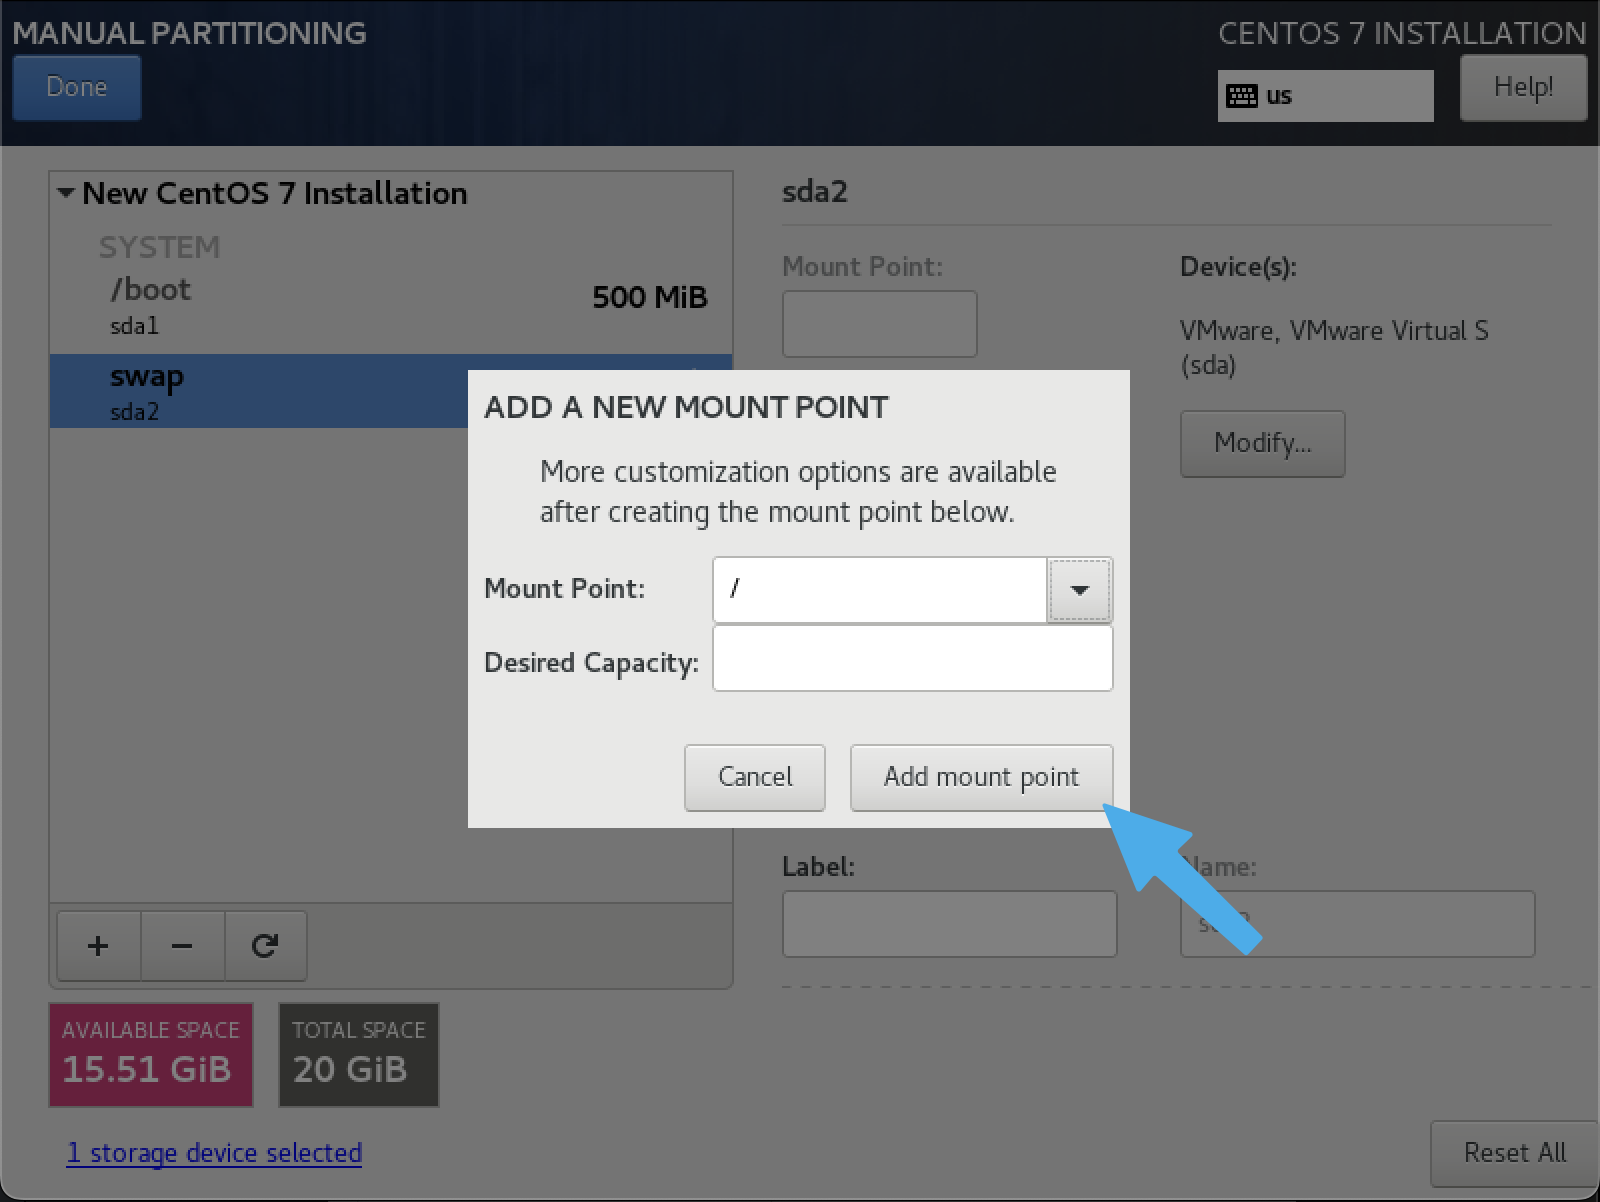
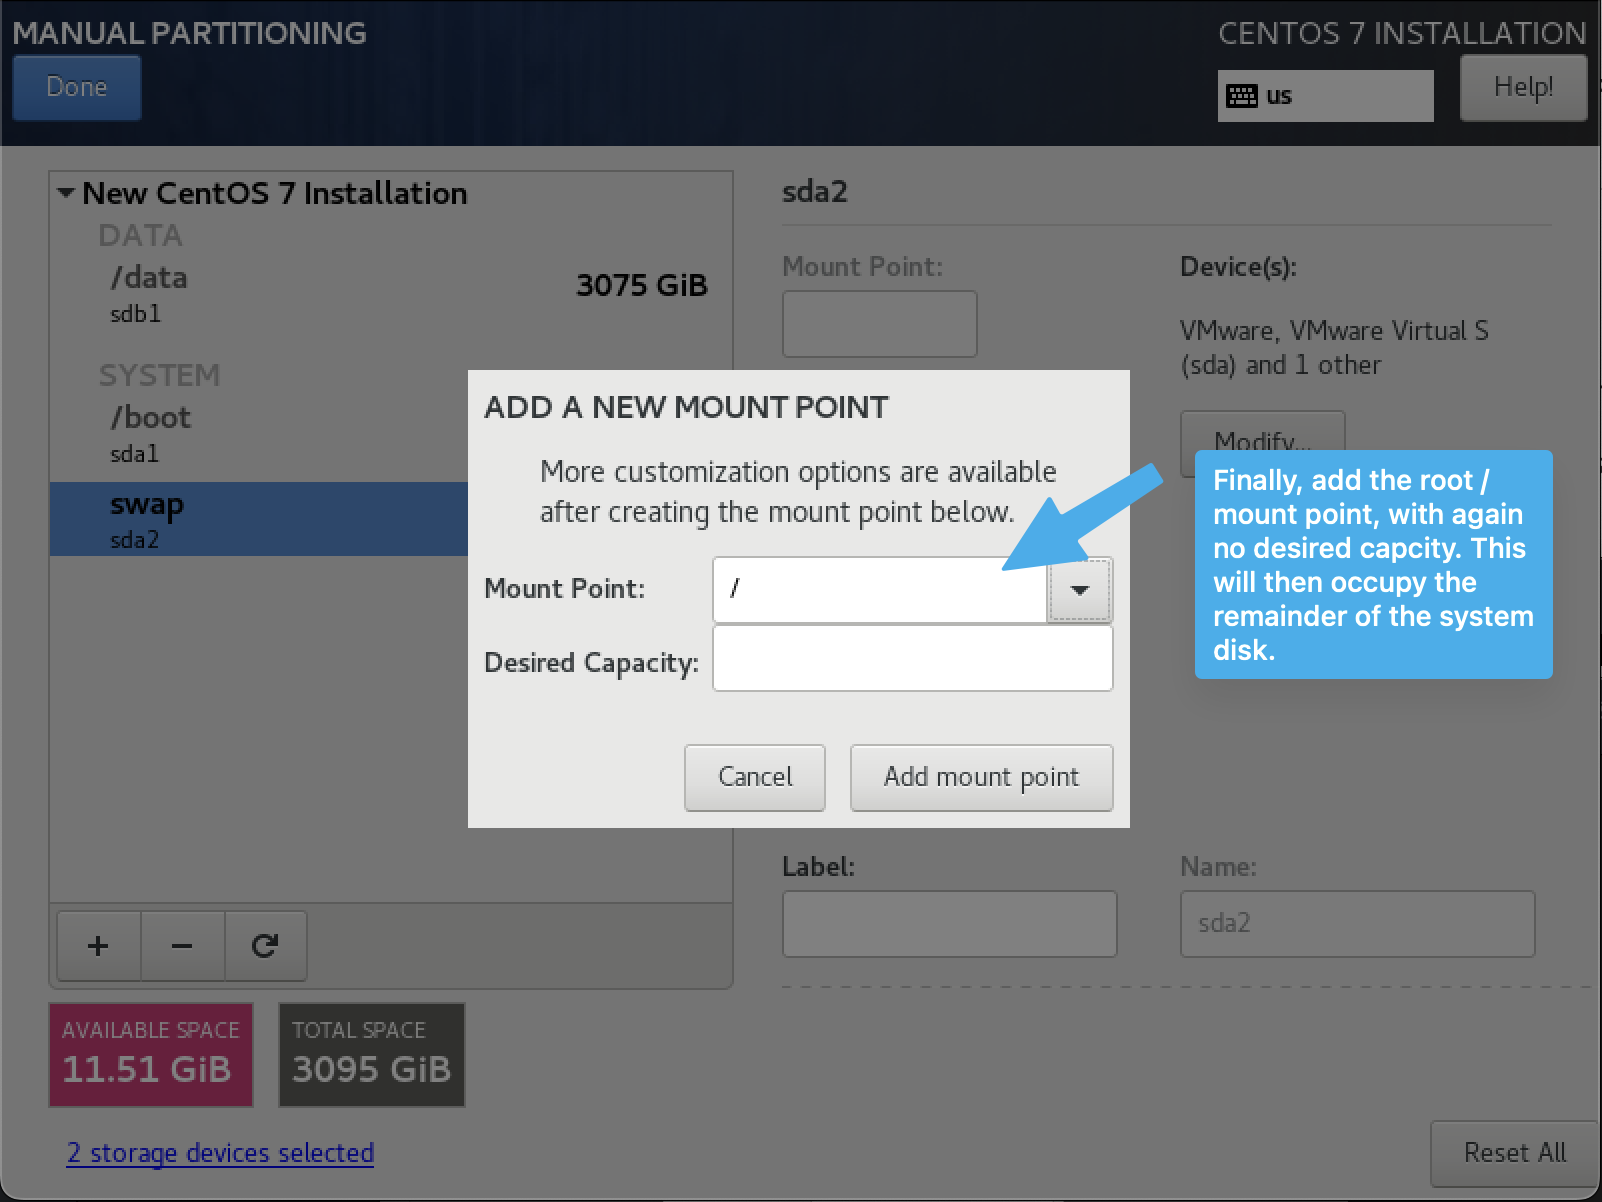
Finally we'll add the / (root) partition. Don't specificy a sice and all the remaining space will be used.
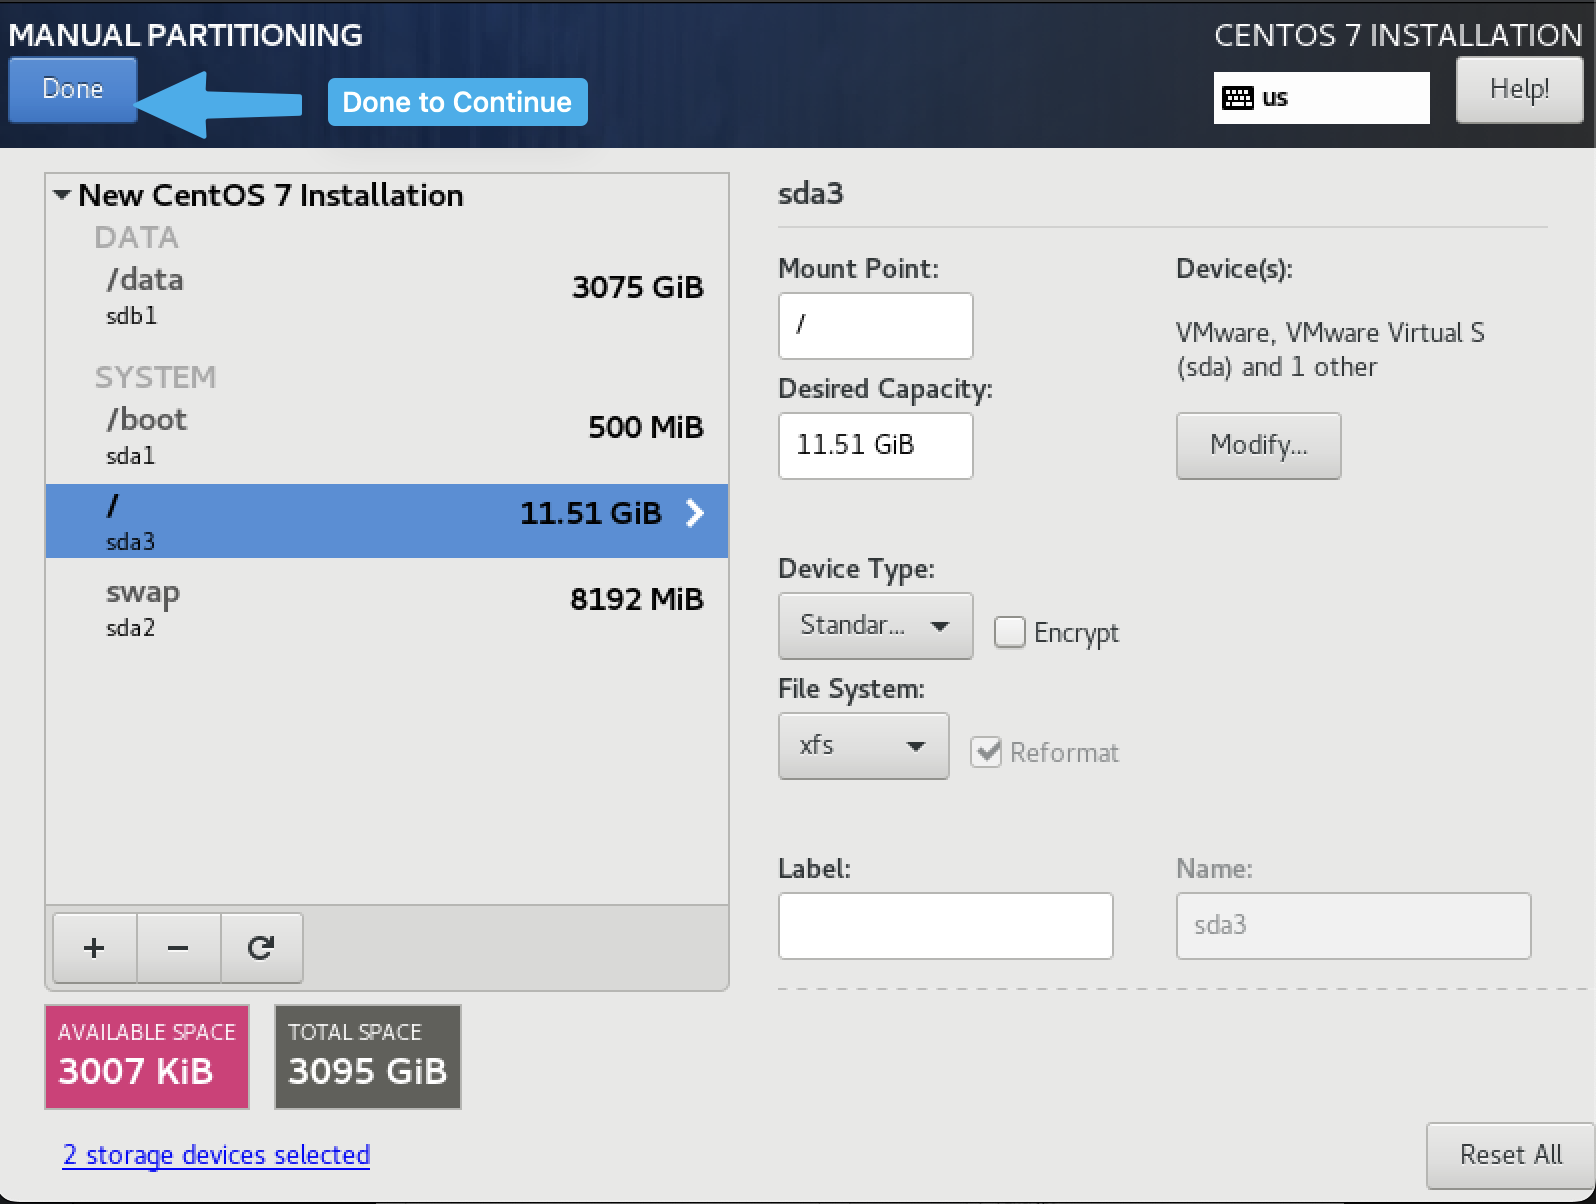
When we're done, it should look like the following screenshot. Click Done to continue.
You'll see a list of tasks that will be performed during the installation in regards to paritioning the disk.
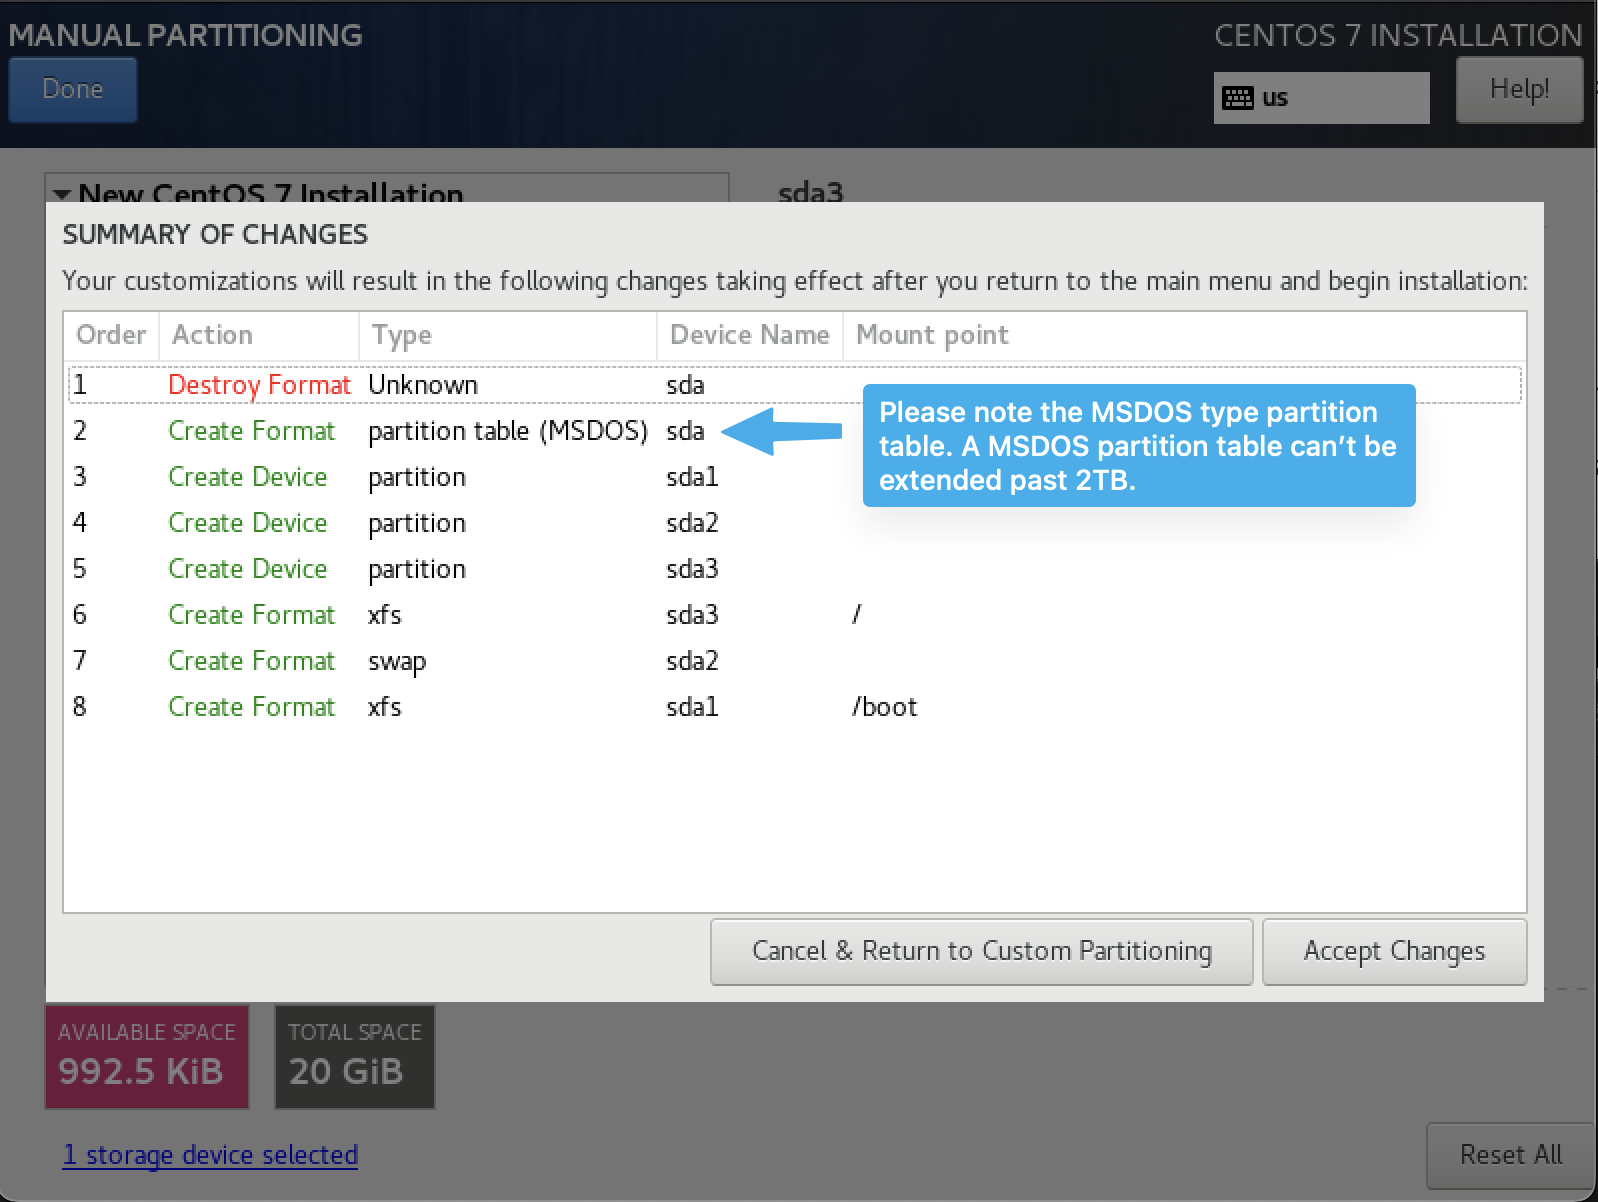
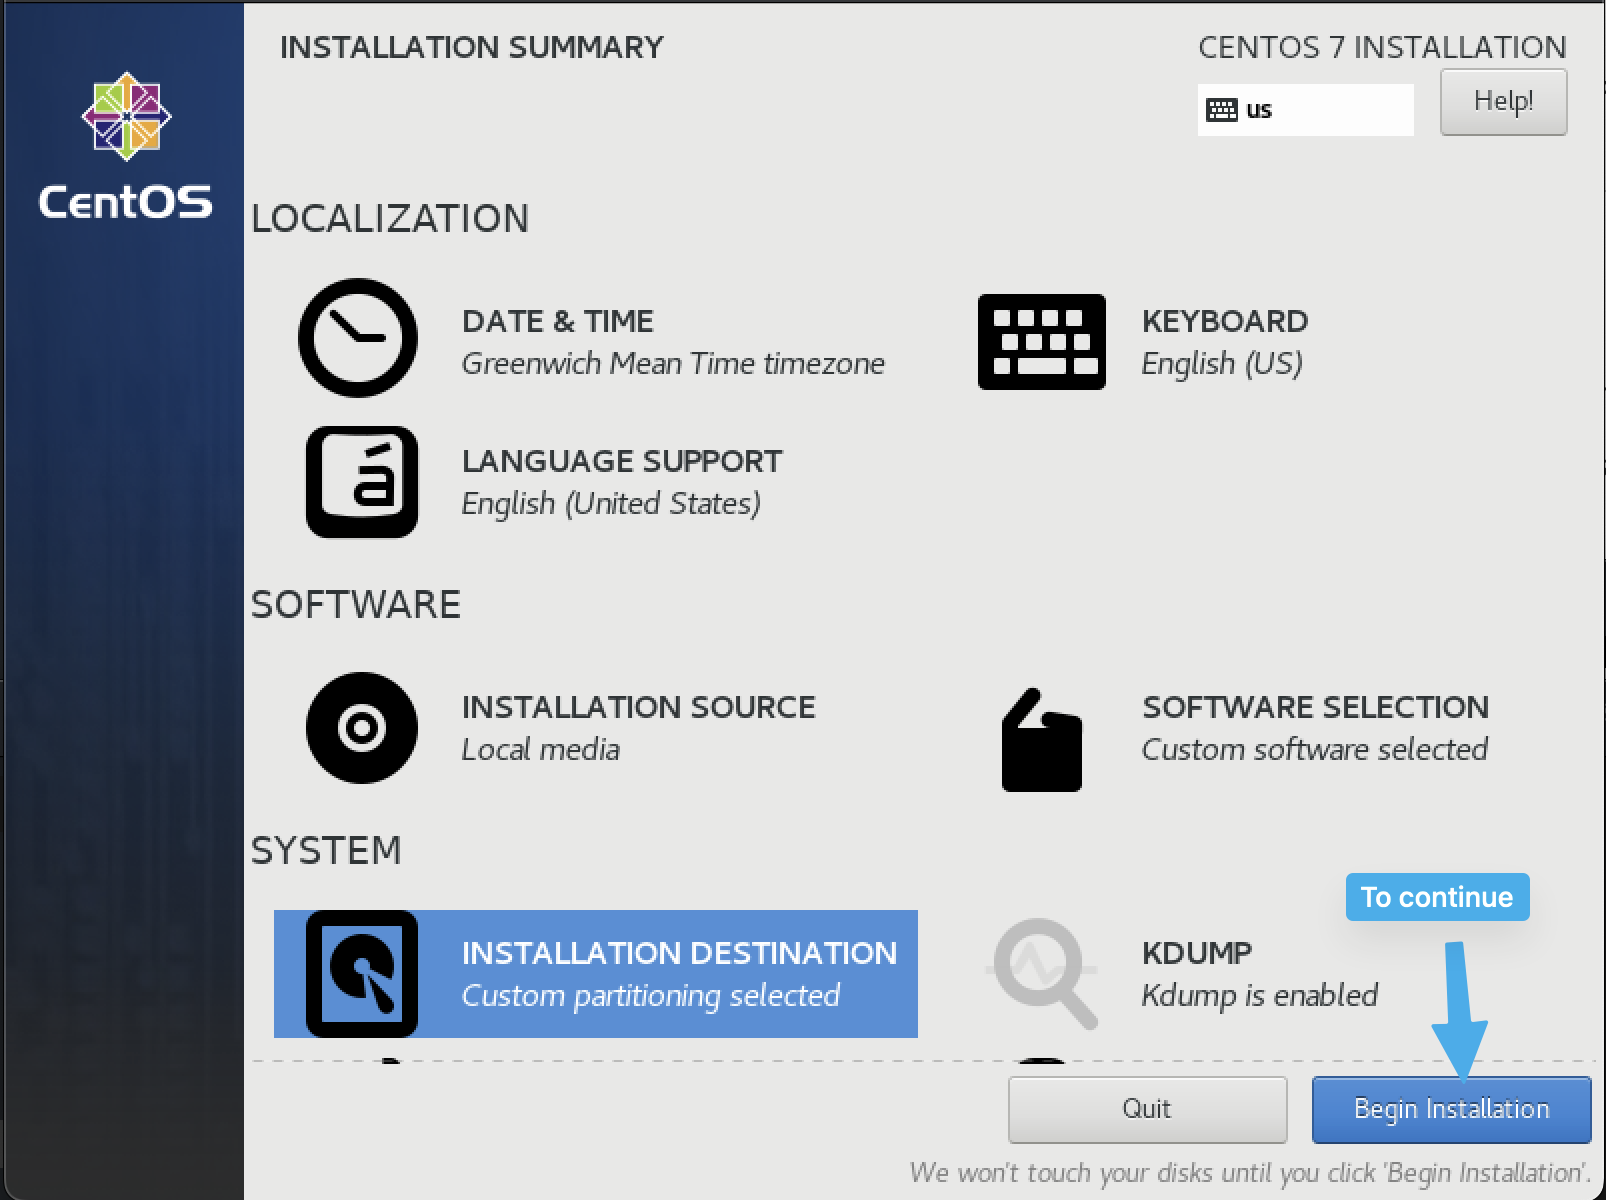
Clicking Accept takes the installer back to the main screen where you can begin the installation.
Custom Installation with separate Data disk
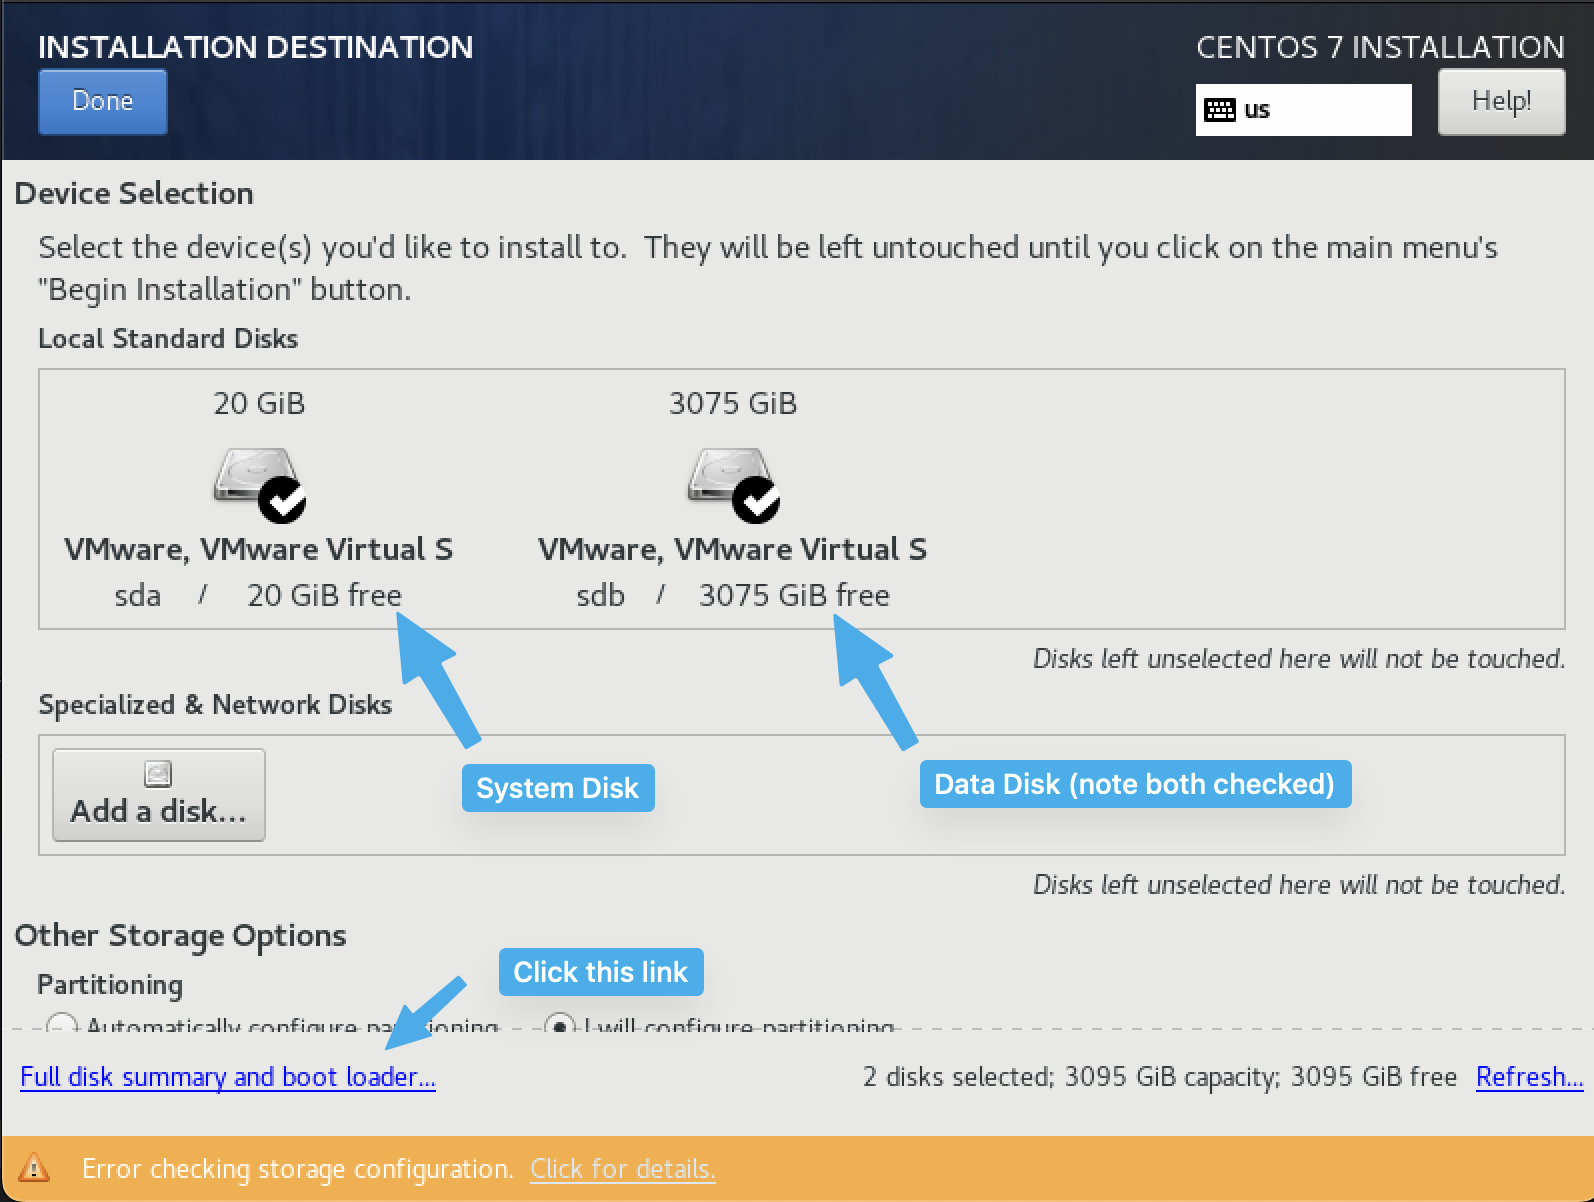
In this guide we begin by adding two disks to the system, one used for the system and one for the data. The system disk will hold the operating system (about 3GB), log files and the database. The database holds all users, messages and data about all the files sent. On default messages are removed from the system 1 year after they expire so basically after about 1 years worth of use, the database shouldn't increase in size any more. Up to 1 year you will need to monitor usage to ensure there's enough space on the root disk. If you adjust the default values and configure the system to keep messages for say 7 years, you can expect disk usage to grow for 7 years and should stabilize after that.
Log files are normally not very big but we have seen installations where they thought it was a good idea to poll to check if they system is up every second and depending how that's done it can produce a few GB of log files. Most logs are deleted after a month but some logs are kept for a year so after a year you can assume that log size will stay the same unless usage changes.
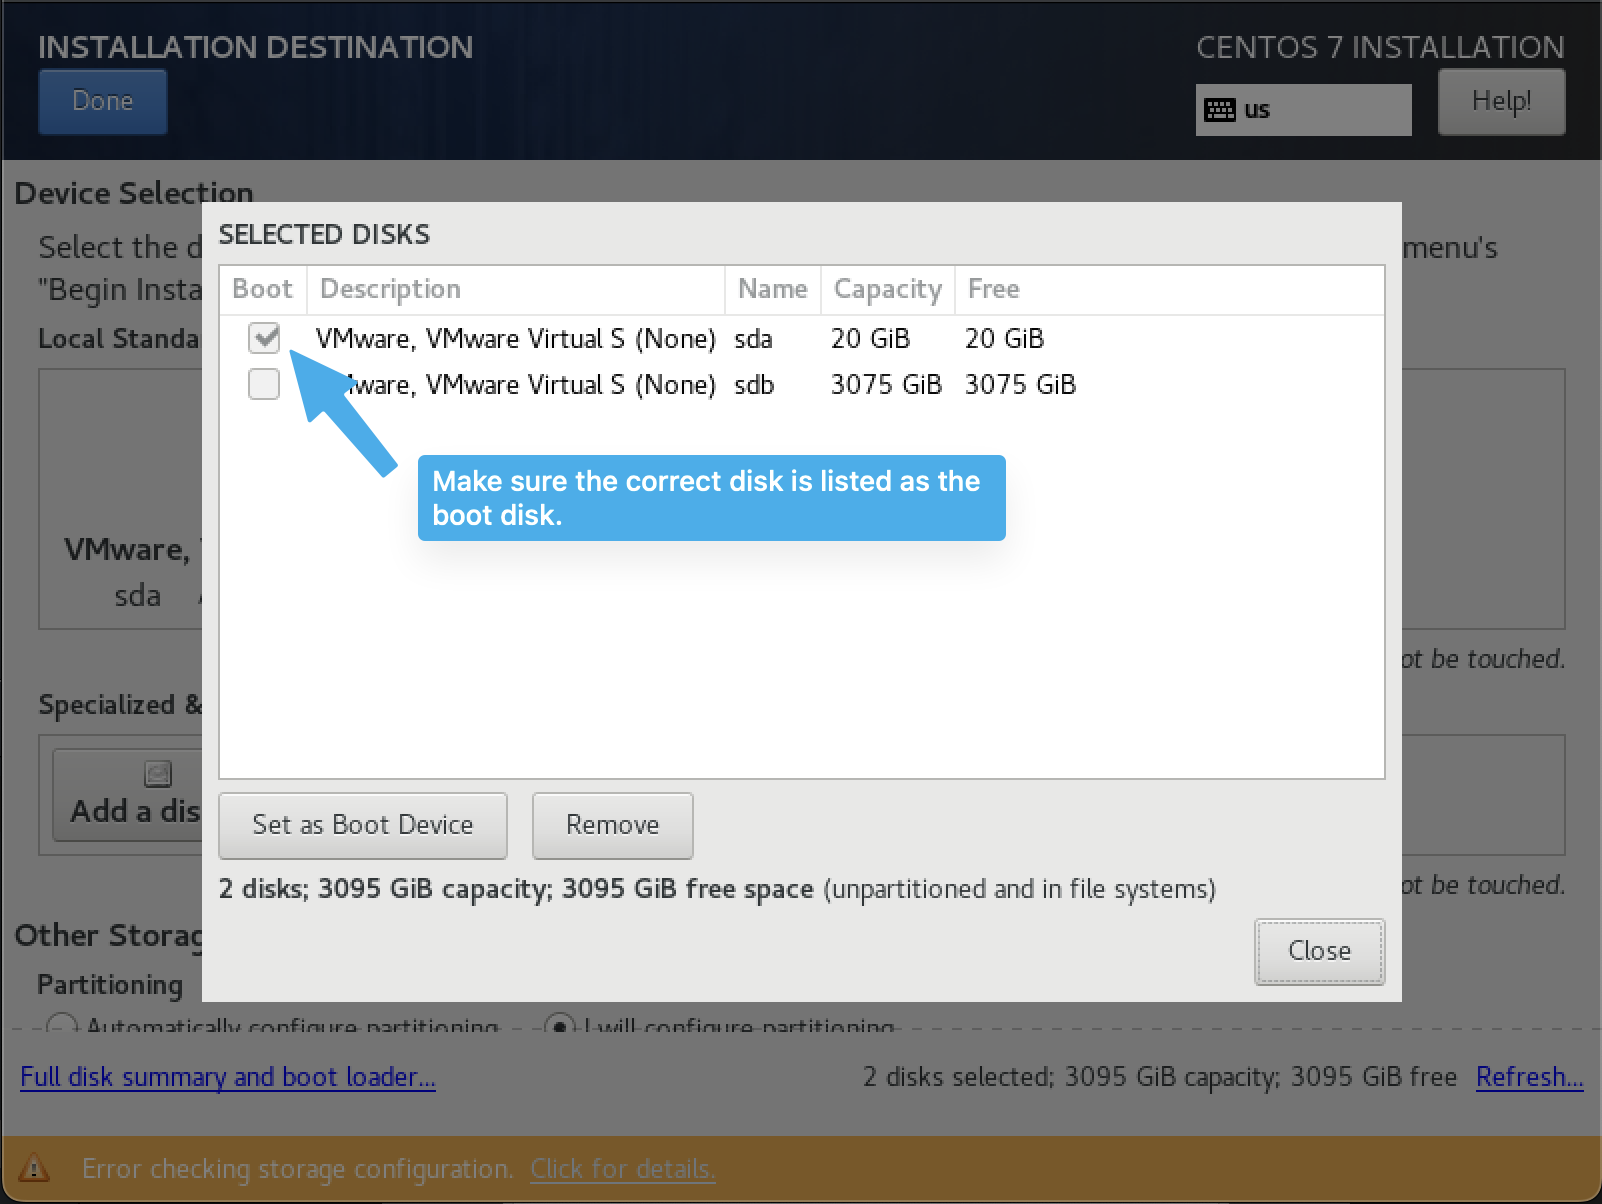
The first part of the installation is the same as with the Single Disk installation option. When you get to the disk select, please make sure that you select both disks (both disks should have check marks).
In the bootloader configuration, please make sure that the system disk is selected as the boot disk.
The beginning of the partition is the same as the single disk option, select the Standard Partition and add a partition.
Add a /boot partition and make it 500m (500MB).
In the next step, add the /data partition without size. The installer will make this as big as posssible and that means adding the /data partition to the data disk.

The rest of the install is similar to the Single Disk option, add the swap partition with twice the size as the RAM available. This system has 4GB of RAM so we add 8GB of swap.
The final partition is the / root partition. We also add this without size which will then occupy the rest of the system disk.
When done, the partition configuration should look similar to the following. Please note that both the / root partition and the /data partition now are the last partitions on their respective disks. This means that in the future you'll be able to expand both those partitions if needed.
In the partition tasks below, you can see that in this case the data disk is 3TB and the partition table format is set as GPT. The system disk is less than 2TB and the partition table will therefore be configured as MSDOS. Please see the overview at the top for more information about GPT vs MSDOS partition table formats.
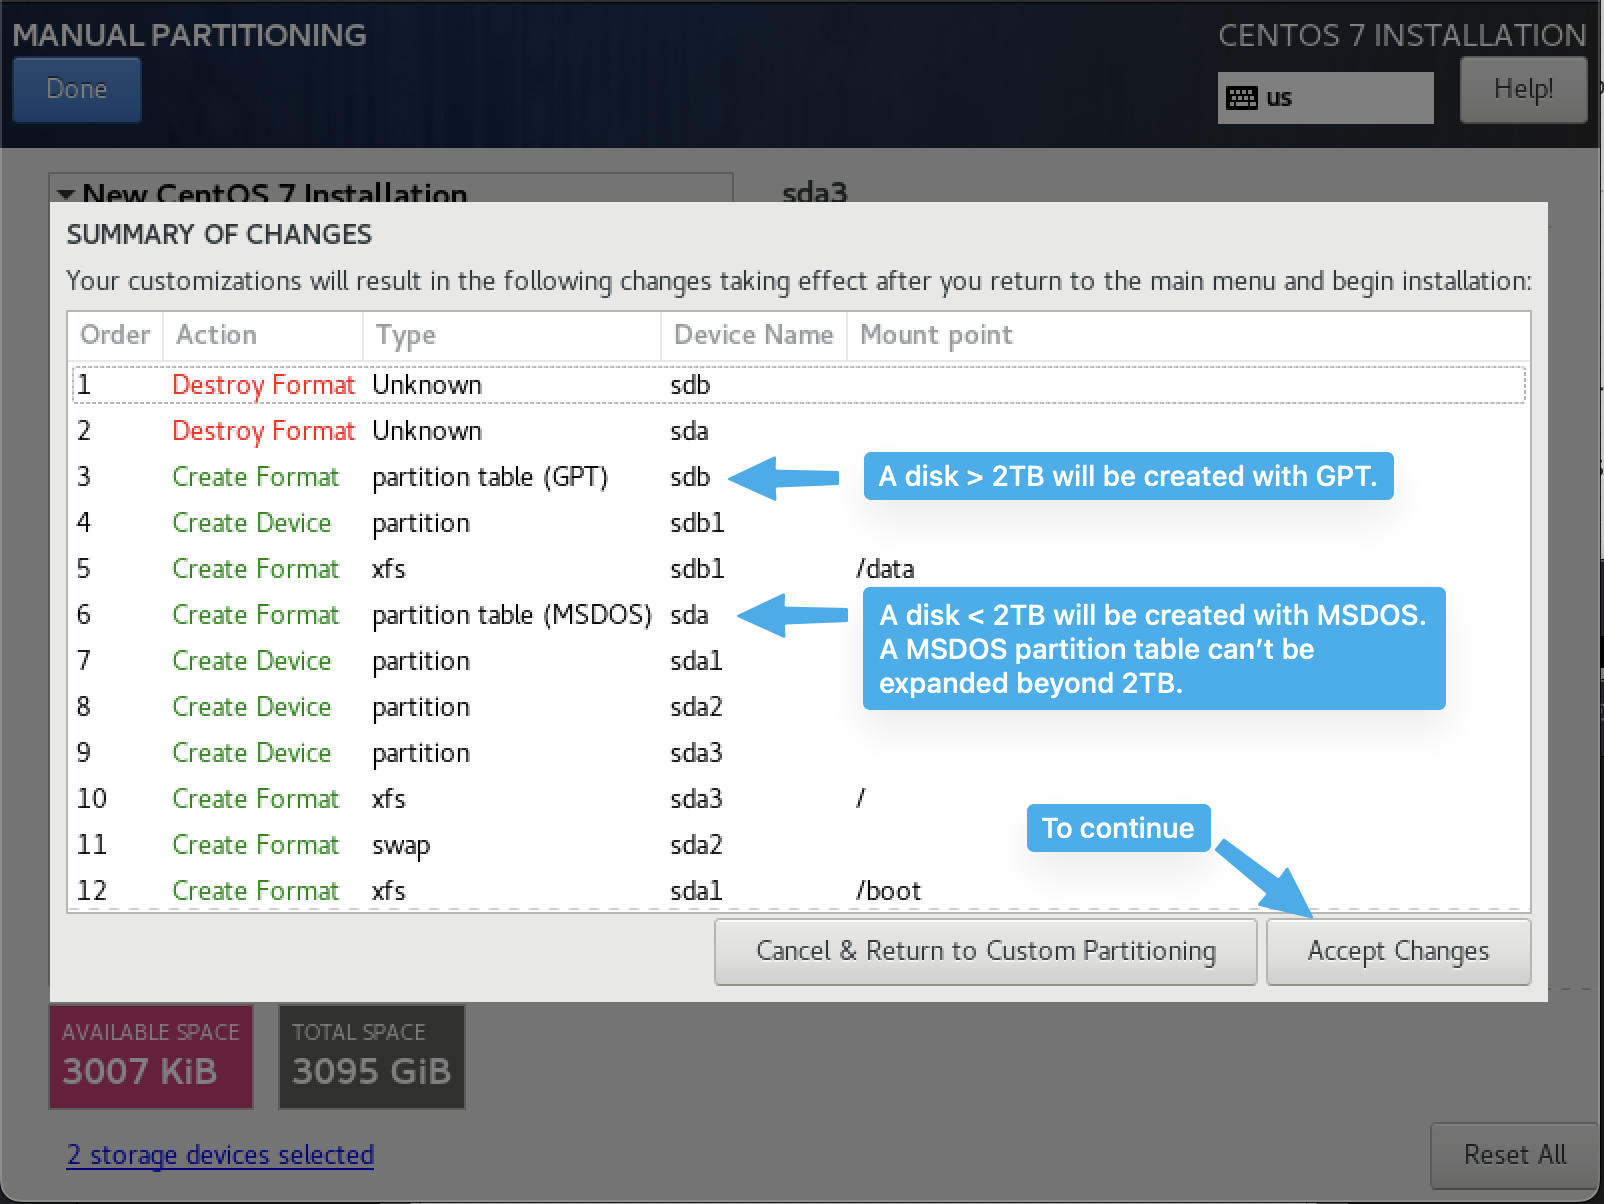
Clicking Accept takes the installer back to the main screen where you can begin the installation.