Import LiquidFiles VM to Amazon Elastic Cloud
Although in the common Amazon Elastic Cloud (EC2), it's quite easy to launch a pre-configured LiquidFiles Virtual Appliance, there are cases where this is not possible or it is required to import existing LiquidFiles appliance from a local virtual environment to the Amazon Cloud. This article should be useful for clients who have their infrastructure hosted in EC2 GovGloud dedicated only for U.S. citizens where the pre-configured LiquidFiles appliance AMI is not available. Following steps will show you how to export LiquidFiles appliance installed in a local virtual environment and import it to the EC2 Cloud.
Requirements
- You must provide an S3 bucket and set up IAM role named vmimport in your AWS
- The AWS CLI installed and configured on your PC
Export LiquidFiles VM from its Virtualization Environment
After you prepare your LiquidFiles VM for export, you can export and use the following formats: Open Virtualization Archive (OVA), Virtual Machine Disk (VMDK), Virtual Hard Disk (VHD/VHDX), and raw. With some virtualization environments, you would export to Open Virtualization Format (OVF), which typically includes one or more VMDK, VHD, or VHDX files.
For more information, see the documentation for your virtualization environment.
For example:
- VMware: Export an OVF Template on the VMware website
- Citrix: Import and export VMs on the Citrix website
- Microsoft Hyper-V: Overview of exporting and importing a virtual machine on the Microsoft website
Upload the exported drive (VMDK or VHD) to the S3 bucket
When you have exported the VM you will need to upload the drive to your configured S3 bucket first. You can use the mentioned AWS CLI tools. If you have created a S3 bucket named lf-import and you have a drive named liquidfiles-disk0.vmdk then with AWS CLI tools the drive can be uploaded with this command:
aws s3 cp /tmp/liquidfiles/liquidfiles-disk0.vmdk s3://lf-import/
It returns following response when the vmdk drive is being uploaded to the S3 bucket:
upload: ./liquidfiles-disk0.vmdk to s3://lf-import/liquidfiles-disk0.vmdk
Import the image
After you upload the drive on your S3 bucket, you can use the AWS CLI again to import the image.
cd /tmp/liquidfiles
aws ec2 import-image --description "Liquidfiles vmdk"  --disk-containers file://containers.json
The following is an example containers.json file.
[
  {
    "Description": "Liquidfiles vmdk",
    "Format": "vmdk",
    "UserBucket": {
        "S3Bucket": "lf-import",
        "S3Key": "liquidfiles-disk0.vmdk"
    }
  }
]
Now the drive is being processed in to the Amazon Machine Image (AMI). This procedure takes some time. The status of this task you can check with the describe-import-image-tasks command
aws ec2 describe-import-image-tasks --import-task-ids import-ami-019f0....
When the import is completed your image will be ready in your AWS console.
{
  "ImportImageTasks": [
      {
       "Status": "completed",
       "LicenseType": "BYOL",
       "Description": "Liquidfiles vmdk",
       "ImageId": "ami-0c10....",
       "Platform": "Linux",
       "Architecture": "x86_64",
       "SnapshotDetails": [
               {
                 "Status": "completed",
                 "DeviceName": "/dev/sda1",
                 "Description": "Liquidfiles vmdk",
                 "Format": "VMDK",
                 "DiskImageSize": 875797504.0,
                 "UserBucket": {
                         "S3Bucket": "lf-import",
                         "S3Key": "liquidfiles-disk0.vmdk"
                  },
	          "SnapshotId": "snap-0088...."
                }
       ],
       "ImportTaskId": "import-ami-019f0...."
     }
  ]
}
Launching an Instance
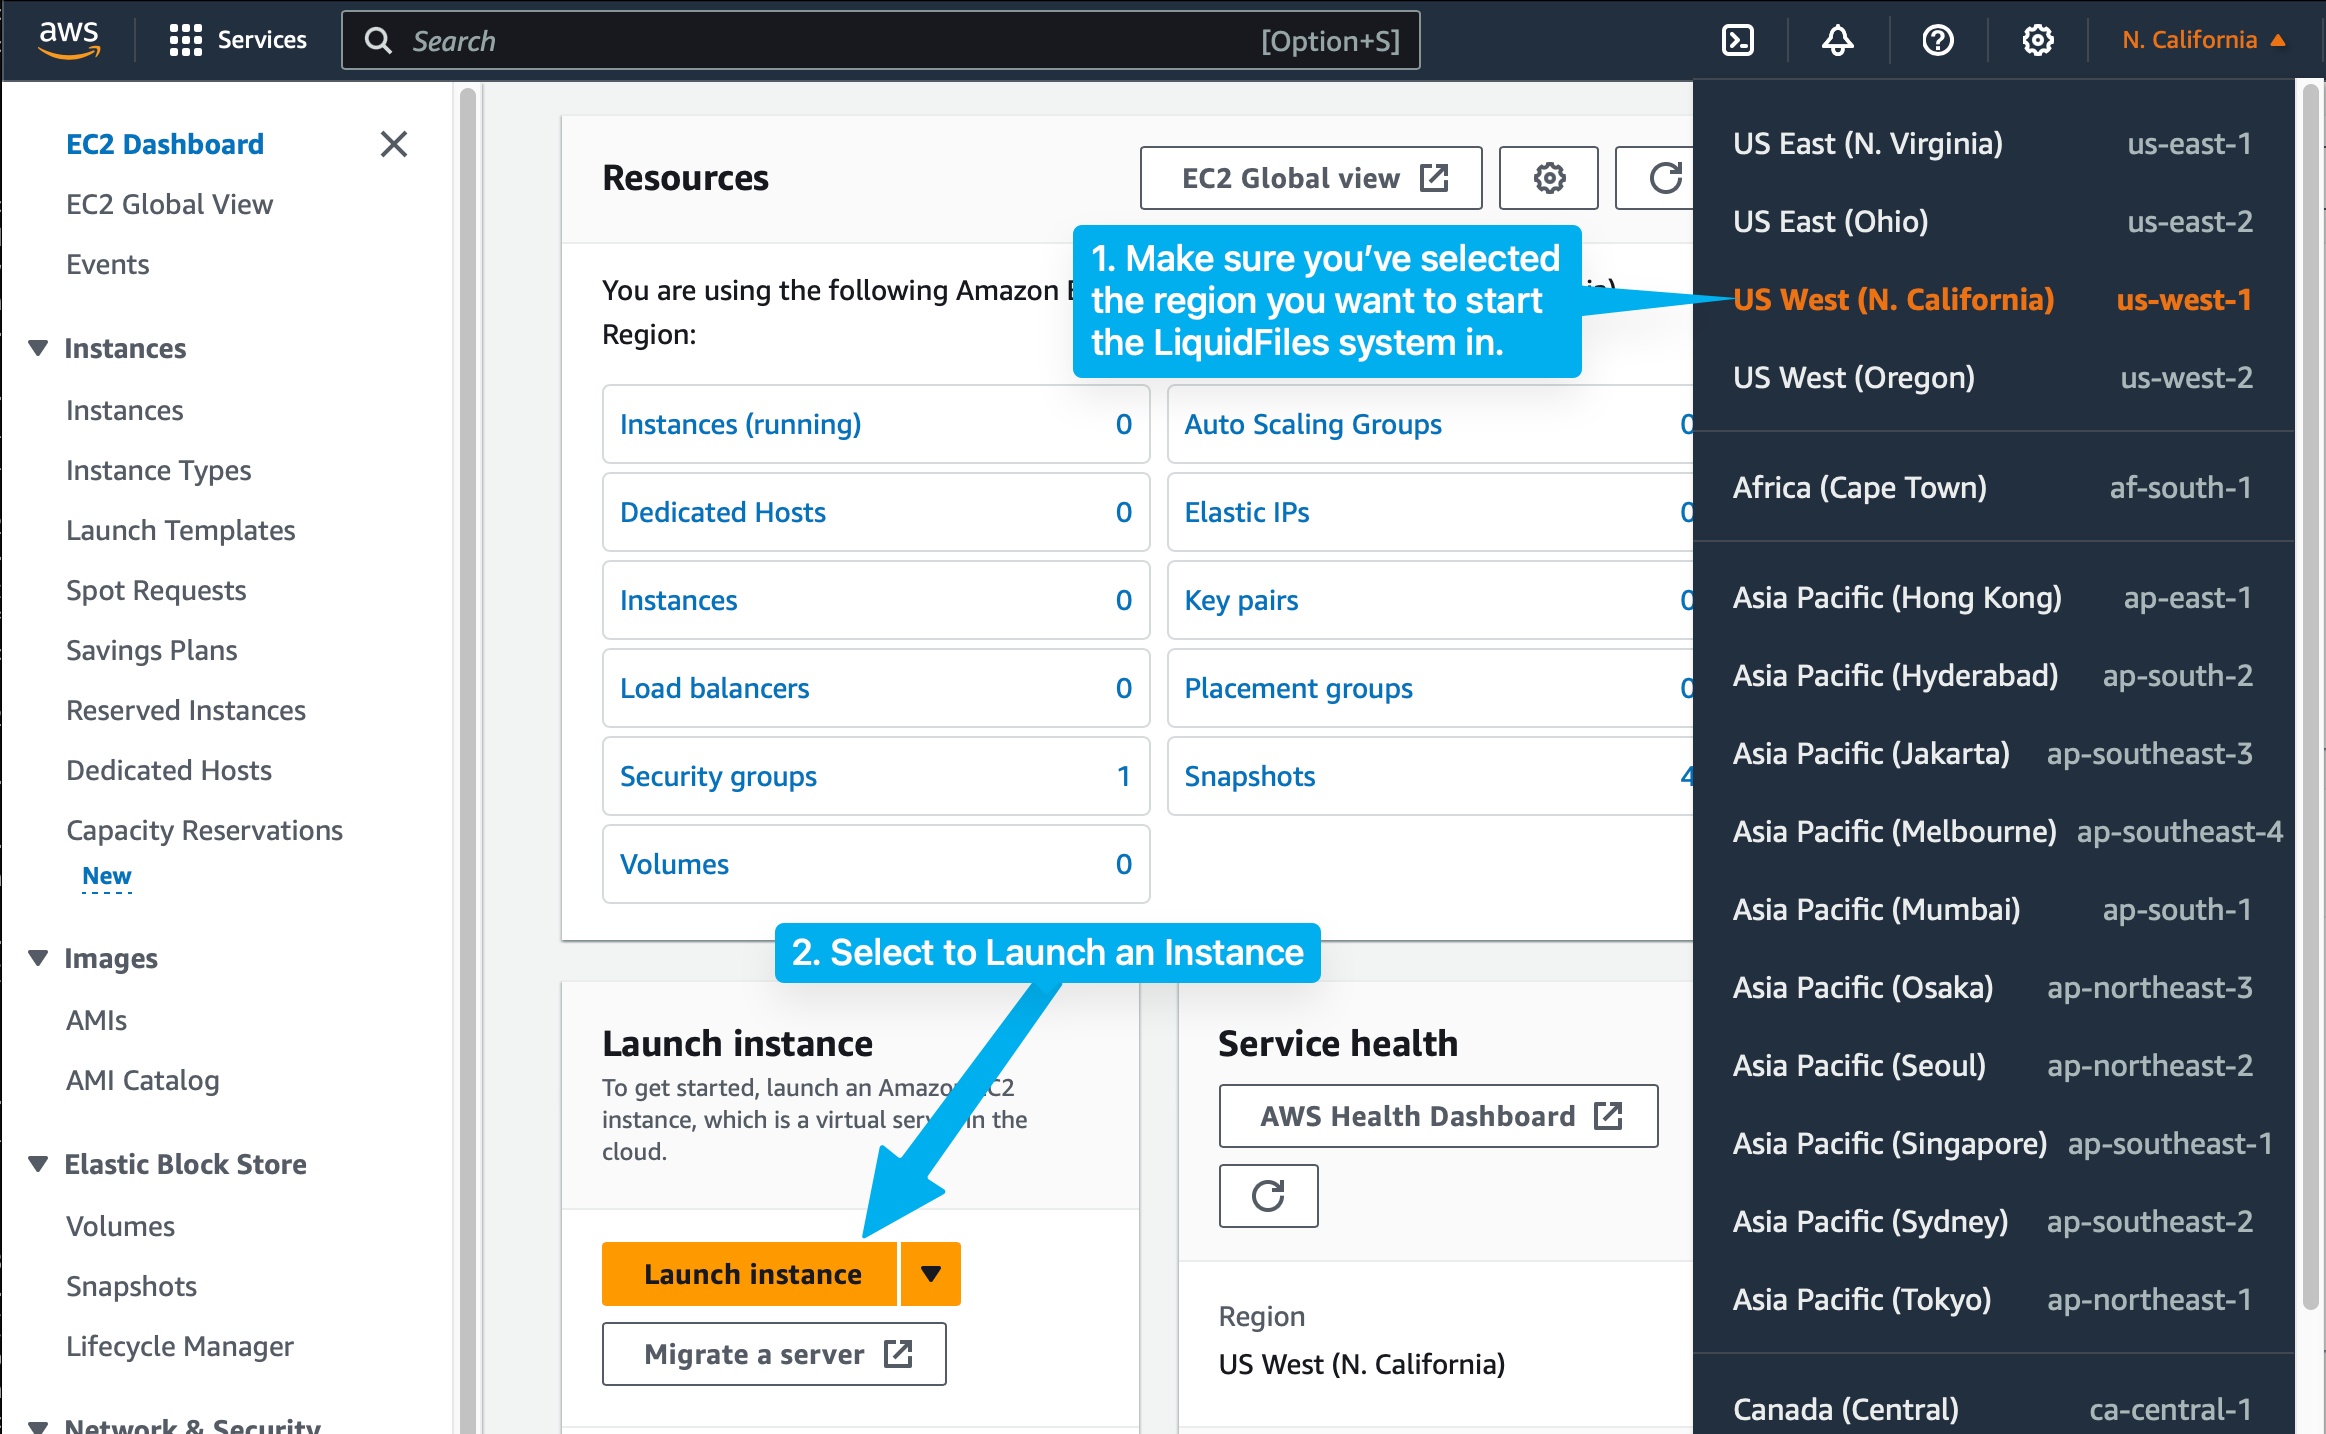
- Open the Amazon EC2 console at https://console.aws.amazon.com/ec2/ .
- In the navigation bar at the top of the screen, the current region is displayed. Make sure there is selected the region in which your image has been created.
- From the Amazon EC2 console dashboard, choose Launch Instance.
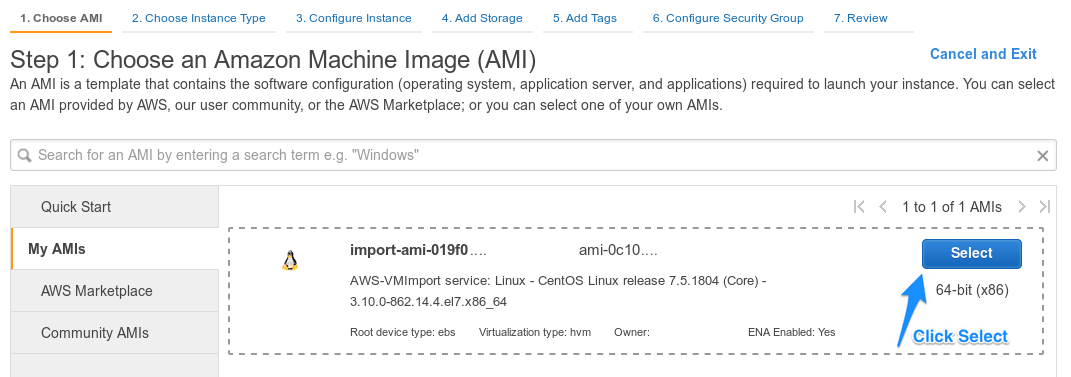
- Click on the "My AMIs" option and then select your imported LiquidFiles image
- On the next page please choose the instance type. From now on the configuration steps are same like if the instance was deployed from the official LiquidFiles AMI.
For further configuration please continue on the Amazon EC2 Installation page